Showing posts with label Ice Cream. Show all posts

Sunday, September 05, 2010

Passion Fruit Ice Cream (Dairy-free... or not!)

"This was the best ice cream you ever made"!
That was the husband's comment about this ice cream, so I knew I just needed to come to the blog and share the recipe!
Passion fruit is a fruit we love here at home, and one that we can't have enough when we go to Brazil. Matheus is always the first one to ask for passion fruit juice or to eat the fruit pulp right inside the shell with me (my favorite way of having this fruit!) when we go visit the family.
This is a fruit that is sweet and tart at the same time, maybe even more tart than sweet, but still, the floral notes from the passion fruit pulp and its crunchy seeds makes for an explosion of flavors and sensation in the mouth.
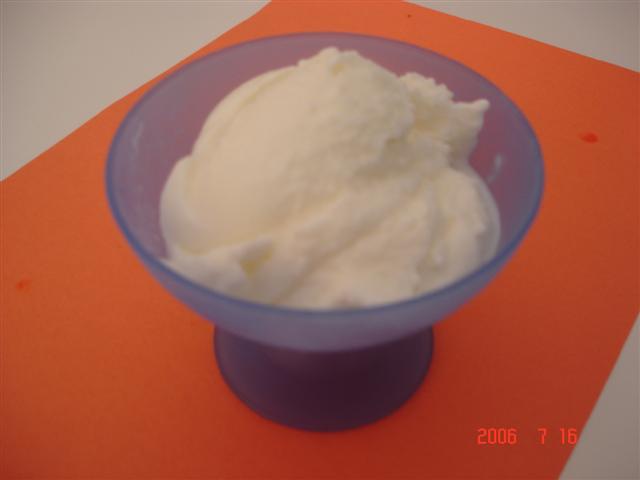
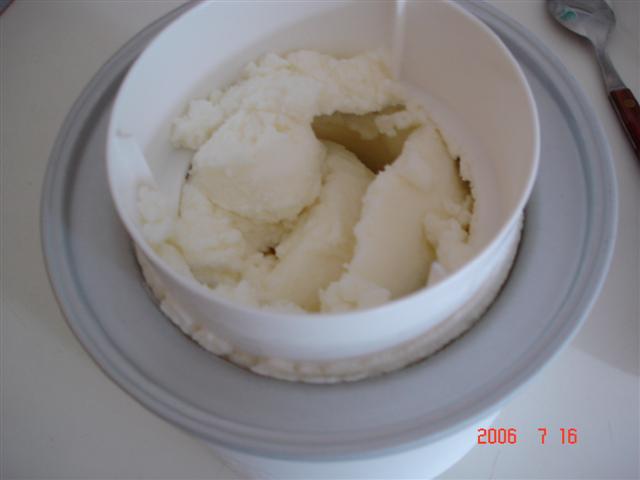
Passion fruit is also very refreshing when made into a cold juice, and the same happened when I made the ice cream. It was amazing how refreshing and delicious this ice cream was, the most perfect treat on a hot summer day!
We loved it, and more than that, I made it dairy free which enabled Matheus to enjoy as much as he wanted without us worrying about the dairy.
I adapted a regular recipe, but feel free to use cream in place of the soy creamer, I am sure it will be equally delicious! (if not even better!) By the way, the flavor of the soy creamer on this one was completely gone, we could not detect any soy taste at all, the passion fruit was the absolute star on this ice cream, which made it even more delightful for us.
Anything that brings us back flavors from home gets big thumbs up around here, and it wasn't any different with this recipe.
If you like passion fruit most certainly give this recipe a try, it is totally worth it!
Ana

Notes:
I bought passion fruit pulp at the frozen section of a Mexican store. All I did was to defrost it and measure the 1 cup of pulp needed. Enjoy!
I am not a fan of using the soy creamer as it is a processed food. Plus I much prefer to use real local cream for its flavor, taste and texture. However, due to Matheus' issues with dairy sometimes I do experiment with dairy free versions of his favorite treats and this was one of them. It was an extremely successful recipe though, I could not have been more pleased. We were all happy and all was right with the world as we sat down together enjoying our ice cream!

Passion Fruit Ice Cream
(Adapted from epicurious.com)

2 cups soy creamer (or heavy cream)
2 eggs
1 cup sugar
1 cup passion fruit pulp

In a bowl whisk together sugar and eggs. Put the soy creamer (or heavy cream) in a saucepan and heat over medium/high heat just until it gets closer to boil, when little bubbles start to form around the sides of the pan. Remove from heat and slowly pour the hot creamer over the eggs whisking the whole time - this will temper the eggs so it doesn't scramble.
Pour the mixture back into the saucepan and cook over medium heat until it thickens slightly (about 160F), don't let it boil.
Pour the custard through a sieve in a clean bowl and let cool to room temperature. Stir in the passion fruit pulp, cover and refrigerate until completely cold.
Freeze custard in ice cream maker. It will come out like soft serve, so transfer to an airtight container and freeze until hard.

Saturday, May 16, 2009

Strawberries!

Unfortunately their season is short, but we have been enjoying the strawberries a whole lot lately!
We go pick them at the strawberry farm and that is as fresh and local as one can get. They are delicious, juicy, red, and soooo sweet!
I love them just as they are, have been enjoying bowlfuls of the berries for breakfast, but there are also a few recipes that both the husband and Matheus request and so they appear year after year in our kitchen during strawberry season!
Truly, this year the one new recipe I made was Strawberry Ice Cream, which turned out not only delicious but had the most gorgeous and natural color I have ever seen on a strawberry ice cream!
It was so good though that we ate it all in a couple of days and I even forgot to take pictures... so, this will be one of the few posts without a recipe photo, but you can imagine how strawberry ice cream looks like, right?!!
And, to make up for that here some of the other recipes I have already made this past few weeks with our juicy red gems:

Strawberry Muffins (Matheus and the Husband love these muffins!)

Strawberry Tart
(This is the Husband's favorite! And my sister's too!)

Strawberry Bavaroise
(This one is strawberry creaminess at it's best, it's my favorite!)

There are other recipes in the blog archive, such as strawberry bread and pancakes with strawberry sauce, which I have made too this year already, so take a peek there and see what other goodies you can find!
Here goes the ice cream recipe, it is so easy and so good! Gotta love ice cream season!
Enjoy!
Ana

Strawberry Ice Cream
(adapted from the book From Your Ice Cream Maker)

3 cups fresh strawberries, clean and stemmed (or 16oz/500g frozen strawberries - unsweetened) I used three heaping cupfulls of strawberries and my ice cream had an intensely awesome fruity flavor!
1 1/2 cups heavy cream
2/3 cups sugar (use more or less depending upon the sweetness of your strawberries)
2 teaspoons vanilla extract
2 tablespoons Triple Sec, or your favorite orange liqueur (alcohol doesn't completely freezes, so this helps your ice cream not to turn rock hard on your freezer - plus it adds a depth of flavor to the ice cream, even though you don't taste it on the final product)
A tiny pinch of salt

Process all ingredients on a blender or food processor until all incorporated and the strawberries are pureed to the desired consistency (I left some ity bitty chunks on mine for texture and deliciousness!). Refrigerate the mixture for a few hours until it is thoroughly chilled. Give it a quick whiz and pour the mixture in the ice cream maker, following the instruction of your machine.
Makes about 1 quart.

My note: if you use chilled fruit and cream you can even pour the mixture directly into the ice cream maker right after you blend the ingredients. However, the colder the mixture the less time it takes for your ice cream to churn and the creamier it will be!
This is pure cold strawberry bliss and since it uses so little ingredients try to use the best fruits and cream you can find, it really does make a difference here!! This is worth the wait, time and money spent on it!
Ana

Thursday, August 07, 2008

Blackberry Sorbet!

Throw in the blender a couple handfuls of blackberries (the ones I used were from our backyard, yum!), two very ripe peaches and a little bunch of fresh cherries, sweeten it lightly with simple syrup* and puree away. A few minutes churning in the ice cream machine and you get the most luscious and flavorful fruit sorbet. Not to mention the pretty color it has!
This was so good there was no leftover. Lovely and super delicious on a hot summer afternoon!
Ana

*To make simple syrup: boil together 1 cup water with 1/2 cup sugar until the sugar melts and the mixture becomes syrupy. Let cool and then use to sweeten your beverages or sorbet mixture. Good thing is that this keeps in the fridge for a good couple weeks, so it is always handy for making yummy frozen desserts!

Thursday, August 09, 2007

Mango Sorbet

It is hot, around 100 degrees F most days, what do we do?? Eat ice cream, of course!!!
This week it's been nothing but water (lots of it!) fruit juices, popsicles and sorbet, more specifically my absolutely favorite: Mango Sorbet!!
Yum, yum, and yum! I don't have better words to describe this sorbet, yes, it is that good! Mango is a delightful fruit all by itself, it is sweet, it is creamy, aromatic. Perfect and delicious alone, freeze it and you get the creamiest and most deliciously natural fruit concoction!
I made my sorbet by simply pureeing lots of pieces mango in a blender until it got really creamy and no chunks remained. Then I added a squirt of lemon juice and a touch of simple syrup (recipe bellow), but just a little bit to make its natural sweetness shine even more after being frozen (as I find that the very cold temperature do tame a little of the sweetness of most of ice cream bases I make).
Depending on the fruit you use you may need to use more or less simple syrup, and I know that some mangoes in Brazil probably would not need any sweeteners at all.
I use the simple syrup here for the mere fact that is more stable to be frozen and even more than that because the sugar is already completely dissolved so I get the base sweetened without having sugar granules in my base.
After all blended and nicely smooth, I strain the fruit puree and just pour it into my ice cream machine. After 25 minutes it is ready and can be dished out as a soft serve, but I do prefer to put my ice cream in the freezer for a couple of hours to let it "ripen" there before consuming - the texture does improve with some time in the ice box!
Make it in the morning and by the afternoon you will be in heaven, again... YUM!!!!
Ana

Simple Syrup
Combine 1 cup of sugar and 1 cup of water in a small saucepan. Bring it to a boil, reduce heat and let simmer for about 5 minutes, or until all the sugar is completely dissolved and the mixture gets "syrupy"!

You can use it to make any flavor of sorbet, just puree the fruit you like and add simple syrup to taste. It can also be used (and works beautifully) to sweeten ice teas and lemonades, or any juice in general, as I mentioned before, the sugar is already dissolved, so you get your beverage sweetened right away, without worrying about sugar bits in the bottom of your jar/glass that may make the last portions of juice too sweet.

Wednesday, August 01, 2007

Nutella Ice Cream

Yes, another ice cream recipe, and there are actualy more to come...
And I promise this ones actually look and tastes a lot better than it appears in the picture (it melted a little too fast when we were eating it, but just because I wasn't patient enough to wait for it to firm up in the freezer before tasting it.... oops! Hard thing to do waiting for ice cream to harden...!)

Isn't summer the best season ever? The most delicious fresh fruits, produce that you can harvest at your own backyard, lots of farmers market opened around the country, what could be better than that? Well, besides all the fruit and veggie goodness, it is also Ice Cream season, Yay!!!
This is the time of the year when I get creative with both my fruits and creamy concoctions, and when my ice cream machine gets little to no rest.
This year I have actually entered into a sorbet mode and have been trying some recipes with many fruit variations. Most came out great, and both recipes and pictures will be posted here, soon.
But right now I wanted to follow up with a recipe that I adapted from the Peanut Butter Ice Cream I posted the other day. I tried making it with Nutella instead of PB and the result was a wonderful, delicious and creamy Nutella Ice Cream.
Who doesn't like Nutella?? Well, I don't.... I LOVE Nutella!!
It is one of the best creations ever, creamy chocolate and hazelnuts... makes my mouth water just to think of it! It is good with strawberries, warmed up over crepes and ice cream, and mixed with hot milk it makes an awesome hot chocolate, but better than all that is having Nutella in its simplest form, straight from the jar by big spoonfuls!
So, I got the so good Nutella and transformed it into ice cream... oh yum, it did turn out quite good!!
I am still trying to figure out the sugar ratio, as I thought it came out a little sweet both times I made it, but my sugar tolerance is usually lower than most people I know, and most of my family who tried really liked it as is.
Of course I used less condensed milk than the PB recipe, as Nutella is already sweetened, but it still was a little too sweet for me, plus, the first time I made I used a little more sweetened condensed milk than I should and its flavor sort of overpowered the Nutella itself. So I am considering either decreasing that, or increasing the Nutella amount next time, or maybe both.
Another thing I am considering is adding a bit of hazelnut liqueur next time I make it, as I would like to reinforce it in the end product. (Got stop by the liquor store! Ic, Ic!!)
All in all, it was still good when I made and both times there was not a bit left for seconds. So I am guessing it is safe to post it right now and I will come back with any updates as soon as I make it again!
Enjoy summer, and lots of ice cream!! Yummmmmm!!!
Ana

Ana's Nutela Ice Cream
1/4 cup sugar
3 large eggs
1 cup milk
1/2 cup Nutela (chocolate-hazelnut spread)
1/4 cup Sweetened Condensed Milk (add more or less to your taste)
1/2 cup cream

Beat the sugar and eggs in a bowl until very well mixed. Set aside.
Bring milk to a simmer in a saucepan over low heat, remove from stove and carefully add the milk to the eggs and sugar, beating constantly. Pour the mixture back into the pan and cook over low heat, stirring constantly with a wooden spoon until it thickens slightly. It doesn't take too long, and remember: don't let the mixture boil or eggs will scramble.
Remove from heat and strain the mixture into a bowl. Mix in the Nutela, condensed milk and the cream (taste and see if you would like more condensed milk at this point - I don't like things too sweet, so you might adjust the sweetness to your tastes).
Cover and let the custard base cool in the fridge overnight. Pour mixture into ice cream maker and churn accordingly to your machine's instruction.
Let ice cream harden in the freezer for a couple of hours before serving.

Saturday, July 28, 2007

The Sister's Favorite!

Yes, I have been cooking, and baking, and having lots of fun too! My mom, sister and brother in law have been visiting us for the last 3 weeks and, although I have lots of recipes and pictures to share, I have used my time to enjoy every second of their stay here, as when we are happy times fly and when you realize it is time to say goodbye already.
They are leaving tomorrow, but I wanted to post an ice cream recipe that my sister requests every time she comes on the first day she lands feet in my house! (together with my "Esfihas", which we made yesterday and everybody enjoyed a lot!)
This one came from the Cooking Light Bulletin Boards, and was posted by Jewel. It is a delicious Peanut Butter Ice Cream she created to lighten up a recipe she liked and that became very popular among both the Bulletin Board and my family members!
Jewel's mentions using fat-free ingredients, but I prefer to use regular of everything (less chemicals in my opinion), and it always comes out perfect! Oh, and I also always use the peanut butter that you grind freshly at Natural grocery stores (simply ground roasted peanuts - again, as simple and pure as I can get).
You can add chocolate chips or even have crushed peanut butter cups mixed in (which we sometimes do to sort of mimic my Husband's previous favorite from B&J's - Yep, now he prefer this one!!!) - add them at the end of the churning process, during the last five minutes when the ice cream already holds its shape and will better incorporate the add ins.
This time I made it simple and everyone loved it! It is a fantastic recipe, simple and easy to make that everyone enjoy. Creamy, rich, and delicious! I am sure anyone who likes peanuts will love this one too, just as my sister does!
Yum!!!! Enjoy!
Ana

PS: Cinara, this one is for you too!!!

Jewel's Peanut Butter Ice Cream
(Adapted from Jewel's recipe posted at the CLBB)


1/4 cup sugar
3 large eggs
1 cup milk
1/2 cup creamy peanut butter (natural)
1 cup Sweetened Condensed Milk
1/2 cup Half & Half
1 tsp Vanilla

In a medium bowl beat the sugar into the eggs until slightly thickened; set aside. Bring the milk to a simmer in a medium saucepan over low heat. Slowly beat the hot milk into the eggs and sugar. Pour the entire mixture back into the pan and place over very low heat. Stir constantly with a wooden spoon or whisk until the custard thickens slightly. This process is very quick, do not let the mixture boil or the eggs will scramble. Remove from the heat, pour custard through a sieve into a clean bowl and beat in the peanut butter with a whisk. Then whisk in the condensed milk, half & half and vanilla. Cover and refrigerate until cold or overnight. Freeze in ice cream machine according to manufacturer instructions.

Monday, October 02, 2006

One recipe lead to another, which lead to another, and…

Don’t you hate when you start to make something just to find out that you are out of an ingredient? And it is most probably an important one? I guess it happens to all of us, right? Or at least it does to me…
I was pretty sure I had condensed milk at the house when I settled on a recipe on Saturday. However, I could not find a can in the pantry, not a small tiny can of the stuff. And since I decided for that recipe just because I didn’t have another ingredient for a different recipe, I had to figure out how I would finish what I had already started.
And that’s when the Internet comes in handy! By simply typing a few words into a search engine and voila, all the solutions for your (culinary) problems are right there in front of you. Great!
So here I go to make my Homemade Sweetened Condensed Milk, which by the way I tried before with a different recipe and didn’t get much success. Well, I believe the other recipe was out of proportions then, because this one was PERFECT!! I could not believe how much this tasted and had the same texture as the canned milk. No wait, it actually tasted BETTER than the canned stuff!
Really, I was surprised and more than happy with my results for both the condensed milk and the recipe I used it for. It tasted so good, and worked so well in my recipe that I can’t wait to make more and try in other recipes too.
Now, all that said, I have to mention that my homemade condensed milk had a slight milk powder taste to it, which is why I loved it so much, because I really love milk powder. Is this too weird??
I do, it is so good, sweet and milky! I love making hot chocolate in the winter (milk, cocoa, sugar), and then adding a couple tablespoons of milk powder to my milk, just to get that yummy taste and make my cocoa even more rich and creamy, yum!
All in all, the homemade condensed milk was great, and Matheus though so too! Hehe!
Now you must be asking, what did you use it for?
Before I forget, I used it to make ice cream! A super simple and easy No-Cook Vanilla Ice Cream recipe that turned out "yummylicious"!
Really, it was a success, both recipes I tried that day worked out really well! Yay! (And to think that I did have a couple disasters during the week… but that's another post).
The ice cream was very tasty, a perfect soft serve consistency right out of the machine, and I opted for this recipe because I didn’t have any cream in the house to make the more traditional recipe. I had to use skim milk because it was what I had on hand (and by now you could tell I wasn’t in the mood to go to the grocery store, right?), but I am sure it would have been much better with whole milk, which I am planning to try next. (skim milk makes more of an "ice milk" rather than ice cream, and it gets too icy after being completely frozen)
Oh, and the original recipe of the day was in reality a Peach Crisp, which is one of my favorite desserts, but the Husband and Matheus enjoy it much more when accompanied by a nice scoop of ice cream. And that is why I decided to make vanilla ice cream, and that’s how I ended up making homemade sweetened condensed milk. Ufff…
I did go all the way with the trouble just for my boys, so they could be happy, and ate my crisp plain, but only because because that is how I like it… Am I a sweet girl or what??
Now, wish me luck, because it will probably be a couple days until I get to post again, as I am having an endoscopy procedure done tomorrow. Ouch, another day of soup and crackers to come…
Ana

Homemade Sweetened Condensed Milk (posted on Cooking Light BB)
1 cup skim milk powder
2/3 cup sugar
3 tablespoons butter
1/3 cup boiling water

In bowl, combine milk powder with sugar. Stir butter into boiling water until melted; pour into sugar mixture. Using electric mixer, beat for about 2 minutes or until smooth and creamy. Cover and refrigerate for 8 hours or until thickened.
Yield:"1 1/4 cups"

Here is a Picture of the Peach Crisp with the Vanilla Ice Cream!


And Here goes the Ice Cream recipe, with a few variations too!

No-Cook Vanilla Ice Cream
(Adapted from Southern Living, AUGUST 2004)

1 can sweetened condensed milk -- (14-ounce)
1 can evaporated milk -- (5-ounce)
2 tablespoons sugar
2 teaspoons vanilla
2 cups whole milk

Whisk all ingredients in a 2-quart pitcher or large bowl until blended. Cover and chill 30 minutes.
Pour milk mixture into freezer container of a 1-quart electric ice-cream maker, and freeze according to manufacturer's instructions. (Instructions and times will vary.)
Remove container with ice cream from ice-cream maker, and place in freezer 15 minutes. Transfer to an airtight container; freeze until firm, about 1 to 1 1/2 hours.

No-Cook Chocolate Ice Cream: Omit sugar, vanilla, and whole milk. Add 2 cups whole chocolate milk and 2/3 cup chocolate syrup. Proceed as directed.
No-Cook Peach Ice Cream: Omit vanilla and sugar, and reduce whole milk to 1 1/4 cups. Process 4 peeled, sliced medium-size fresh ripe peaches or 1 (15.25-ounce) can peaches in light syrup, drained, with 2 tablespoons sugar; 1/4 cup fresh lemon juice; and 1/4 teaspoon salt in a blender or food processor until smooth. Stir into milk mixture with 3/4 cup peach nectar. Proceed as directed.
No-Cook Strawberry Ice Cream: Omit vanilla, and reduce whole milk to 1 1/2 cups. Process 1 (16-ounce) container fresh strawberries or 1 (16-ounce) package thawed frozen strawberries, 2 tablespoons lemon juice, and 1/4 teaspoon salt in a blender or food processor until smooth. Stir into milk mixture. Proceed as directed.
No-Cook Coconut Ice Cream: Omit vanilla and sugar, and reduce whole milk to 1/2 cup. Whisk 1 (13.5-ounce) can coconut milk, 2 tablespoons fresh lemon juice, and 1/4 teaspoon salt into milk mixture. Proceed as directed. Serve ice cream with toasted coconut, shaved chocolate, or chopped macadamia nuts.

Sunday, August 06, 2006

Another Chocolate Gelato

I know I have posted a chocolate gelato already this past month, but I tried another recipe last week and just had to come share this one too.
The previous recipe is good, light and tasty, one of the favorites here at our home, but if you are a real chocoholic like me then you will leave that one for the kids and go for this new one instead.
Now this is serious Chocolate Gelato, realy, realy, realy good ice cream stuff, by far the best chocolate ice cream recipe I have made and one of the best I have ever had. It is rich and chocolaty, smooth and creamy, simple and absolutely the best!
The previous recipe got its flavor from melted chocolate and a little bit of cocoa powder, on the other hand, there is a lot of cocoa in this rich gelato, and that is what makes it so good, it is pure chocolate flavor in creamy and cold deliciousness. I really loved this one!!
Also, the other best thing about this is that it did not get icy after being in the fridge for a couple of days, it kept super well, smooth and creamy just as when consumed the first day.
I first saw this recipe at Nic’s blog, Baking Sheet, and drooled just by looking at her picture. I knew right away it would be my kind of dessert, and I am glad I tried it early in the summer, because I am already going to whip up some more!
My picture however doesn’t make justice of the goodness involved in this dessert, but you can certainly check out her post and picture here.
The recipe comes from a great book called “Bittersweet” by Alice Medrich, which I actually borrowed from the library to check out and has tons of mouth watering chocolate recipes and pictures; a nice book to take a look if you are into chocolate desserts.
This Chocolate Gelato is not as dense as ice cream, but it is rich enough that you may not need much to satisfy your chocolate cravings, and even though I am the biggest chocoholic here both Matheus and the Husband enjoyed this one a lot too. And as Matheus says “chocolate ice cream is the best”! Oh yes, I am all with him!!
Really, if you like chocolate, give this a go, it is amazingly good!
Thanks Nic for giving the heads up on this one!
Ana

Sicilian Chocolate Gelato
(Adapted from Bittersweet by Alice Medrich)
3 cups milk
2/3 cups sugar
¾ cups unsweetened cocoa powder
1 ½ tablespoons cornstarch

In a medium saucepan, bring 2 cups of the milk to a simmer over medium heat.
Meanwhile, whisk the remaining 1 cup milk with the sugar, cocoa, and cornstarch in a small bowl. Add the cocoa mixture into the hot milk and cook, stirring constantly, until the mixture thickens and bubbles a little at the edges. Cook for 2 more minutes, pour mixture on a bowl and let it cool. Cover with plastic wrap and chill it overnight. Freeze in ice cream machine according to its instructions.

Tuesday, July 25, 2006

Cookies and Cream Ice Cream

“This is good!” That was the husband’s expression once he first bite into it, and this time I never ever mentioned the “secret ingredient”! Yes, there was tofu in this one, and I would not believe it if I haven’t made it myself. ”Sneaky” soy in a yummy treat!
Perfect consistency, super creamy, and the bits of crushed cookies add not only texture but also a great chocolaty taste to it. Really yummy, we loved it, one of the best ice creams I have made it with our machine, and better than that, a light one! Chocolate is still our favorite ice cream flavor, but this one was a very close second!
I believe the base would be good by itself, and even with chocolate incorporated in some way to make it a chocolate ice cream…. Humm, I guess we need some experimentation on this one!
Meanwhile I will leave the great recipe here and you guys make sure to try it, because this one is no doubt a winner! Really, it was the creamiest ice cream from all the recipes I posted lately here.
Yum!
Ana

Cookies and Cream Ice Cream (adapted from Cooking Light)
1 (12 ounce) package reduced-fat firm tofu
1/2 cup sugar
1/2 cup half-and-half
1 teaspoon vanilla extract
1/4 teaspoon salt
2 cups whipped cream (measure it already whipped)
10 cream-filled chocolate sandwich cookies (such as Oreos), crushed

Combine first 5 ingredients in a food processor or blender; process until smooth. Place tofu mixture in a large bowl and fold in whipped cream. Pour mixture into the freezer can of an ice-cream freezer; freeze according to the manufacturer's instructions. Stir in crushed cookies during last 5 minutes of freezing. Spoon ice cream into a freezer-safe container; cover and freeze 1 hour or until firm.
Yield: 8 servings (serving size: 1/2 cup)
Note: make sure to use silken tofu here, other varieties will make it grainy.

Playing around with cookies and ice cream: coffee and vanilla ice cream sandwiches!

And, before you start wondering, no I didn’t lick the filling off the cookies to make these; there is a brand that sells the “tops and bottoms” of the cookies around here. Pretty neat, huh!?!

Sunday, July 23, 2006

Peach goodness!

When someone gives you peaches… make ice cream! I went to the farmer’s market this week and came back with a box full of peaches, about 30 of them. Most of them were peeled, sliced, and directly into the freezer they went. They are there, patiently waiting to be consumed in smoothies and the like later on. The rest I kept in the counter, some were used in a crumble, others turned into ice cream; summer is by far my favorite time of the year!

The recipe today I got from the website “Epicurious”, which by the way is full of nice recipes. It is the perfect recipe to make with those sweet and ripe summer peaches; this ice cream is pure fresh fruit!

Peach Gelato is easy and simple to make, and since there is no cream or milk it has the added bonus of being a refreshing fat-free dessert.
We definitely enjoyed it here, however, it has to be served as the recipe states: immediately after being churned. Ours was nice and smooth, but the little bit we had leftover was icy after an hour or so, we even ended up tossing it, as it was definitely not edible anymore. I wonder if it had something to do with my freezer, or due to the small amount that I froze, because it didn’t look like a recipe that would end up that way to me.
Anyways, it was very tasty, and one of the “peachiest” (if this words exist, that is) desserts I have had!
Oh, and you can definitely try making it even if you don’t own an ice cream machine. Simply put the final mixture in a bowl and put in the freezer. Stir the mixture every 30 minutes, then every 20 minutes after it starts to freeze more solid. It may not be as smooth, but I am sure it will still taste good! (This is a method I used to make ice cream when I lived in Brazil and didn’t have my machine…)

A good summer treat, plus you get a full piece of fruit in every serving of gelato here! Nice, huh?!

Ana


Peach Gelato (adapted from epicurious)
¾ cups granulated sugar
1/2 cup plus 1 tablespoon water
1 1/2 pounds peaches (I didn’t actually measured, but used 8 peaches)
1 tablespoon fresh lemon juice
1 teaspoon lightly beaten egg white


In a small heavy saucepan heat sugar and water, stirring until sugar is dissolved. Cool syrup. Peel and pit peaches and in a food processor purée until smooth. Transfer 2 cups purée to a bowl, reserving remainder for another use, and stir in syrup and lemon juice. Chill peach mixture until cold and up to 1 day.
Stir in egg white and freeze in an ice-cream maker. Serve gelato immediately or transfer to an airtight container and put in freezer to harden no more than 3 hours.
Makes about 1 quart.

Tuesday, July 18, 2006

Lemon Ice Cream

This was the other ice cream recipe I made over the weekend. Lemon-Buttermilk Ice Cream is one of the most refreshing ice creams I have ever tasted, and comes from my favorite magazine, Cooking Light.
It is creamy, lemony and sweet, and has a wonderful tang from the buttermilk, making it even more refreshing. The perfect indulgence for those super-hot summer days we get around here.

It is light and delicious, and makes you want to have more after each time you fill your mouth with it. If you like lemon ice cream you must try it, and I am pretty sure you are going to love it too!
Enjoy!
Ana


Lemon-Buttermilk Ice Cream
3/4 cup sugar
1/2 cup fresh lemon juice
1 cup half-and-half
1 cup whole milk
1 cup buttermilk

Combine sugar and juice in a large bowl, stirring with a whisk until sugar dissolves. Add half-and-half, whole milk, and buttermilk. Pour mixture into the freezer can of an ice-cream freezer; freeze according to manufacturer's instructions. Spoon ice cream into a freezer-safe container. Cover and freeze 1 hour or until firm. Yield: 9 servings (serving size: 1/2 cup)

Adapted from Cooking Light, May 2003

Chocolate Ice Cream

With almost 100 F around here there is nothing better than ice cream! This weekend I made two of our favorite recipes. The first one, that I am posting today, is for Chocolate Gelato. I created this recipe based on other 3 recipes I have read. It makes a creamy concoction without being too heavy, however, it is rich enough to satisfy our chocolate cravings!
I have made it with all milk (use whole milk here, please!) and also with 2 cups milk and 1 cup cream, the later being the best version. You definitely cannot compare this with a normal gelato you find in Italian Ice Cream Parlors, but is so refreshing and satisfying that here in our house is the chocolate ice cream of choice. And I definitely do not complain about making it over and over again!!
Enjoy!

Ana


My Chocolate Gelato
3 cups whole milk (or 2 cups milk and 1 cup cream)
3 tablespoons cornstarch
1/3 cup sugar
3 teaspoons cocoa powder
2 oz semisweet chocolate chopped (or chocolate chips)
1 teaspoon vanilla extract
a pinch of salt

Combine 1/2 cup milk with cornstarch and set aside. In a saucepan add remaining 2 1/2 cups milk, sugar, and cocoa. Heat over medium heat until almost boiling; add milk/cornstarch mixture and cook, stirring constantly, until mixture thickens. Add chocolate chips and whisk until melted. Remove from heat, stir in salt and vanilla.
Strain mixture into a bowl (or plastic container), let cool to room temperature and then put in the fridge until completely cooled. (Or you can put the container on top of a bowl filled with ice water and keep stirring the mixture until cooled enough to put in the fridge)
Freeze in ice cream machine, according instructions.
Note: I put a piece of plastic wrap directly on top of the mixture as soon as I put it on the plastic container to cool, just so that a crust won't form.

Wednesday, June 14, 2006

Happy Birthday to the Husband!

Yesterday was the husband’s birthday, and he asked for an ice cream cake this year. I went on the web and found this recipe at Epicurious; the original recipe used peppermint candies and extract to flavor the ice cream, but I opted for leaving the ice cream on its original vanilla flavor, as we definitely like it more around here.
One of the husband’s favorite ice creams is vanilla-Oreos, so when I spotted this recipe I knew right away it was going to be a success. And it sure was; we all liked it a lot here! Although, with lots of ice cream and chocolate, what is not to like?!
It is not a difficult cake to make, actually the crust and glaze is all there is to make. The rest is basically assembling and waiting for it to freeze as you go. Quite simple, but you need to make it in advance.
The cake provides a good contrast between the softness of the ice cream and the firmness of the crust, plus the shinny and gooeyness of the glaze. One word: Yummy!
Now, recipes apart, we are going to Brazil today, so it will probably be a few days before I post again, but do come back, because I will sure be posting while we are there!
See you all soon!
Ana


Ice Cream Cake
Crust
1/2 cup (1 stick) unsalted butter
8 ounces bittersweet (not unsweetened) or semisweet chocolate, chopped
1 1/2 9-ounce packages chocolate wafer cookies (about 61 cookies)

Glaze
1/2 cup whipping cream
1/4 cup light corn syrup
6 ounces bittersweet (not unsweetened) or semisweet chocolate, chopped

Filling
7 cups vanilla ice cream, slightly softened

For crust:
Melt butter with chocolate in heavy small saucepan over low heat. Finely grind cookies in processor. Add warm chocolate mixture; blend just until crumbs are moistened. Reserve 1 cup crumb mixture in small bowl. Press remaining crumb mixture onto sides, then bottom of 9-inch-diameter springform pan with 2 3/4-inch-high sides. Freeze.

For glaze:
Bring cream and corn syrup to boil in heavy large saucepan. Remove from heat. Add chocolate; whisk until melted and smooth. Let stand until cool but still pourable, about 1 hour.

Assembling:
Spoon half of ice cream into crust; spread evenly (place remaining ice cream mixture in bowl in freezer). Sprinkle reserved 1 cup cookie crumbs over ice cream in pan; press gently. Pour 1 cup chocolate glaze over ice cream in pan. Freeze 1 hour. Top with remaining ice cream; spread evenly. Freeze until firm, about 4 hours. Stir remaining glaze over low heat just until pourable but not warm (I nuked in the microwave for 20 seconds). Pour glaze over ice cream; spread evenly. Freeze overnight.
Run sharp knife between crust and pan sides to loosen cake. Release pan sides. Transfer cake to platter. Garnish as desired and serve.
(adapted from the following recipe from epicurious.com: Chocolate-perppermint Ice Cream Cake)

Sunday, December 04, 2005

It is tomorrow….

Yes, it is tomorrow, we are going to Brazil!!!
I have been meaning to come here and post the recipes I have made during the week, but with all the packing, laundry, Christmas shopping, and a few other things I had to get done before going, I simply did not have much time left to post.
But here I am, ready to go! Everything is done and now I just have to be organized and put everything together before we leave. Until tomorrow I will probably find out that something is missing, or that I forgot something important, but I will leave to worry about this part later.
Now on to my favorite subject… Food!!
I had a pretty busy week but still managed to cook and even try new recipes, cooking for me is like a therapy so nothing better than heading to the kitchen after a stressful day. Thursday I decided to make muffins to leave for the husband’s breakfasts during the weeks he will be here alone. He requested banana bran muffins and strawberry muffins, and I also made my new favorite oatmeal muffin (the one from Nic’s site, posted here before!), believe it or not, we were in a muffin mood this week and about half of them is already gone… seems I will be making one more batch before leaving!
I also made an asparagus soup that was very good! I know, it is not asparagus season right now, but I found some frozen asparagus spears for the first time when shopping at whole foods during the week, I was extremely happy with my finding and since it was cold I decided to make soup. Very easy recipe and very good too, and you can vary the vegetables accordingly to what you have on hand.
Another recipe I made was for potato rolls, and this was a new one. I have had this recipe on my “to try pile” for years, and although it looked like a good one (it had a picture with it, which I like!) I had not made it before. And I have no idea why I waited so long, because the rolls were awesome! Simple but so good, they had the perfect texture of the potato rolls we buy at bakeries in Brazil, which usually come filled with a creamy cheese called “catupiry”. Well, I did not have the cheese here so I improvised and stuffed them with small pieces of those laughing cow triangles (Brazilians, read “ polenghinho”). It worked very well and the rolls were delicious! The recipe is in Portuguese, so if you want it just let me know and I will be glad to translate!
Recipe for the rolls can be found here: http://cybercook4.uol.com.br/exibir_receita.php?codigo=486
Friday night we had Cheese Fondue! What can be better than melted cheese in a cold night, huh?! So good, and very easy to make too! I always make the same recipe, which I got from foodtv. As with usual fondue it is made with wine, but since Matheus was eating with us I made ours with chicken broth, instead (you can use milk too). I turned out very good, but if you have no kids for dinner by any means use the wine!
Finally, today after our obligatory “Sunday Pasta”, we had Cheesecake Ice Cream! This is actually a recipe I created after browsing different other recipes. As I have told you before, the husband loves cheesecake, and I love ice cream, so during the summer I developed this recipe in an attempt to combine both our likings and create one concoction we could happily enjoy together. It worked, we were all happy and now I share my recipe with you! Today I had some cream cheese left that I needed to use, so I made the recipe again, however, I did not have half-half on hand and used plain whole milk yogurt instead, which worked nice! The recipe is super easy to make and makes a creamy and delicious ice cream!
That is it for today. Have to finish up cleaning and getting everything in order for the husband before we go tomorrow. And I promise I will write from Brazil and try to post some pictures. Whish me a good trip!
See you soon, and enjoy the recipes!

Ana


Cream of Asparagus Soup (Cooking Light, April 2002)
3 cups (1/2-inch) sliced asparagus (about 1 pound)
2 cups fat-free, less-sodium chicken broth
3/4 teaspoon fresh thyme, divided
1 bay leaf
1 garlic clove, crushed
1 tablespoon all-purpose flour
2 cups 1% low-fat milk
Dash of ground nutmeg
2 teaspoons butter
3/4 teaspoon salt
1/4 teaspoon grated lemon rind
Combine asparagus, broth, 1/2 teaspoon thyme, bay leaf, and garlic in a large saucepan over medium-high heat; bring to a boil. Reduce heat, cover, and simmer 10 minutes. Discard bay leaf. Place asparagus mixture in a blender; process until smooth.
Place flour in pan. Gradually add the milk, stirring with a whisk until blended. Add puréed asparagus and ground nutmeg; stir to combine. Bring to a boil. Reduce heat; simmer 5 minutes, stirring constantly. Remove from heat, and stir in 1/4 teaspoon thyme, butter, salt, and lemon rind. Yield 4 servings (serving size: 1 cup).

Cream of Carrot Soup: Substitute 2 cups baby carrots for asparagus. Omit bay leaf.
Cream of Leek Soup: Substitute 3 cups sliced leek for asparagus. Substitute 3/4 teaspoon rosemary for thyme. Omit bay leaf.


Cheese Fondue (Tyler Florence)
1/2 pound imported Swiss cheese, shredded
1/2 pound Gruyere cheese, shredded
2 tablespoons cornstarch
1 garlic clove, peeled
1 cup dry white wine
1 tablespoon lemon juice
1 tablespoon cherry brandy, such as kirsch
1/2 teaspoon dry mustard
Pinch nutmeg

In a small bowl, coat the cheeses with cornstarch and set aside. Rub the inside of the ceramic fondue pot with the garlic, then discard. Over medium heat, add the wine and lemon juice and bring to a gentle simmer. Gradually stir the cheese into the simmering liquid. Melting the cheese gradually encourages a smooth fondue. Once smooth, stir in cherry brandy, mustard and nutmeg.


My Cheesecake Ice Cream
8 oz cream cheese
1 cup milk
1/2 tablespoon lemon juice
3/4 cup sugar
1/8 teaspoon salt
1/2 cup sour cream (or heavy cream)
1 teaspoon vanilla

Blend everything together in a blender and freeze on ice cream machine.