Showing posts with label Chocolate. Show all posts

Friday, December 24, 2010

HoHoHo!!

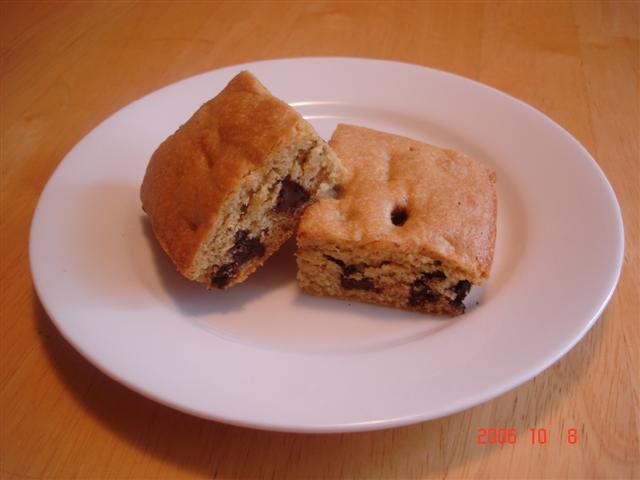
Remember when I said I had celebrated the end of my grad school semester by baking cookies and that I had made the best Chocolate Graham Crackers?
Well, I wasn't kidding, and I couldn't wait to share it with you. Simply because these were truly the best Chocolate Cookies/Crackers I have ever made and eaten, they are that delicious!
The recipe I found at Ashley's blog The Edible Perspective, a super nice blog which I really enjoy reading, plus Ashley has some awesome recipes in there, you should take a look!
I saw this Graham Cracker recipe at Ashley's blog and could not wait to try making them myself, so as soon as I was done with my school work I entered the kitchen and made a batch. Oh my, it was Chocolate Graham Crackers perfection! Even the dough was delicious just by itself, and since it is vegan we were able to indulge on it without any worries - and I tell you, Matheus and I did have a fair share of raw chocolate cookie dough. However, the baked crackers were even better!
Perfect texture and taste, both Matheus and I loved them!
Matheus liked it so much that when I had to make reindeer cookies for his class' end of the year learning experience he asked me to make it with Ashley's recipe. Here is the result:


30 + cute reindeer cookies that I baked for the whole class, teachers and volunteers, we had a fun time at school!
To make the reindeer shaped cookies I used a circle cookie cutter which I bent into a triangular shape (the first reindeer cookie I made I shaped the dough into a triangle myself, that is the picture you see on the top of this post, using the cookie cutter made for a much more neat reindeer!). Cut out the triangles, stick two pretzels for the antlers, two chocolate chips for the eyes, and one red m&m candy for the nose and bake the cookies for about 10 minutes.
Couldn't be more simple and you cannot imagine how much the kids enjoyed this! Actually the teacher and the moms all really liked it too.
Since I followed Ashley's recipe exactly I am going to leave here the link and you can get the recipe at her website:
Chocolate Graham Crackers


I hope everyone is having a wonderful holiday season, and wish you all a Very Happy and Blessed Christmas! Ho Ho Ho to all!
Ana

Tuesday, February 02, 2010

Easy chocolate cake!

Another day without school... still lots of ice/snow outside on the roads, and to get things a little worse it was raining, the whole day, sigh.
At least we were able to get out of the house and went to the YMCA, mom gets an workout and kid can play with friends, and we both come back home happy!
But what one do when there is another afternoon of nothing ahead and it is so cold out that it makes you want to have tea and hot cocoa for breakfast, lunch and dinner? Make chocolate cake, of course!
And that's what we did! You can't beat a slice of warm chocolate cake, it warms you up from the inside out - chocolate does put a smile on my face! (and wrecks my morning workout, but that's another story... we gotta live a little, right?!)
After a few days staying home I got the urge to bake, and after a batch of muffins (I made Morning Glory Muffins this time!) and a frittata for lunch I was left with no eggs... "no problemo", I can find a chocolate cake recipe without eggs, right? Sure, and to be true I even have one like that in my archives already (this one), but still I wanted to see if there was something different out there and got me some google action! (What can't you find on google, tell me?!!)
A minute on the search engine led me to some very similar recipes to the one I had previously made, and after adapting my recipe and and combining it with a slightly different one I came up with a new egg-free chocolate cake recipe, and guess what? It was way better than the one I made before!!
People, if you don't have eggs, or milk, or if you can eat any of those ingredients, do not fret, you can still have some awesome chocolate cake! Some call this a whacky cake, but you can call it whatever you want and I don't care, just don't shy away from making this cake, it is really yummy!
Plus you will only dirty up one bowl, that's all - and the baking pan. Super easy and so fluffy and chocolaty, we really enjoyed it!
The combination of vinegar and baking soda is the key to this cake, it is what gives the leavening action and make this type of cake rise, pretty cool, huh?
The cake was delicious warm just by itself, and that's how we ate it right after it came out of the oven. Then, a little later, we decided that a chocolate sauce would only improve the goodness. I quickly whipped some of our favorite chocolate syrup and we went to town, it was heavenly!
This recipe yields a small, 8-inch round cake, which was just perfect for the three of us. It is a fluffy, very tender cake, chocolaty and delicious, just perfect for another snow day!
Enjoy!
Ana

Easy no-egg chocolate cake

1 cup whole wheat flour
1/2 cup all-purpose flour
2 or 3 tablespoons cocoa
1 teaspoon baking soda
1 tablespoon white vinegar (I used champagne vinegar, it was what I had)
3/4 cups sugar (feel free to add more if you want it sweeter)
1/4 teaspoon salt
1/3 cup oil
1 teaspoon vanilla
1 cup water (cold)

Preheat oven to 350F and spray an 8-inch round cake pan with oil.
In a bowl mix up dry ingredients, make a well in the center, add wet ingredients and stir all together until smooth. Pour batter into prepared pan and bake for about 20 to 25 minutes.

My notes: start checking at around 20 minutes. Turn on the oven light and see how it looks, if risen then open and check with a toothpick, mine was done at 22 minutes.

Sunday, January 20, 2008

Sweet Crepes!

When it comes to end a meal with a sweet touch my choices pretty much revolve around creamy desserts, but with the cold weather we are having right now I knew that ice cream or panna cotta would not make it to the table - I wanted something warm!
Matheus and my husband both love savory crepes and a while ago Matheus realized we could make them sweet and has been asking for us to try it sometime.
With him asking and my desire for something warm (and chocolaty!) we decided to make some sweet crepes for dessert, and the choice could not have been better!
I made crepes with my regular recipe, which I use for savory ones, but added a tablespoon of sugar to the batter (recipe bellow). Then I chopped some bananas, added a touch of cinnamon and sugar to them and sauteed them in a skillet over the stove top just to warm them up and sort of let them caramelize on their own sweetness... oh my, the filling was absolutely delicious on its own, really, I didn't even needed the crepes after I tasted it!
I then put some filling in each crepe, rolled (tucking in the sides as in a burrito) and drizzle the top with a simple chocolate syrup made with warm cream (and a little milk) and dark chocolate - just melt the two together, but don't put too much milk so it doesn't turn too soupy.
It was simply heaven! Warm, sweet, plus the bananas were creamy inside, and paired with the chocolate.... ohhh it was good!
So easy, and the crepe recipe made a lot, so I saved them on a zipbag in the freezer and now we can have crepes for dessert when the cravings strike!
Enjoy!
Ana

Here you can see the yummy bananas inside!!


Basic Crepe Recipe

1 cup flour
1 cup milk
2 eggs
1 tablespoon baking powder
1 tablespoon melted butter
1 teaspoon salt (or more to taste)

Put all ingredients in blender and process until smooth.

My Notes: This recipe can be used to make both sweet and savory crepes. When I made the sweet ones I reduced the salt to 1/4 teaspoon and added 1 tablespoon sugar to the batter, and it just added a subtle sweetness to the crepe.
Also, when making the sweet crepes you might want to add a touch more milk just so that the batter is a little more loose, and that will help in making thiner crepes, which are desirable for a dessert course.
For the savory ones though, I keep the batter as is, since my boys here like the crepes to be a little on the thicker side!
Also, for savory crepes you can flavor the batter by mixing finely chopped herbs into the batter (parsley, basil, rosemary, etc - but mix it with a spoon, unless you don't mind a greenish crepe batter!), even a little parmesan cheese is a good addition to flavor the basic crepes.
That's it! This is a pretty basic recipe, so you can use your imagination and create your own delicious concoction, being it savory or sweet!

Sunday, November 11, 2007

Chocolate Soufflé

Although it is a nice day outside it is quite cold for us, so we opted to stay inside today. We called grandma and grandpa in Brazil, saw them on the computer through the camera and ended up having fun in our own way.
Part of our fun today was making and eating these Chocolate Soufflé Cakes. They were warm and delicious, perfect for the cold weather. And they were so light and airy that I love the way I felt satisfied with a sweet treat without feeling I had an entire cake for dessert. Plus it makes just enough for the three of us and we don't have tons of leftovers, which I like since I do love to cook and experiment with different recipes quite regularly.
We all loved and totally agreed that this is certainly going to be repeated during the winter.
Really yummy!
I have had this recipe marked to try since it appeared in the magazine, in April... now, why did I wait so long to make it?????
Enjoy!
Ana

Note: I used less sugar in this recipe (thought it would be too sweet as written) and both the husband and Matheus agreed it was perfectly sweet. Since I am a 70% dark chocolate girl I still found this a little on the sweet side, but I know that if I made it less sweet they would not enjoy it as much.
Anyway, just wanted to suggest that as you make this recipe give the soufflé base a taste and from there see how much more sugar you would like added to the egg whites, just so that you can control the sweetness to your taste.


Individual Chocolate Soufflé Cakes
(Adapted from Cooking Light, April 2007)

Cooking spray
9 tablespoons granulated sugar, divided
5 teaspoons all-purpose flour
3 tablespoons Dutch process cocoa
4 tablespoons fat-free milk
1/2 teaspoon vanilla extract
2 large egg white
2 teaspoons powdered sugar

Preheat oven to 350°.
Coat 4 (6-ounce) ramekins with cooking spray; sprinkle each with 3/4 teaspoon granulated sugar.
Combine 4 tablespoons granulated sugar, flour, cocoa, and milk in a small saucepan over medium heat. Cook 2 to 3 minutes, stirring until thickened and smooth. Spoon chocolate mixture into a medium bowl; cool 4 minutes. Stir in vanilla.
Place egg whites in a medium bowl; beat with a mixer at high speed until soft peaks form. Add remaining 4 tablespoons granulated sugar, 1 teaspoon at a time, beating until stiff peaks form (do not overbeat). Gently stir 1/4 of egg white mixture into chocolate mixture; gently fold in remaining egg white mixture. Spoon mixture into prepared dishes. Sharply tap dishes 2 or 3 times to level. Place dishes on a baking sheet; bake at 350° for 15 minutes or until puffy and set. Sprinkle each soufflé with 1/2 teaspoon powdered sugar. Serve immediately.

Yield: 4 servings.
(Recipe can be made to serve 2. Use 1 tablespoon flour and just half all other ingredients!!)

Saturday, November 03, 2007

Vegan Pumpkin Muffins

At this time of the year we just cannot resist the many pumpkins we see around us. They are everywhere, decorating houses, in front of yards, grocery stores, and its many varieties just make the farmers market shine in an various tones of orange glow.
Every place you look a pumpkin pops out, and luckily we love this fruit a lot, so enjoying its flavors is definitely a pleasure for us!
We already made pumpkin pie, pumpkin soup, and even a chicken in creamy sauce that I served inside a whole roasted pumpkin (very popular in Brazil, this dish is usually made with shrimp, but when you have chicken, it is chicken that you use!). But this year the star of the season for us were the Vegan Pumpkin Muffins, they were simply THE BEST! And yes, they do deserve the capital letters!
We liked it so much that I have made this recipe 4 times already, in little more than a month, and keep getting requests for it again.
The Husband declared it to be one of the best muffins yet, and Matheus just loved the pumpkin and chocolate in it. I loved the yummy pumpkin flavor, the texture, and the fact that it is completely whole grain.
Really, what is not to like about this one?! Plus it is vegan, which means there are no raw eggs and we can lick the bowl as much as we please - which Matheus and I love to do together! And this batter is goooood! :o)
I got this amazing recipe from the book "Vegan Lunch Box", which has been a wonderful source for me and Matheus to make creative and delicious lunches for him to take to school. The author also has a super nice website with the same name, vegan lunch box, that is absolutely worth checking out. (By the way, it is from her website that I got the idea for the cool "mummy calzone" I showed in the Halloween post bellow).
Bellow I am posting my adaptation for the recipe in the book. I reduced the sugar a bit (plenty sweet this way, 1 1/3 cups sugar was waaaay too much for us) and didn't add pecans as the recipe asked for.
Also, based on an idea I saw in the blog baking bites, we used chocolate covered raisins in place of the chocolate chips, it added a surprisingly "tchans" to the muffins and Matheus (raisin lover) enjoyed it a lot. I still do prefer chocolate chips, but made it with the raisins twice as the boys seemed to really like that.
If you find pumpkin + chocolate a weird combination (and some do) give it a try, you may be surprised by how yummy it is. Believe me, it is really good!
These muffins are truly worthy trying, they ARE delicious! It is amazing how moist and flavorful they are, and with all the nutrition in them... yummm, I might make them again this week!!
Ana


Vegan Pumpkin Muffins
(adapted from the book Vegan Lunch Box by Jennifer Mccann)

1 cup pureed pumpkin (canned or home cooked)
1/3 cup water
1/3 cup canola oil
2 TB ground flax seed
1 tsp. vanilla
1 2/3 cups whole wheat pastry flour
1 cup sugar
1 tsp. baking powder
½ tsp. baking soda
½ tsp. kosher salt
½ tsp. cinnamon
1/3 cup vegan chocolate (or carob) chips

Preheat the oven to 350º. Spray a nonstick muffin tin well with nonstick spray, set aside.
Put pumpkin, water, canola oil, ground flax seed, and vanilla in a blender and process on high for at least one minute, until light in color and well-blended. Reserve.
In a large mixing bowl, whisk together the whole wheat pastry flour, sugar, baking powder, baking soda, kosher salt, and cinnamon. Add the pumpkin mixture and mix well with a wooden spoon or large spatula until well-blended. Fold in the chocolate (or carob) chips.
Spoon batter into prepared muffin tin.
Bake for 30-35 minutes, until a cake tested inserted into the center of a muffin comes out clean. Let cool for 5 minutes in the pan, then lift each muffin from the tin and let cool on a wire rack.

Wednesday, August 01, 2007

Nutella Ice Cream

Yes, another ice cream recipe, and there are actualy more to come...
And I promise this ones actually look and tastes a lot better than it appears in the picture (it melted a little too fast when we were eating it, but just because I wasn't patient enough to wait for it to firm up in the freezer before tasting it.... oops! Hard thing to do waiting for ice cream to harden...!)

Isn't summer the best season ever? The most delicious fresh fruits, produce that you can harvest at your own backyard, lots of farmers market opened around the country, what could be better than that? Well, besides all the fruit and veggie goodness, it is also Ice Cream season, Yay!!!
This is the time of the year when I get creative with both my fruits and creamy concoctions, and when my ice cream machine gets little to no rest.
This year I have actually entered into a sorbet mode and have been trying some recipes with many fruit variations. Most came out great, and both recipes and pictures will be posted here, soon.
But right now I wanted to follow up with a recipe that I adapted from the Peanut Butter Ice Cream I posted the other day. I tried making it with Nutella instead of PB and the result was a wonderful, delicious and creamy Nutella Ice Cream.
Who doesn't like Nutella?? Well, I don't.... I LOVE Nutella!!
It is one of the best creations ever, creamy chocolate and hazelnuts... makes my mouth water just to think of it! It is good with strawberries, warmed up over crepes and ice cream, and mixed with hot milk it makes an awesome hot chocolate, but better than all that is having Nutella in its simplest form, straight from the jar by big spoonfuls!
So, I got the so good Nutella and transformed it into ice cream... oh yum, it did turn out quite good!!
I am still trying to figure out the sugar ratio, as I thought it came out a little sweet both times I made it, but my sugar tolerance is usually lower than most people I know, and most of my family who tried really liked it as is.
Of course I used less condensed milk than the PB recipe, as Nutella is already sweetened, but it still was a little too sweet for me, plus, the first time I made I used a little more sweetened condensed milk than I should and its flavor sort of overpowered the Nutella itself. So I am considering either decreasing that, or increasing the Nutella amount next time, or maybe both.
Another thing I am considering is adding a bit of hazelnut liqueur next time I make it, as I would like to reinforce it in the end product. (Got stop by the liquor store! Ic, Ic!!)
All in all, it was still good when I made and both times there was not a bit left for seconds. So I am guessing it is safe to post it right now and I will come back with any updates as soon as I make it again!
Enjoy summer, and lots of ice cream!! Yummmmmm!!!
Ana

Ana's Nutela Ice Cream
1/4 cup sugar
3 large eggs
1 cup milk
1/2 cup Nutela (chocolate-hazelnut spread)
1/4 cup Sweetened Condensed Milk (add more or less to your taste)
1/2 cup cream

Beat the sugar and eggs in a bowl until very well mixed. Set aside.
Bring milk to a simmer in a saucepan over low heat, remove from stove and carefully add the milk to the eggs and sugar, beating constantly. Pour the mixture back into the pan and cook over low heat, stirring constantly with a wooden spoon until it thickens slightly. It doesn't take too long, and remember: don't let the mixture boil or eggs will scramble.
Remove from heat and strain the mixture into a bowl. Mix in the Nutela, condensed milk and the cream (taste and see if you would like more condensed milk at this point - I don't like things too sweet, so you might adjust the sweetness to your tastes).
Cover and let the custard base cool in the fridge overnight. Pour mixture into ice cream maker and churn accordingly to your machine's instruction.
Let ice cream harden in the freezer for a couple of hours before serving.

Monday, March 26, 2007

It was a Soccer Party!!

I still can't believe my "baby" already turned 5, but the party sure was fun! Matheus' birthday was yesterday and we had a party for him at the place he practices soccer. It was great, the kids had a blast running around and kicking balls. One of the coaches was there and kept them busy and laughing for the entire time.
Matheus loved it, he was so happy, and of course so was I! The cake was his idea, a soccer field, and let me tell you, the kids loooooved it!
It was my first attempt with fondant, and I believe a very successful one. I got some tips with a friend that is used to making cakes like this and didn't have much problems. The fondant was actually easy to work with and I had so much fun making the cake, coloring and rolling the fondant. It took me a while to get everything done, but it was so worth it!
I loved and even told my husband that one day I will work with this type of thing. I had the best time doing it, and can you imagine getting paid and having this much fun??? I can just dream about it!
The cake itself was a recipe for chocolate cake that I first made when I was in Brazil, and I have actually mentioned this recipe here. It has the basics ingredients in it, simple method of preparation, but the result is outstanding. I loved this cake from the moment I tasted the batter the first time I made. Simple but yet delectable, rich chocolate taste with just the right amount of sweetness to it. Everyone enjoyed it and I even got some requests for the recipe from some of the mom's, how cool it that??!
So, here is the recipe for all of you who would like a taste of my little soccer cake! I am also including the ganache that came with the recipe originally, you can use it to fill and cover the cake if desired. This cake covered and filled with the ganache was one of the best chocolate cakes I have ever had, yumm!!
Enjoy!!
Ana

The one piece leftover from the cake (the kids really liked the cake, everyone wanted to touch it and even the little guys on the top were taken home as souvenirs!!)


Cocoa Cake with Chocolate Ganache
(Adapted from the book "Cozinha de Estar" by Rita Lobo)

2 cups all-purpose flour
1 cup cocoa
2 tablespoons baking powder
1/2 teaspoon salt
200 grams butter, room temperature
2 cups sugar
4 eggs
1 cup milk

Ganache:
400 grams semisweet chocolate
2 cups heavy whipping cream

For the cake
Preheat oven 350F. Grease and flour a round cake pan (it can also be baked in bundt or rectangular 13x9 pans).
Sift the flour, cocoa, salt, and baking powder, set aside.
With the mixer beat butter and sugar until light and fluffy. Add eggs, one at a time, and keep beating to incorporate.
On low speed, add flour mixture alternating with the milk. Do this in three additions, starting and ending with the flour. Mix everything just until well incorporated.
Pour batter into prepared pan and bake at 350F for about 40 to 45 minutes, or until a toothpick inserted in center comes out clean. Let cake cool completely before filling and covering with the ganache.

For the ganache:
Put cream on a sauce pan and heat until it reaches a boil. Remove from heat, add chocolate and let it rest for about 10 minutes. Gently mix the chocolate and cream mixture until all the chocolate is melted and the ganache is uniform. Pour mixture in a bowl, cover with plastic wrap and let it cool in the frige for about 30 minutes, or until it has a good consistency to be applied to the cake.


Since I had fondant leftover I decided to make a second small cake. It turned out kind of cute, didn't it??!

Wednesday, December 20, 2006

Almond Tofee

Now, I have start my post by saying that if you like toffee, and you like almonds, and you like chocolate, then you absolutely have to try making this candy!
Oh my, it was one of the most delicious candies I have had, and since it was my first time at candy making, it was certainly the best I have made too! :o)
I got this recipe from Anna’s blog Cookie Madness, but I have it on my to try list since I saw a post about it, loaded with great comments about the recipe, back in 2002.
Why did I wait so long to try? I have no idea… at the time I first saw the recipe it was maybe because I was taking care of a newborn, but waiting so many years after that, oh well, there are really no good excuses but me being not as organized as I would like to be and postponing to try such delicious treat.
However, this weekend I finally made and I am sure glad I did! I was quite proud of myself, since it was my first trying with candy making and the toffee turned out perfect!
I got all prepared, bought the ingredients and a candy thermometer, told my husband and my son to go play somewhere else but the kitchen while I was concentrated with this, stayed there, with my nose super close to the pan, watching impatiently for the mercury to rise and the candy to work through its stages of ooey gooey “caramely” goodness. It took a bit of time, but it was worth every second of it.
The toffee is awesome, it tastes rich and buttery and the almonds inside just made it as good as can be. Then comes the chocolate, which melts beautifully on top of the warm candy in the pan and is then sprinkled with even more delicious almonds, which by the way were even better, as they were lightly toasted in the oven before. Let it cool, break into big chunks and…. Yummmmm, PERFECT!
So good, so good, words cannot describe!
And even though some people are afraid to give this kind of candy making a try, it was pretty simple to make. The thing here is to keep focused on the process and watch the temperature carefully; if you cook it properly the toffee will for sure set!
I made it last Sunday, we had some, I gave some for friends and the thing is all gone already. Matheus’ teachers got to enjoy this too and I have even been asked for the recipe. How good is that?!
I guess it did turn out right and certainly was a success! So much so that I am considering making some more in the next couple of days, you know, there are always some friends out there to share the goodies with, right?!
Consider giving this a try, it is a seriously delicious treat!
Thanks Anna, your toffee is perfect, its name says it all, and your blog is great too, I love reading about all those cookies of yours!
Enjoy!!
Ana

I am posting here the recipe, exactly how I got from Anna’s website, as her directions are extremely necessary for the makings of the toffee. And you can also check out her post and pictures at her yummy cookie blog, Cookie Madness!

Best-Ever Almond Toffee
1 1/2 cups sliced almonds, divided use
2 sticks butter (I use salted) -- 1/2 pound
1 cup granulated sugar
1/2 cup warm water
1/2 teaspoon salt
1/2 teaspoon baking soda
8 ounces good quality dark or milk chocolate, chopped

Preheat oven to 350 degrees F. Spread 1/2 cup of the almonds on a non-stick cookie sheet and bake for 6-8 minutes or until toasted and aromatic. Set aside.
Line a 13x9 inch pan with parchment paper and set next to stove.
Place butter in a heavy, medium sized (3 qt or larger) saucepan and melt over medium heat. When butter is mostly melted, stir in sugar, warm water and salt. Set a deep fry thermometer in pan, being careful that bulb is not touching bottom of pan. Cook mixture over medium heat, stirring once in a while (once or twice around), until it reaches 240 degrees F.
At 240 degrees, add the remaining 1 cup sliced almonds to sugar mixture. After adding almonds, stir constantly, keeping heat at medium, until mixture reaches 295 degrees F. If temperature is not rising at a slow and steady rate, raise heat a tiny bit until mercury starts rising. When mixture reaches 295 degrees F, immediately remove from heat and stir in baking soda. Pour into parchment lined pan. The mixture should be kind of a liquid blob at hit point and if you are on track, the pan will be clean when you dump the blog onto the parchment. Mixture will begin to firm, and butter may pool and separate, Do not pour off any excess butter. Do not panic, because if you cooked the toffee to 295, your candy should set. Sometimes it just takes longer.
Scatter chopped chocolate across top of hot almond mixture and let chocolate melt into and over the candy as candy firms. Using back of a spoon, spread melted chocolate evenly over candy. Crush your toasted almonds and sprinkle over melted chocolate. Let candy cool for 1/2 hour at room temperature. Transfer to refrigerator and chill for about 1 hour to firm chocolate.
When chocolate is set is set, lift candy from pan by grasping parchment. Break candy into large chunks.

Sunday, November 05, 2006

Chocolate Syrup

Kids must talk about a lot of stuff when they are at preschool. Even though Matheus only stays at school for 3 hours, he sometimes come home with the greatest ideas, and sometimes not all that good…
Lately he has been asking me to take him to a specific fast-food chain, just because a couple of his friends said it is their favorite place to eat. Oh my, and here I go, planning on a day to take my kid to have some greasy chicken nuggets… yuck! At least I hope that all my teaching about healthy foods will help him make good choices when eating out as he grows up.
Another of his requests lately was that he wanted to try chocolate milk make with chocolate syrup, instead of the chocolate powder we normally use. Well, this one was easy, as I had a recipe on my to try pile just waiting for an excuse to be tested.
Besides being super easy, it is a healthier choice for chocolate syrup, made with natural and simple ingredients, as opposed to the “corn syrup and artificial flavorings’ filled” commercial variety.
I made the syrup yesterday, and at night the three of us enjoyed yummy cups of chocolate milk! Fun, and delicious! It does taste really good, plus it is great to use in ice cream and all kinds of desserts, and to make your plates look pretty too!
Enjoy!
Ana

Note: I made 1/3 of the recipe and it yielded me one squeeze bottle! Oh, and there was a couple tablespoons of corn syrup on the original recipe, which I omitted, as I don’t have that stuff in the house.

Cocoa Syrup
(Adapted from foodtv.com – Recipe from Alton Brown)

1 1/2 cups water
3 cups sugar
1 1/2 cups Dutch-processed cocoa
1 tablespoon vanilla extract
1/4 teaspoon kosher salt

In a small pot, bring water and sugar to a boil and whisk in cocoa, vanilla, salt, and corn syrup. Whisk until all of the solids have dissolved. Reduce sauce until slightly thickened. Strain and cool to room temperature. Pour into squeeze bottles.

Tuesday, October 24, 2006

Espresso Cake

The recipe I am posting today if for a cake that really impressed me last week. It is a super simple and easy cake to make; however the flavor is intense and extremely pleasant.
Espresso Cake first called my attention because the recipe had another recipe that came with it where the leftover cake could be used to make truffles (more on this latter). Second I liked the idea of trying a new Chocolate Cake recipe!
And what a chocolate cake that was! Delicious, moist, and with a great flavor distributed all over it. I would say it is sort of a “grown up chocolate cake”, but have to add that Matheus just loved it too! He said it was one of the best chocolate cakes, which by the way is his favorite cake!
The husband liked it too, but being the “coffee hater” he is, he really pointed out that the coffee flavor was rather strong. I on the other hand really loved this cake, it was not too sweet, and ultra moist, which is a plus for me, and chocolate cakes in general. I have tried a few simple chocolate cake recipes and this one was by far the best one I made.
I will certainly make this cake again, even more because Matheus already asked for it and I also want to try the alternative recipe that came with it. And next time I make it I will probably use half coffee and half water, or maybe even substitute milk for the coffee, just to please my lovely hubby!
I got this recipe from a book called “Conscious Cuisine” by Cary Neff. The author is a spa chef and the book is full of delicious and nutritious recipes. I borrowed the book from the library and am now considering buying it for myself, as I liked and still want to try a few more recipes from it (and I already renewed it once, so I am running out of time with the library here!).
As I mentioned earlier, there is another recipe in the same book that uses this cake to make truffles! I loved the idea, but unfortunately didn’t have the time to make it sooner and when I went to take a look at the leftover cake, other than not having much left, it was also sort of smelling weird, with a pronounced prune smell and flavor. So I decided to toss it (oh no!) and will definitely make the truffles the next time I make the cake (which I am planning to do pretty soon). And I promise to post the recipe and reviews for that here, of course!
I used prune puree when I made my cake but you can also use applesauce, which I plan to try next (I opted for the prunes since it was a chocolate cake, and I do believe it contributed to the cake rich dark color too). You can easily make your own prune puree, but I saved time by using the baby food little jars, which for my surprise came in little plastic containers, with lids and all. I though they were really nice (usually when I was young there were only the glass jars…), and the prune puree was also very good!
Right now I will leave the cake recipe and some pictures here. It is a very nice cake, really really easy, super moist and incredibly tasty! Plus, another light recipe, each slice has only 80 calories, can you believe that? See why I loved the book? Yummy and healthy recipes, what else can you ask for?!
Ana

Espresso Cake
(Conscious Cuisine, by chef Cary Neff)

2/3 cup whole-wheat pastry flour
1/4 cup all-purpose flour
1 cup sugar
2/3 cup unsweetened cocoa powder
1 1/2 teaspoons baking powder
1/4 teaspoon baking soda
1/4 teaspoon salt
1/2 cup pureed prunes or unsweetened applesauce
3 large egg whites
1 teaspoon pure vanilla extract
1 cup coffee

Preheat the oven 350 degrees F. Spray a 9-inch cake pan with cooking spray and dust with additional cocoa powder, set aside.
In a medium bowl, combine the flours, sugar, cocoa, baking powder, baking soda, and salt; set aside. In another bowl, combine the prune puree, egg whites, vanilla, and coffee. Mix the wet ingredients into the dry ingredients and pour into the prepared cake pan.
Bake for 20 to 25 minutes or until a toothpick inserted in the middle of the cake comes out clean. Cool the cake in the pan on a wire rack for 10 minutes. Run a knife around the edge of the cake and invert onto a wire rack to cool completely.

A picture of a cake slice...


And the prune puree I used.


Sunday, October 15, 2006

Peanut Butter Brownies

Matheus has a thing with the peanut butter grinder of our local natural store. He think is the coolest think to turn it on and see zillions roasted peanuts inside become peanut butter! Does he like peanut butter? Well, not really… but the always begs for me to buy some for him when we go to this particular store, just because of the machine. Most of the time I won’t buy it, but there are some days I end up giving in.
He is always hearing about peanut butter and pb&J sandwiches from his friends; he has tried it several times, but definitely doesn’t care for it at all. Neither my husband nor me grew up eating the stuff ourselves, so we are not crazy for it either (although we all like to eat salted peanuts!). I don’t even buy peanut butter, unless I am making one of my husband’s favorite ice creams, which by the way I should post here, in another post, of course.
The other day Matheus went to the grocery store with me and he had to have his little peanut butter/grinding machine fix, so I bought the smallest amount for him, and we all came home happy.
However, after one week, the thing was still sitting there, at the corner of the refrigerator shelf, completely isolated and ignored. So I decided to use it up in come sort of recipe, and hope that at least someone would eat my baked good.
I then found a recipe for Peanut Butter Chocolate Chip Brownies, and decided to give it a go, as Matheus declared that he would eat a cake with the peanut butter in it, and oh yes: “I love chocolate chips mommy”!
He indeed ate the brownies, and said he liked it, but nothing major as some other cakes and stuff I make that he really likes (one piece and then it was the brownie’s turn to be forgotten and left in the corner by itself…)
I have to say that this is not my favorite recipe. First of all, because to me brownies should be chocolate! It was actually interesting trying this recipe, as the texture of the finished cake (yes, to me this should be called cake, but anyways…) was exactly like that of a chocolate brownie: was moist and sort of fudgy in the middle. The peanut flavor however was very subtle, so I believe that the amount of PB could be increased here, or maybe adding some crushed peanuts to the batter might help too.
It is super easy and quick to make, so I will post the recipe and the improvement options for you all, in case someone would like to try it! ‘Cause for me… if I want brownies, I will make brownies, and by that I mean chocolate brownies, of course!
Oh, and before I go, I just wanted to say that the chocolate chips were a good complement here, and just as Matheus, I liked them too!
Ana

Peanut Butter-Chocolate Chip Brownies (Adapted from Cooking Light – Jun/00)
1 cup all-purpose flour
1/4 cup semisweet chocolate minichips
1/4 teaspoon baking soda
1/8 teaspoon salt
3/4 cup granulated sugar
1/4 cup packed dark brown sugar
1/4 cup creamy peanut butter
1 tablespoon vegetable oil
1 teaspoon vanilla extract
1 large egg
1 large egg white

Preheat oven to 350°.
Coat bottom of an 8-inch square baking pan with cooking spray (do not coat sides of pan).
Lightly spoon flour into a dry measuring cup; level with a knife. Combine flour, chocolate chips, soda, and salt in a bowl.
Combine sugars and remaining ingredients in a bowl; stir until well-blended. Add flour mixture, stirring just until blended. Spread batter in bottom of prepared pan. Bake at 350° for 25 minutes or until a wooden pick inserted in center comes out almost clean. Cool on a wire rack.

Monday, September 11, 2006

Brigadeiro

When I think about my country’s typical cuisine, only a few food come to mind that are so Brazilian as Brigadeiro. This is an extreme popular sweet in Brazil, present at almost all kid’s birthday parties and family gathering events.
These little brown gems are fudgy in texture and very chocolaty in taste, creamy inside and rolled in crunchy decorative sprinkles on the outside.
Matheus had a “cultural feast” last week at school and each child had to bring in a dish from its own heritage. Well, I asked him what Brazilian food he would like to take to school and after a few undoable treats (like churrasco and kinder eggs – which are not Brazilian at all but he discovered them when staying in Brazil) he decided he wanted these. Brigadeiros are one of his favorite treats when we go to Brazilian birthday parties. He usually can’t wait for the birthday kid to cut the cake so he will be able to get some of the brigadeiros, which usually surround the cake in a decoratively manner.
Kids of all ages really love these treats! And the best thing is that they are super easy to make. A few ingredients and you get a lot of the little balls! The size I made them I got about 50 from 1 can of condensed milk, which is basically the main ingredient here.
The catch of the recipe is to cook it at medium heat, and stir constantly as you don’t want it to burn or lump up on you. It takes a couple of time making it to get it right, and once you do it you won’t forget.
Since I had to make it for the school last week, I took a few pictures of the process to post it here, together with the recipe of course!
Enjoy!

Ana


Brigadeiro
1 can sweetened condensed milk

2 to 3 tablespoons cocoa (add 2, try it and see if you want more chocolate… I like to use 3!)

1 tablespoon butter

First of all, grease a big plate (or a pie plate) with butter and set aside.
Mix all ingredients on a medium saucepan, put pan over medium heat. It may take about 20 to 25 minutes for the mixture to cook completely, and during this time you must keep stirring constantly. The mixture will get thicker as it cooks, and you will know it is ready when you tilt the pan and the mixture sort of comes out of the pan, it runs down without sticking to it (look the picture below!). It will thicken up quite a bit, become darker and smoother than when you started.
After the mixture is cooked pour it on the prepared plate and let it cool completely. Pour sprinkles in a small bowl. Coat the palms of your hands with butter (or oil – some people even use water for this) and, using a teaspoon, spoon the “dough” into your hands and form it into a ball. Roll the ball into the sprinkles and put into a plate or in little paper cups/molds.
It may yield at least 30, or more, depending on what size you make them!

Here are a couple of pictures I took while making them. (and remember, you can always click on the pictures to make them easier to view!)

Here is how it should look like when the mixture is cooked through. Tilt the pan, and if done the mixture should easlily slide off the bottom of the pan.


My little assembly line for rolling the brigadeiros...

Wednesday, August 09, 2006

Brownie Bites

Today’s recipe is basically an idea to be made with your favorite brownie recipe, nothing really special here, but let me tell you, this was a huge success with the kids the other day!
Matheus is having some fun these past couple of weeks at the YMCA Summer Camp program, he made a lot of new friends and the environment there is so healthy and friendly, he loves playing and going to the pool at the camp. They have got all this “counselors” that take care of the kids, and the best thing is that they are kids themselves! The counselors’ age range around 17 years old, so they have extra energy to deal with the kids, it is fun to see them play. But enough with that, lets get to the cooking part of the post.
Last week they had a cookout at summer camp, and Matheus’ huddle was supposed to contribute with desserts. I wanted a treat that would be easy to eat, that the kids could grab and go, and preferably something not very messy. Since I believed that there would be a good amount of cookies showing up (and I was certainly not wrong!), I discarded that possibility and went looking for something else instead.
The thought of mini muffins came to my mind, and suddenly brownies popped up. That’s it, Mini Brownies, perfect!
Great idea, they came out very good looking and cute too. The kids loved them, it was super simple and easy to make, plus with all the chocolate goodness and the yummy chocolate chips inside there was no need for messy frostings or the like. Matheus loved taking this to the camp, so I will probably be making more of them during the next preschool year to share with the friends.
As I said before, you can make this with your favorite recipe (make sure to not over bake them so they came out nice and fudgy inside), but I am posting here the recipe I used just in case, and you know what, if you like brownies this is worth trying, it was very good! (Especially warm out of the oven… oh the goodness of melted chocolate, yum!!)

Ana


Brownie Bites
½ cup cocoa powder

1/3-cup oil (I used canola oil)

1 cup sugar

2 eggs

1 teaspoon vanilla extract

2/3 cup flour

1 teaspoon baking powder

¼ teaspoon salt

1/3 cup chocolate chips

Preheat oven to 350 F and either line with paper or grease 24 mini muffin tins.
In a large bowl mix all ingredients together, adding the chocolate chips at the end. Pour batter into prepared mini muffin cups (don’t fill them too much!). Bake for about 16 minutes. Makes 24.
(Recipe adapted from the Hershey’s website)

Sunday, August 06, 2006

Another Chocolate Gelato

I know I have posted a chocolate gelato already this past month, but I tried another recipe last week and just had to come share this one too.
The previous recipe is good, light and tasty, one of the favorites here at our home, but if you are a real chocoholic like me then you will leave that one for the kids and go for this new one instead.
Now this is serious Chocolate Gelato, realy, realy, realy good ice cream stuff, by far the best chocolate ice cream recipe I have made and one of the best I have ever had. It is rich and chocolaty, smooth and creamy, simple and absolutely the best!
The previous recipe got its flavor from melted chocolate and a little bit of cocoa powder, on the other hand, there is a lot of cocoa in this rich gelato, and that is what makes it so good, it is pure chocolate flavor in creamy and cold deliciousness. I really loved this one!!
Also, the other best thing about this is that it did not get icy after being in the fridge for a couple of days, it kept super well, smooth and creamy just as when consumed the first day.
I first saw this recipe at Nic’s blog, Baking Sheet, and drooled just by looking at her picture. I knew right away it would be my kind of dessert, and I am glad I tried it early in the summer, because I am already going to whip up some more!
My picture however doesn’t make justice of the goodness involved in this dessert, but you can certainly check out her post and picture here.
The recipe comes from a great book called “Bittersweet” by Alice Medrich, which I actually borrowed from the library to check out and has tons of mouth watering chocolate recipes and pictures; a nice book to take a look if you are into chocolate desserts.
This Chocolate Gelato is not as dense as ice cream, but it is rich enough that you may not need much to satisfy your chocolate cravings, and even though I am the biggest chocoholic here both Matheus and the Husband enjoyed this one a lot too. And as Matheus says “chocolate ice cream is the best”! Oh yes, I am all with him!!
Really, if you like chocolate, give this a go, it is amazingly good!
Thanks Nic for giving the heads up on this one!
Ana

Sicilian Chocolate Gelato
(Adapted from Bittersweet by Alice Medrich)
3 cups milk
2/3 cups sugar
¾ cups unsweetened cocoa powder
1 ½ tablespoons cornstarch

In a medium saucepan, bring 2 cups of the milk to a simmer over medium heat.
Meanwhile, whisk the remaining 1 cup milk with the sugar, cocoa, and cornstarch in a small bowl. Add the cocoa mixture into the hot milk and cook, stirring constantly, until the mixture thickens and bubbles a little at the edges. Cook for 2 more minutes, pour mixture on a bowl and let it cool. Cover with plastic wrap and chill it overnight. Freeze in ice cream machine according to its instructions.

Tuesday, July 18, 2006

Chocolate Ice Cream

With almost 100 F around here there is nothing better than ice cream! This weekend I made two of our favorite recipes. The first one, that I am posting today, is for Chocolate Gelato. I created this recipe based on other 3 recipes I have read. It makes a creamy concoction without being too heavy, however, it is rich enough to satisfy our chocolate cravings!
I have made it with all milk (use whole milk here, please!) and also with 2 cups milk and 1 cup cream, the later being the best version. You definitely cannot compare this with a normal gelato you find in Italian Ice Cream Parlors, but is so refreshing and satisfying that here in our house is the chocolate ice cream of choice. And I definitely do not complain about making it over and over again!!
Enjoy!

Ana


My Chocolate Gelato
3 cups whole milk (or 2 cups milk and 1 cup cream)
3 tablespoons cornstarch
1/3 cup sugar
3 teaspoons cocoa powder
2 oz semisweet chocolate chopped (or chocolate chips)
1 teaspoon vanilla extract
a pinch of salt

Combine 1/2 cup milk with cornstarch and set aside. In a saucepan add remaining 2 1/2 cups milk, sugar, and cocoa. Heat over medium heat until almost boiling; add milk/cornstarch mixture and cook, stirring constantly, until mixture thickens. Add chocolate chips and whisk until melted. Remove from heat, stir in salt and vanilla.
Strain mixture into a bowl (or plastic container), let cool to room temperature and then put in the fridge until completely cooled. (Or you can put the container on top of a bowl filled with ice water and keep stirring the mixture until cooled enough to put in the fridge)
Freeze in ice cream machine, according instructions.
Note: I put a piece of plastic wrap directly on top of the mixture as soon as I put it on the plastic container to cool, just so that a crust won't form.

Monday, June 12, 2006

Chocolate-Tofu Mousse

Don’t let the title of this recipe refrain you from trying this mousse. I know sometimes tofu can be intimidating, and I have had some issued with it myself, but in this recipe there is no error, no problems, no after tastes, what you get is a creamy and chocolaty concoction, so good that no one will never ever think about tofu when eating this.
My husband won’t even get near tofu… no matter how much I want to try and experiment with it, I will have to eat the food all by myself. However, I have made this recipe twice already and he has not the slightest idea it has tofu in it. No one here knows… and we all agree it is one of the best chocolate desserts. I loooove creamy desserts, and this one is just perfect!
Super easy to make, full of good stuff, not to mention the rich chocolate flavor!
This recipe turned into a very dense and dark chocolate mousse, and I have made another similar recipe before which contained 2 egg whites beaten to stiff peak. We liked this recipe a lot as is, but if you want your mousse to have that light and airy texture, then you might consider adding the egg whites, which to be quite frank with you, I will do next time I make this.
Try this mousse. Seriously, it is good!
Oh, and before I forget, it is Valentine's Day in Brazil today so... "Feliz Dia dos Namorados" to all the Brazilian lovers out there!!
Ana

Dark Chocolate Mousse
1 (12.3-ounce) package silken tofu
3 ounces semisweet chocolate, chopped
1/4 cup unsweetened cocoa powder
1/2 cup sugar
1/4 cup water

In a blender puree the tofu until it is smooth.
Melt the chocolate, cocoa powder and water in a double boiler, or in the microwave
. Remove from heat. Mix in 1/2 cup of sugar until smooth.
Add the chocolate mixture to the tofu and puree until smooth and well blended. Spoon the mousse into serving dishes, cover and refrigerate for at least 1 hour.
Yield: 5 servings
(adapted from a recipe by Ellie Krieger)

Sunday, June 11, 2006

You Can’t Beet this Cake

No, it is not a typo, you read it right, I wrote “beet” in the title of the post. Yep, there is beet in the cake!
Can you believe it?!?! So couldn’t we! If no one tells, you would probably not know there was beet in this nice and chocolaty cake!

As I was making the cake:
Matheus: mommy, what are you making?
Me: cake!
Matheus: chocolate cake?
Me: yes, it is a Chocolate Beet Cake!
Matheus: (looking at me, smiling like I was crazy) Ahhh, silly mommy, you can’t put beets in cakes!
Me: Yes you can! Don’t we make carrot cakes?
Matheus: Yes!
Me: So, I am making a beet cake today!
Matheus: is it really a chocolate cake?
Me: Yes!
Matheus: Yummy, I love chocolate cake!

And he sure liked this one. Especially the glaze, he actually asked if he could eat a second piece, but just the glaze part! The husband also liked it a lot (and the glaze too!), and I actually ended up mentioning the beet to him, just to get a real review of the recipe. He said he would never guess about the beets in it, he could not taste it (although I could), and happily finished his piece of chocolate cake!
The method for this cake is actually the way we make Brazilian-style carrot cakes, however, we do not use the cocoa in the batter and the cake turns out a nice shade of orange, and it is commonly topped with a chocolate glaze. I will post a picture and recipe for the carrot cake here soon.
Now I have to get to the news… I am going to Brazil! Yes, again!! And no, this is not common. We normally go for Christmas time and my family came to visit us in July. However this year they are not coming and we are probably not going in December, so we decided to go now.
Matheus has been asking to go to Brazil again since we got back in January, so the husband finally gave off the multiple requests and decided to send the two of us for a little vacation (hubby has to work… no Brazil for him this time, sniff!). We are leaving this week and will be back in July.
I made lots of recipes this past two weeks, and have been meaning to come here and post, but between the end of school year and the trip I ended up not having much time and inspiration to write. But I guess I will have time in Brazil, so I will keep posting from there and adding the new recipes as we go.
Until then, I hope you enjoy our chocolate cake too!
Ana


Chocolate Beet Cake
1 large beet (or 2 small), raw, peeled and chopped into pieces
4 eggs
1 ½ cups sugar
½ cup canola oil
1 cup all-purpose flour
1/2 cup whole-wheat flour
1 tablespoon baking powder
4 tablespoons cocoa

Pre-heat oven to 350F.
Put beet, eggs, sugar, oil and cocoa in a blender and mix until smooth and liquidy, and there is no large pieces of beets remaining.
Pour batter in a large bowl, add flours and baking powder, and mix well with a wooden spoon until everything is incorporated. Pour batter into a greased bundt pan and bake at 350F for 35 to 40 minutes, or until a toothpick inserted comes out clean.

Chocolate Glaze:
In a saucepan put 1 cup sugar, ¾ cups cocoa, 1 tablespoon butter, and ½ cup milk. Cook over medium heat until thickened. Remove from heat and immediately pour over cake.

Wednesday, May 17, 2006

Brownies

No posts this past couple of days, but it was for a good cause. We went to the beach for the weekend and that was a lot of fun! The weather was nice, it was sunny and Matheus had a good time between playing in the sand and swimming in the pool at the hotel. Definitely one of the best trips we had around here!
As I mentioned in a previous post, the play date we were having last week (the one I made the cookies for) was rescheduled, so we decided to make a different treat for the new date. This one was even easier to make and just as good as the cookies. After all, who doesn’t like brownies, huh?!

Well, we do! And although I prefer my brownies on the simple side (with a scoop of ice cream is nice too!), this one didn’t disappoint.
With a little addition to the top, Cheesecake Brownies bring some improvement to the brownie world. These were yummy, and being the cheesecake fan he is, the Husband loved this one!

Brownies were fudgy in the middle, just as I like, and the cheesecake topping really gave them an extra twist, something to definitely consider trying if you have not had it yet!

I actually developed my own topping recipe based on others I had seen, and to be practical (and use up the box that was sitting in the pantry for a while) I used a brownie mix, but you can use your favorite recipe, it will work just the same. The picture is not that pretty, since I had to cut it while it was still a little warm, but if you wait until completely cool you should be able to get nice clean cut squares out of them.

Hope you all like it, and come back for some savory recipes this week, I have been making too much sweets lately, haven’t I?!!

Ana

Cheesecake Brownies
1package brownie mix, or your favorite recipe
4 ounces cream cheese
½ egg (yes, I thought 1 egg would be too much…)
1 teaspoon vanilla extract
2 teaspoons flour
¼ cup sugar (more or less to taste)

Prepare the brownie mix accordingly to the package instructions. Pour the batter on a 8x8 square baking pan, reserving about ¼ cup of it, set aside. In a small bowl combine all the other ingredients until well mixed and smooth. Pour the cheesecake mixture over the brownie batter, dollop with the remaining ¼ cup of reserved brownie mix. Gently run a knife into the batter to make swirls. Bake at 350 F for about 30 minutes. Do not to over bake, so start to check it at 25 minutes to see if it is not ready yet. Let cool before slicing.
Notes: if your brownie recipe yields a 9x13 baking pan, then you should double the cheesecake batter, and reserve about ½ cup of the brownie batter to dollop on top and make the swirls.

Tuesday, May 16, 2006

And more cookies…

We were going to have a play date last week and since we were in a chocolate chip cookie mood we decided to make some more to share with the friends. This time though I choose a slightly different recipe, with peanut butter in the dough, as I had some in the fridge that needed to be used up.
Chocolate and Peanut Butter Cookies is basically your usual recipe for chocolate chip cookies with a couple tablespoons of peanut butter added to it. I actually upped the peanut butter, adding an extra tablespoon (as I said, needed to use up the peanut butter and I wasn’t going to leave one tablespoon in the fridge anyway…), I also added and extra tablespoon of butter to it, as some people that made the cookies commented on it being a little on the dry side.
Well, ours were not dry or crumbly at all; they were actually perfect, crispy bottom, crunchy edges and chewy middle, very delicious! There were not much peanut butter flavor to it, a very subtle taste, but it definitely added to the texture of the cookies, and since I used natural peanut butter there were those tiny little pieces of ground peanuts through out the cookies, which made them taste even better!
Matheus and the Husband really liked it, and I was very pleased with the results on this one (I am not a huge fan of chocolate chip cookies…), which has already been added to our list of favorites!
If you like chocolate chip cookies do give it a try, cause these are really good!
Oh, and by the way….the play date was rescheduled and we ended up eating all the cookies ourselves during the weekend, yum!
Ana

Chocolate and Peanut Butter Cookies
1 cup all-purpose flour
1/2 teaspoon baking powder
1/2 cup granulated sugar
1/2 cup packed brown sugar
1/4 cup butter, softened
2 tablespoons creamy peanut butter
1 1/2 teaspoons vanilla extract
1 large egg white
3/4 cup regular oats
1/2 cup raisins
1/2 cup semisweet chocolate chips
Cooking spray

Preheat oven to 350°.
Lightly spoon all-purpose flour into a dry measuring cup, and level with a knife. Combine flour and 1/2 teaspoon baking powder in a small bowl, stirring well with a whisk. Place the granulated sugar, brown sugar, butter, peanut butter, vanilla extract, and egg white in a large bowl; beat with a mixer at medium speed until well blended (about 2 minutes). Add flour mixture, 3/4 cup oats, 1/2 cup raisins, and 1/2 cup chocolate chips, stirring until ingredients are well combined. Cover and freeze cookie dough for 10 minutes.
Divide cookie dough into 30 equal portions, shaping each one into a ball. Place the dough balls 2 inches apart on baking sheets coated with cooking spray, and flatten dough balls with the bottom of a glass. Bake the dough balls at 350° for 15 minutes. Remove the cookies from pans, and cool completely on wire racks.
Yield: 30 cookies
Cooking Light, April 2004

Cookies

One week without postings… I miss porting in the blog, but last week I was just not in the mood for neither cooking nor eating much. I had such a bad episode of sinus and ear infections, that food literally lost it taste for a few days. I was so congested that I could not smell or taste well the food I made. And this does not help when you like to cook and is already feeling tired with all the viruses going on inside your body.
Oh well, a week of antibiotics later and I am feeling much better! Which is good, because we are going to spend the weekend at the beach and I definitely want to be feeling good then.
Not much cooking, but Matheus and I managed to make some cookies last week. It’s been a while since we did a weekly treat for the class, so he wanted to make cookies and take to school to share with his friends.
It seems that everybody’s favorite there is chocolate chip cookies, so that is what he chose.
Bev’s Chocolate Chip Cookies is my favorite recipe for this kind of cookies. I love oatmeal and chocolate, put the two together and it cannot end in something bad! This cookies are healthier the other versions, but just as good, we all love it at home, and it was also a big success at school! Matheus came home all happy telling me all his friends liked the cookies too!!
Enjoy!
Ana

Bev's Chocolate Chip Cookies
3/4 c rolled oats
1 c whole wheat flour
1/2 tsp baking soda
1/2 tsp salt
1/4 c butter -- softened
1/4 c canola oil
1/3 c sugar
1/3 c packed brown sugar
1 egg
1 tsp vanilla
1 c chocolate chips

Grind oats in a blender or food processor. Transfer to a bowl and stir in flour, soda, and salt. Beat butter in a large bowl until fluffy. Add sugars, oil, egg, and vanilla and beat until smooth. Add dry ingredients and beat until just combined. Stir in chips. Drop by heaping teaspoonfuls onto pan. Bake at 350 for 15 minutes or until cookies are firm around the edges and golden on top. makes 30 small cookies.
(Recipe from Eating Well Magazine)