Friday, September 30, 2005

Wednesday’s Loaf

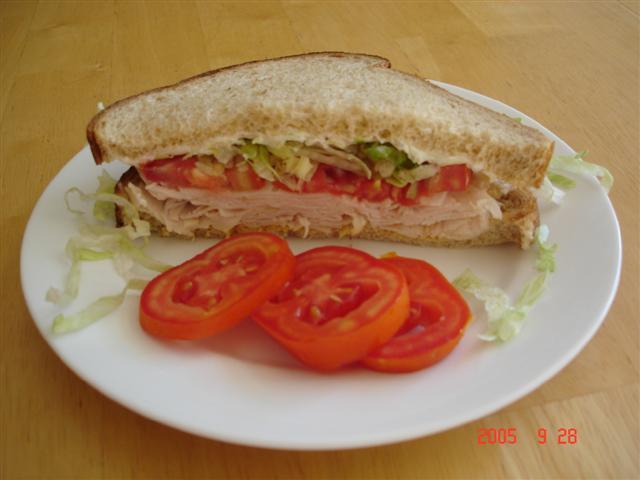
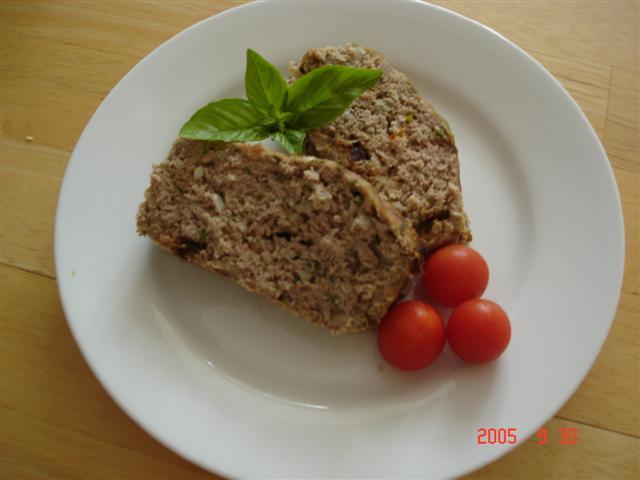
Today’s lunch reminded me of the wonderful time I had this past July when my mom and my sister were visiting us. I made a turkey loaf one Wednesday during the first week they were here; they liked it so much that we ended up having it every Wednesday of their vacation (four times to be more exact!). As per my sister request I always ended up adding ground turkey to my weekly grocery list, and we all enjoyed having our Wednesday menu filled with meat loaf!
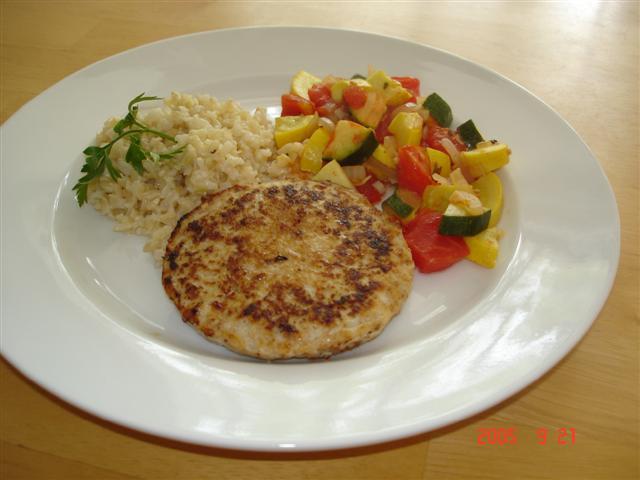
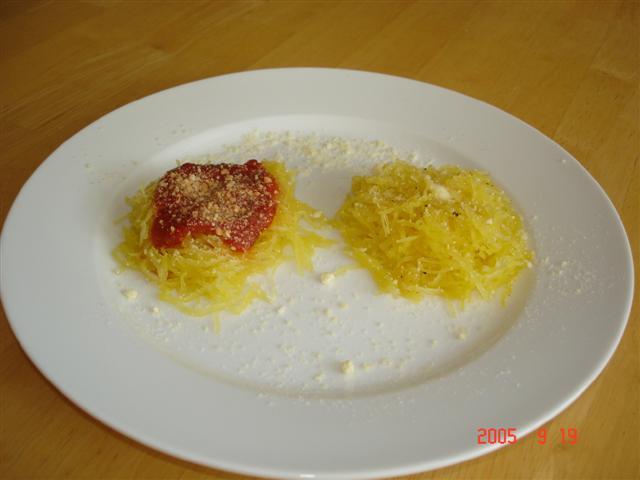
I know, it is Friday, but this recipe is so easy and so good that I decided to make Turkey Loaf today! We used to have it accompanied by brown rice and a salad made with yellow squash and tomatoes from our garden, but since our garden has given up its production and it is starting to get cold around here, today the loaf was paired with the usual brown rice and Herbed Zucchini Soup, from Eating Well – Aug/Sept 2005.
I usually make the loaf with ground turkey (white and dark meat) but you can use any kind of meat you like (beef, chicken, pork). My loaf recipe is based on a CL recipe called Sun-Dried Tomato Meat Loaf (March 2003), and I add sun-dried tomatoes only if I have them around (which is not always the case), so you can omit that if you wan. But definitely do not forget to add the Parmesan cheese, as I once did… the loaf was not the same without it.

This is a pretty basic loaf and can easily be jazzed up by adding grated carrots and/or zucchini, which I have done before (a good way to sneak in some veggies). Also, you can double the recipe and freeze a loaf for later.
You can make it as a loaf by using a pan, or by just shaping the mixture and baking in a baking sheet. Another alternative is making it as meatballs, as I have done numerous times. I bake the meatballs, then pop them into a zip bag and freeze for future use. When it is time to eat, just drop them into a saucepan with your favorite tomato sauce or soup and simmer it all together until the meatballs are heated through. This loaf is very versatile and tasty, besides it is always nice being able to make things ahead of time and having them ready when the hunger attacks!
The Zucchini Soup is even easier and super delicious! I tried it this summer and I think I have made it about ten times by now. It is creamy and cheesy, so good and so healthy!

I am posting both recipes for those who want to try. And if you like the ingredients then do give it a try, ‘cause these recipes are very easy to make and shock full of flavor!
Have to go now; we still have an afternoon play date and a goodbye potluck dinner to attend today. See you around!

Ana

My Wednesday Meatloaf
1/2 cup fresh bread crumbs
1/2 cup chopped onion
1/2 cup grated Parmesan cheese
1/4 cup fresh basil, chopped
1 tablespoon shopped sun-dried tomatoes
2 tablespoons chopped fresh parsley
2 garlic cloves, minced
1 pound ground meat (turkey, beef, or chicken)
1 egg

Preheat oven to 400F. Combine all ingredients in a bowl. Put the mixture into a loaf pan (8 x 4-inch), or shape into a loaf and place it on a baking sheet. Bake it for 50 minutes (or until a thermometer inserted reads 180). Serves 4.


Herbed Zucchini Soup
3 cups chicken broth
1-1/2 pounds zucchini (about 3 medium), cut into 1-inch pieces
1 tablespoon chopped fresh tarragon or dill or 1 teaspoon dried
3/4 cups shredded Cheddar Cheese (3 oz)
1/4 teaspoon salt
1/4 teaspoon freshly ground black pepper

Place broth, zucchini and tarragon (or dill) in a medium saucepan; bring to a boil over high heat. Reduce to a simmer and cook, uncovered, until the zucchini is tender, 7-10 minutes. Puree in a blender, in batches if necessary, until smooth. Return the soup to the pan and heat over medium-high heat, slowly stirring in cheese until it is incorporated. Remove from heat and season with salt and pepper. Serve hot or chilled.
Serves 4. Eating Well – Aug/Sept 2005.

My notes: For the herbs I used fresh basil and oregano that I had in the garden and the soup came out delicious! I added some chopped onions and a clove of garlic to the broth, and substituted the cheddar cheese with 3 of those laughing cow Swiss cheese triangles, which made the soup velvety smooth! (For the Brazilians: I used 3 “polenguinhos”)

Thursday, September 29, 2005

C is for…

Carrots! And oh my, have I grated some carrots yesterday… Today was Matheus’ show and tell at school and the letter of the week is C, so we decided to make some carrot cookies to share with his friends.
However, even with the best of intentions our cookies did not came as expected. The first batch was a little too cakey and crumbly at the same time (is there such thing possible?!). Plus, in a tentative to get them a tad crispier I ended up burning the second batch… oh well, definitely not a “cookie day” here. So I lost half of it and, besides not being enough, the other half was breaking apart so easily that there was no way they would get intact to school.
I have no idea why that happened since I followed the recipe exactly as written, baking at the right temperature and all. All that said, they tasted great and the non-burnt ones were quickly devoured. I even took a picture of the three that were left this morning, and am going to post the link for the recipe in case anyone wants to give it a try.
Cookies aside, I got one of my “handy-dandy-never-fail” recipes and we baked “Carrot Cupcakes” for our letter C day! Technically they are muffins, but Matheus wanted cupcakes as it also starts with C… so they were called cupcakes today!
This is another of our favorite muffin recipes here, referred by the husband as “the tasty ones”. This together with the oatmeal and the banana-bran (both previously posted here) are the muffin staples at our house!
They are moist and healthy muffins, filled with carrots, apples, and raisins. The cinnamon in them infuses the whole house with such a nice aroma while baking, and whole-wheat flour makes them hearty and good for you! The ingredient list may look big, but they are very easy and simple to make, and I bet you may have most of the ingredients in your pantry already.
It is actually an Eating Well recipe from Sept/Oct 94, called Morning Glory Muffins, which I adapted to suit our taste. I am posting the original recipe bellow, and the way I always make ours is: using 1 cup all-purpose and 1 cup whole-wheat flour, ¾ cup sugar, ½ cup raisins, 2 whole eggs, ½ cup apple sauce (instead of apple butter). The topping I add if I have the ingredients at home. The recipe says it makes 18, but since we like nice and plump muffins I fill my muffin tins to the top and usually get 14 at the most. (Today I made them in mini muffins and got 36)
These muffins freeze well, so go ahead and make the whole batch ‘cause I think you are going to like them!

Ana

Morning Glory Muffins
1 1/2 cups all-purpose flour
1/2 cup whole wheat flour
1 1/4 cups sugar (I use 1/2 cup sugar, add more to your taste)
1 tablespoon ground cinnamon
1 teaspoon baking powder
1 teaspoon baking soda
1/2 teaspoon salt
2 cups grated carrots
1 medium apple -- peeled & shredded
1 cup raisins
1 large egg
2 large egg whites
1/2 cup apple butter (I always use applesauce!)
1/4 cup canola oil
1 tablespoon vanilla extract
Topping:
2 tablespoons finely chopped walnuts or pecans
2 tablespoons toasted wheat germ

Preheat oven to 375ºF. Spray 18 muffin cups with nonstick cooking spray.
In a large bowl, combine flours, sugar, cinnamon, baking powder, baking soda, and salt. Stir in carrots, apple and raisins. In a medium bowl, whisk together egg, egg whites, apple butter, oil and vanilla. Add to dry ingredients and stir just until moistened (don't over mix).
Spoon the batter into prepared muffin cups, filling them about 3/4 full. In a small bowl, combine nuts and wheat germ; sprinkle mixture over muffin tops.
Bake for 15 to 20 minutes, or until the tops are golden and spring back when lightly pressed.
Eating Well Magazine Sept/Oct 94

Here are the cookies and the link for the recipe. (My cookies came out soft/crumbly, and I know they are supposed to be “cake cookies”, but the ones in the website picture look a little crispy, don’t they?)
http://www.marthastewart.com/page.jhtml?type=content&id=recipe1209&contentGroup=MSL&site=living

Wednesday, September 28, 2005

Say Cheese... and Turkey!

Today I did something I had not done since I got pregnant (4 years ago): Ice Skating! A friend is taking ice skate classes and has to do one hour/week of training, so yesterday she called and asked if I wanted to go with her today, and of course I said yes! I love roller-skating, ice-skating, and any variation of the sport!

As I mentioned before, it has been a few years since I last put on my roller skates. However I think I did great today in the ice, and definitely had a lot of fun! Needless to say I almost turned into a Popsicle inside the rink, even wearing pants, sweatshirt, and gloves… I almost froze! I spent 45 minutes skating and when I left I could barely fell my toes, ears and fingertips, but it was completely worth it! I was purplish but happy!

Now I can’t wait for Matheus to learn some basics so we can go skating together! (But first lets buy some warmer socks and gloves, please!)

Having fun at the Ice House left me no time to cook something for lunch, so we had our favorite “quick meal”: Turkey and Cheese Sandwiches! It is my favorite sandwich and makes frequent appearances on our menu! (and thankfully Matheus likes it too
)
And who said a sandwich can’t be healthy? Whole grain bread, mustard, smoked turkey breast, Swiss cheese, tomatoes and lettuce (normally I use a mix of lettuces and spinach leaves, but did not have it in the house today), baby carrots and ranch for dipping rounded out the meal, and me and Matheus were more than happy with our lunch today! Healthy, delicious, and good for you!

No recipes today but come back tomorrow, ‘cause some baking is on the way!


Ana


And look what I found in the closet!
Oh Yes, I am back into action!
(Do I need to say how excited I got with the ice skating today?!)

Monday, September 26, 2005

I told you I like muffins…

The oatmeal muffins are gone, so today I made Banana Bran Muffins! This is hands down our favorite banana muffin recipe, and it comes from Eating Well magazine. They are just out of the oven, cooling in the wire rack, and the house smells so good... can't wait for breakfast tomorrow!
These are healthy muffins, not overly sweet, yet “bananaey” enough to satisfy an occasionally fruit craving!
The recipe calls for chocolate chips but I always omit it, as hubby says he does not like chocolate for breakfast (but drinks a huge cup of milk with nesquik with his muffins every single morning… go figure!). I have added raisins once and it makes a good combination with the bananas. Today I was out of walnuts and omitted that as well, but they do add a nice crunch to the top, so if you want to try the recipe and have walnuts hanging around, by all means add it!
Had a busy day today and did not cook much. Lunch was turkey burgers with acorn squash, nice and simple. The squash was delicious and I can’t believe I forgot to take a picture… oh well, no “problema” because we are definitely going to have more squash sometime soon!
That is it for today, I got my October Cooking Light in the mailbox today and there is a nice yummy looking soup in the cover, now if you excuse me I have some reading to do!

Ana

Banana-Bran Muffins
2 large eggs
2/3 cup packed light brown sugar
1 cup mashed ripe bananas (2 medium)
1 cup buttermilk
1 cup unprocessed wheat bran
1/4 cup canola oil
1 teaspoon vanilla extract
1 cup whole-wheat flour
3/4 cup all-purpose flour
1 1/2 teaspoons baking powder
1/2 teaspoon baking soda
1/4 teaspoon salt
1/2 teaspoon ground cinnamon
1/2 cup chocolate chips (optional)
1/3 cup chopped walnuts (optional)

Preheat oven to 400°F. Coat 12 muffin cups with cooking spray.
Whisk eggs and brown sugar in a medium bowl until smooth. Whisk in bananas, buttermilk, bran, oil and vanilla.
Whisk whole-wheat flour, all-purpose flour, baking powder, baking soda, salt and cinnamon in a large bowl. Add the wet ingredients and stir with a rubber spatula just until the dry ingredients are moistened. Stir in chocolate chips, if using. Scoop the batter into the prepared muffin cups (they'll be quite full). Sprinkle with walnuts, if using.
Bake the muffins until the tops are golden brown and spring back when touched lightly, 15 to 25 minutes. Loosen edges and turn muffins out onto a wire rack to cool slightly before serving. Makes 1 dozen muffins.

Source: Eating Well Magazine – Winter 2004

Sunday, September 25, 2005

Flowers...

We had a nice and quiet weekend. To me actually was a little too quiet. I wish I could visit my family on the weekends…
Oh well, at least I got a flower today! Yes, the little pink speck in my hand is the tiniest flower, but meant the world to me. Matheus was working in the yard with daddy this morning when he called me in the garage door: “Mommy, come here, I have something for you”, and then he handed me the flower. So little, but he was so happy when I said I loved it “Really mommy, are you going to keep it inside the house? I love you mommy!”
Yesterday YMCA had parents night out again, and (believe me) Matheus asked to go! Oh well, how could we waste such opportunity to go out?! And so we did; we went to the movies and watched "Just Like Heaven”, very cute and sweet movie, I liked it a lot! Hubby and I had a nice date, plus Matheus had a great time and really enjoyed the “super hero” theme of the YMCA night.
Today we had Taco Salad for lunch! I recreated the chicken taco salad from our favorite Mexican restaurant. No recipe actually, just made it by using the ingredients I believe they use at the restaurant, and served it in a baked “tortilla shell” with shredded lettuce, tomatoes, and monterey jack cheese. Rice and black beans completed the meal. It all came out very tasty and we enjoyed our lunch a lot!
That is it for today, not much I know, but do come back ‘cause I am planning on doing some more baking during the week!

Ana

Chicken taco salad my way: onions and garlic sautéed in olive oil, shredded chicken breasts (poached or roasted), tomato paste and some chicken broth (to create a sauce), parsley (Mexicans use cilantro, but I don’t actually like its flavor), a little bit of flour to thicken the sauce, a little sour cream to make it creamy and delicious! You can definitely add some Mexican spices and make it even more flavorful.

Friday, September 23, 2005

Meet the "Muffin Girl"

Today is one of those slow days… at a regular check up appointment I found out last week that I now have hypothyroidism, and two days ago started taking the medication.
I know that my body is still adjusting in order to properly function, but all this hormone action is kind of getting me down.
So, no special cooking today… it was “leftovers day” for lunch, and I have no idea what I am going to make for dinner.
Although not much cooking is going on, I woke up early this morning and baked some muffins for breakfast!
I am posting today one of our favorite and easiest muffin recipes. I call them “Oatmeal Muffins”, as that is simply what they are.
I copied the base for this recipe in one of my first visits to the local library, when I first moved to the US, however it was a while ago and I have no idea which book it came from.
I am a declared “Muffin Girl”, I really, truly adore muffins! I bake muffins every week, and my muffin pan is for sure the most used bakeware in my kitchen.
And by muffins I mean homemade muffins, not the commercial stuff loaded with sugar, white flour, and all those fake flavorings. I like the tender muffins we make at home, full of real flavors, with oatmeal and fruits, whole-wheat flour and cinnamon, the ones that invades the whole house with the sweetest and most wonderful aroma while baking. Muffins are delicious, can be very nutritious, and are warming and comfortingly good for you!
And I guess I have passed my passion to both my boys at home. You can bet that at least one muffin is eaten at our house everyday!
Give this recipe a try, it is super easy and will not disappoint, I promise!

Ana

Matheus took a picture of his breakfast today! (quite nice pic, huh?!)


Oatmeal Muffins
2 cups oatmeal
2 cups flour (I use 1 cup all-purpose and 1 cup whole wheat)
1/2 cup sugar (I like brown sugar)
1 tablespoon baking powder
½ teaspoon salt
2 teaspoons cinnamon
2 eggs (or 4 egg whites)
1 cup milk
4 tablespoons oil
1 teaspoon vanilla
½ cup raisins

Preheat oven to 400F. Mix flour, oats, sugar, baking powder, salt, cinnamon, and raisins. In another bowl mix milk, egg whites, oil, and vanilla. Make a well in center of dry ingredients, add milk mixture, and stir just until combined.
Pour batter into 12 muffin cups greased with cooking spray (or oil). Bake 15 to 20 minutes, or until tops are golden brown.

Notes: the raisins are optional and can be omitted. I have made this recipe in numerous different ways by substituting the raisins with chocolate chips, fresh blueberries, one grated apple, dried cranberries, and chopped dried apples. As with most muffins these freeze extremely well. As soon as they cooled a bit I pop the leftovers into a zip bag and into the freezer they go. And then, every morning we just microwave them for 30 seconds to have warm homemade muffins for breakfast!

Thursday, September 22, 2005

B is for…

Matheus is learning about the letter B at preschool this week, and since today was his turn at “show and tell” we decided to bake some Banana Bread for him to share with his friends, along with the item he picked to show everybody: his beloved Mr. Bear!
He was so happy this morning and entered the class very proud and running to tell his teachers about the treat he had brought!
Last week was letter A and we baked apple muffins, he liked the idea so much that for now on you can all expect to see some baked goods around here every Thursday (Planning on carrot cupcakes for next week, ideas, ideas, ideas…!).
Lunch was so nice today, especially because I did not have to cook! Hubby asked if we wanted to go out for lunch with him today and we more than quickly accepted the offer. It is always nice to go out, and Matheus loves to go pick up daddy at work so we can all eat together!
We went to a Greek deli (as I was craving some Greek food – hummus, tzatziki, baba ghanoush, yum!), nothing fancy but the food was very good!
And speaking of the husband, on Mondays he usually goes to a pizza place with his friends during lunch break, and when he comes home late afternoon he always mentions having at least a slice of one of his favorite pizza. Well, today I decided to recreate the much-loved Italian pie and, based on what he once told me the ingredients were, I made White Pizza for dinner!
The catch on this one is that there is no red sauce, and here is how I made it: I mixed some ricotta and grated Parmesan cheeses and spread that on the crust, sprinkled some salt, pepper and garlic powder, covered the whole thing with grated mozzarella cheese and, to top it all, added a few diced tomatoes and chopped fresh basil. It actually came out nice and the Husband said it was pretty close to the one he likes at the pizza place (and obviously I was proud of myself!). Only the crust, which was store bought, was not of our liking and is not going to be a repeater for us. However, the pizza is definitely going to show up again (with homemade pizza crust, I might add), as I like ricotta a lot and this combination was very tasty!

Ana

White Pizza


This Banana Bread is of my favorites Cooking Light recipes, super easy and very tasty; I have made it numerous times as loaf as well as muffins (just reduce the baking time), and bet you all are going to like this one!

Mr. Bear coul not resist and had a muffin for breakfast today!


Mom's Banana Bread
1 cup sugar
1/4 cup light butter, softened
1 2/3 cups mashed ripe banana (about 3 bananas)
1/4 cup skim milk
1/4 cup low-fat sour cream (or plain yogurt)
2 large egg whites (or 1 whole egg)
2 cups all-purpose flour
1 teaspoon baking soda
1/2 teaspoon salt
Cooking spray

Preheat oven to 350°.
Combine sugar and butter in a bowl; beat at medium speed of a mixer until well blended. Add banana, milk, sour cream, and egg whites; beat well, and set aside. Combine flour, baking soda, and salt; stir well. Add dry ingredients to creamed mixture, beating until blended. Spoon batter into a 9x5-inch loaf pan coated with cooking spray; bake at 350º for 1 hour and 10 minutes or until a wooden pick inserted in center comes out clean. Let cool in pan 10 minutes on a wire rack; remove from pan. Let cool completely on wire rack. Yield: 1 loaf.
Cooking Light, November 1996.

My notes: I always make it using one whole egg (I don’t see the point why waste 2 yolks, and do not believe one egg is going to add much fat to a whole loaf). Today I made it into mini-muffins, it yielded 36, and they were ready in 18 minutes.

Wednesday, September 21, 2005

Today I was not very inspired to cook so lunch was pretty simple: some veggies, brown rice (jazzed up with some butter and grated cheese to make a kind of risotto thing – my favorite way to eat rice), and some chicken burgers I had previously made and frozen.
I copied the burger’s recipe from a book called Cooking Thin (by Kathleen Daelemans) that I once got from the library. These chicken burgers are moist and super easy to make. It is something I try to always have them in the freezer in case we need some quick and tasty meal.
For the vegetables I just sautéed some onions, garlic, tomatoes, a small yellow squash, and half zucchini in a skillet with some olive oil and seasonings until everything was cooked and flavors melded together. The rice… well, I cook a batch of brown rice every Monday and keep it in the fridge for our lunches throughout the week.
Although I was not inspired to cook, I was definitely in the mood to bake, so I baked a cake in the afternoon. I am in a “nutella kick” this week, and decided to try a recipe that has been on my “to try” list since last year, Sour Cream-Hazelnut Bundt Cake, another Cooking Light recipe (be prepared to see lots of CL recipes around here, I am a subscriber and love that magazine!). I chose this recipe to help me use up some of the nutella jar I bought the other day, before I eat it all by the spoonful, which is what I have been doing…
Other than omitting the hazelnuts (did not have any), I pretty much followed the recipe as written. Oh, and I used low-fat sour cream, as I don’t find the fat-free stuff as good.
The cake came out very moist and tender, and the nutella swirl was more than good, definitely the best part of the cake!
I believe the sour cream is what makes this cake so moist, giving it a pleasantly distinctive flavor, making it not very sweet and leaving a little of its tanginess in the background. Also, the nutella has such a yummy hazelnut taste that I did not miss the actual nuts at all; I guess they are there just to add an extra crunch. And for those like me who also like to lick the spoon (bowl, beaters, spatulas…), the cake batter tastes super good!
All in all, a nice great cake that will probably be repeated over here. I think that this cake can be used as a base for all sort of add ins, the nutella/nuts can easily be omitted and substituted for other things you may enjoy, like chocolate chips folded in the batter, or those different kind of chips (cappuccino chips, toffee bits, etc), maybe even caramel could be swirled to the batter turning it into a totally different cake.
I will leave here the ideas and recipe in case any of you would like to try, and hope you enjoy it as much as we did. Just don’t forget to come back and give me your feedback!

Ana

Our Lunch today


Chicken Burgers
Cooking Thin, by Kathleen Daelemans

1 pound ground white meat chicken
2 cups fresh breadcrumbs
½ cup low-fat milk
3 tablespoons grated onions
¼ teaspoon cayenne pepper
½ teaspoon salt
black pepper to taste
1 tablespoon olive oi

Mix chicken, ½ cup of breadcrumbs, milk, onion, cayenne pepper, salt and pepper. Divide chicken mixture into 4 or 5 piles and, using your hands, form them into patties. Coat each patty with the remaining breadcrumbs.
Heat oil in skillet over medium heat and fry patties until golden and cooked through, about 5 minutes per side.
My notes: the meat mixture is very sticky, sometimes I add a little more breadcrumbs if it seem too wet. The onions make these very tasty and moist burgers. And I always omit the cayenne pepper, as we are not big fans of very spicy food.

Do I have to tell you I love nutella...?!


Sour Cream-Hazelnut Bundt Cake
The moist cake is enhanced by the hidden surprise of crunchy hazelnuts and chocolate-hazelnut spread. Bake the cake up to two days ahead of the brunch, and store at room temperature. Or bake it up to a month ahead, and freeze; thaw at room temperature.

Cooking spray
1 tablespoon dry breadcrumbs
1 1/2 cups granulated sugar
1/2 cup butter, softened
2 large eggs
1 teaspoon vanilla extract
1 (16-ounce) carton fat-free sour cream
2 1/2 cups all-purpose flour
1 teaspoon baking powder
1/2 teaspoon baking soda
1/4 teaspoon salt
1/4 cup chopped hazelnuts, toasted
2 tablespoons chocolate-hazelnut spread (such as Nutella)
1 teaspoon powdered sugar

Preheat oven to 350°. Coat a 12-cup Bundt pan with cooking spray; dust with breadcrumbs.
Place granulated sugar and butter in a large bowl; beat with a mixer at medium speed until well blended (about 2 minutes). Add eggs, 1 at a time, beating well after each addition. Add vanilla and sour cream; beat until well blended. Lightly spoon flour into dry measuring cups, and level with a knife. Combine flour, baking powder, baking soda, and salt in a medium bowl, stirring with a whisk until well combined. Add flour mixture to sugar mixture, stirring just until combined. Spoon half of batter into prepared Bundt pan; sprinkle evenly with hazelnuts. Drop small spoonfuls of chocolate spread over nuts. Spoon remaining batter over chocolate spread; swirl batter using the tip of a knife. Bake at 350° for 55 minutes or until a wooden pick inserted in center comes out clean. Cool in pan on a wire rack for 15 minutes; remove cake from pan. Cool completely on a wire rack. Sprinkle cake with powdered sugar.
Yield: 14 servings
Cooking Light, November 2004

Tuesday, September 20, 2005

And here is the recipe for the rolls. They are so good that I could not talk about it and not share the recipe here! Nothing beat this rolls warm, out of the oven, with some butter on top... yum!

Ana


Cloverleaf Honey-Wheat Rolls
Bake these rolls up to a day ahead; store at room temperature in a zip-top plastic bag, or freeze them for later. Wrap the rolls in foil and reheat at 350º for 10 minutes or until warm.

1 package dry yeast (about 2 1/4 teaspoons)
1 cup warm water (100° to 110°)
2 cups bread flour, divided
1 cup whole wheat flour
3 tablespoons honey
2 1/2 tablespoons butter, melted
1 teaspoon salt
Cooking spray
1 tablespoon water
1 large egg

Dissolve yeast in 1 cup warm water in a large bowl; let stand 5 minutes. Lightly spoon flours into dry measuring cups; level with a knife. Add 1 1/2 cups bread flour, whole wheat flour, honey, butter, and salt to yeast mixture; stir until well blended. Add 1/4 cup bread flour; stir until a soft dough forms.
Turn dough out onto a floured surface. Knead until smooth and elastic (about 8 minutes); add enough of remaining bread flour, 1 tablespoon at a time, to prevent dough from sticking to hands (dough will feel tacky).
Place dough in a large bowl coated with cooking spray, turning to coat top. Cover and let rise in a warm place (85°), free from drafts, 1 hour or until doubled in size. (Press two fingers into dough. If indentation remains, the dough has risen enough.) Punch dough down; cover and let rest 5 minutes.
Preheat oven to 425°.
Coat 12 muffin cups with cooking spray. Divide dough into 12 equal portions. Working with 1 portion at a time, divide each portion into 3 pieces; shape each piece into a ball (cover remaining dough to prevent it from drying). Place 3 balls in each muffin cup. Cover and let rise 25 minutes or until doubled in size.
Uncover dough. Combine 1 tablespoon water and egg; brush over rolls. Bake at 425° for 12 minutes or until lightly browned. Serve warm.
Yield: 1 dozen.

Cooking Light, September 2002

Yes, we really like soup!

Yesterday I saw such a nice looking bunch of escarole at the grocery store that I was more than tempted to buy it. Needless to say it ended up being part of our lunch today!
As times goes by and I post more you will see how much I like my vegetables and fruits! I like all kinds of veggies and greens, and am still to meet a fruit I don’t like. Seriously, I love all fruits!
Escarole can be bitter, but if you cook it enough all the bitterness seem to “evaporate” leaving behind a nice flavor and bite to the greens.
Today I made Escarole and White Bean soup. So healthy and so good! I like beans, especially the white ones, they are buttery and tender, and such a good compliment to soups and stews. I am going to post the recipe I based my soup on, it is from Bon Appetite, and other than not adding tomatoes to my soup I basically followed the recipe (although I chopped my garlic and left in the soup… Yes, garlic lover here!).
I made half of the recipe for me and Matheus, and believe it or not, there were no leftovers…!
We had our soup with some rolls I made and froze last week. The rolls are a Cooking Light recipe and called Cloverleaf Honey-Wheat Rolls, they are so easy to make and freeze beautifully. I have made it many times and they always come out great!
Simple, light and delicious… no wonder I love soup so much!
(oh, and the escarole in the picture is half of the bunch I bought... so escarole will probably show up again in the menu later this week!)

Ana


White Bean and Escarole Soup with Garlic
1 tablespoons olive oil
1 cup chopped onion
1 large carrot, cut into small dice
5 large garlic cloves, peeled, flattened
3 cups (packed) 1-inch pieces escarole (about 1/2 large head)
4 cups (or more) canned vegetable broth
3 1/4 cups cooked Great Northern beans or two 15-ounce cans cannellini (white
kidney beans), rinsed, drained
1 14 1/2- to 16-ounce can diced tomatoes, drained
2 tablespoons freshly grated Parmesan cheese

Heat oil in heavy large Dutch over medium-low heat. Add onion, carrot and garlic and sauté until onion is golden and tender, about 7 minutes. Discard garlic. Add escarole; stir 3 minutes. Add 4 cups broth, beans and tomatoes and bring to boil. Reduce heat to medium-low. Cover and simmer until escarole is tender and flavors blend, about 20 minutes. Thin with more broth, if desired. Season soup to taste with salt and pepper. (Can be prepared 1 day ahead. Cover and refrigerate. Bring to simmer before continuing.) Ladle soup into bowls. Sprinkle with Parmesan cheese and serve.
Serves 4
Bon Appétit - March 1996

Monday, September 19, 2005

Spaghetti Squash 2 ways

Although my favorite season is almost over, the sight of pumpkins at the grocery store makes me smile!
For me summer brings the best fruits and vegetables, but I am also fond of the squashes and apples that come with fall.
Today I made one of my favorites: Spaghetti Squash! I discovered this vegetable not long ago, having not knowing about it when I lived in Brazil. Some people have seen and eaten this over there, but the first time I saw it was here in the US.
I think this is an interesting vegetable, as once cooked, it really does resemble spaghetti. And it is so simple to make: just cut it in half and remove the seeds, put it cut side down on a Pyrex dish with some water or broth (if using water you can add some salt and pepper to flavor it). Cover with plastic wrap and microwave for about 20 minutes. It comes out perfectly done, steamy and delicious, just scrape it with a fork out of its shell and there it is, ready for some butter and the seasoning of your choice.
Speaking of seasoning, that is what the title today is about: 2 different ways to eat your squash. Just with the sound of “spaghetti” Matheus declared: “yummy, I want mine with tomato sauce and cheese”. He did not even let me get to the squash part of the dish… Anyways, that’s how he got his, and for me butter, some salt and pepper were more than enough; this way I could taste the wonderful squashy flavor! But if you know me a little better you will figure out that I obviously added some grated cheese on top of mine too! (Matheus and I are the kings of “cheese on top”!)
Give it a try, it is easy to make and so versatile, you can add whatever seasoning and sauce you like: butter, some herbs, tomato sauce, even white sauce is good. Plus it is delicious and full of vitamins, healthy and good for you!
Everything else is going well today! Need to go grocery shopping this afternoon as we are running out of milk. I added a few extra ingredients to the list and am planning on making a cake during the week, lets see how it goes.

Ana


Here is how it looks, and then after I cut into it.


Sunday, September 18, 2005


6 years… 2190 days…
Together, loving and sharing everything…
Happy Anniversary Fran!
Te Amo Demais!
Ana

Saturday, September 17, 2005

Apple Disaster... (not so bad though!)

Today the day ran pretty smooth; Matheus is already feeling better and jumping around! It is amazing how fast kids recover and the energy they have, even when not at their 100%.
Tomorrow is our wedding anniversary and since the YMCA is having "Parents Night Out" today, and Matheus loves playing over there, we decided to go ahead and celebrate tonight (no need to find an available baby sitter!), so tonight we are going out for dinner! Yay!
Lunch was no different than what we use to have on the weekends when it is warm outside: grilled meat, rice and salad! I normally make some sort of tomato salad with all the tomatoes we get from our garden, but (unfortunately) summer is almost over and so is our tomatoes production… So I made a salad with a variety of vegetables today. Nothing special, but it was so colorful! (And good!)
I was going to make an Apple Galette for us to have tomorrow, but my pastry dough did not came right so I had to improvise and ended up making an Apple Crisp instead. (I mixed the filling and the dough didn’t work when I went to assemble the tart, hence the need to use the filling on something else).
The crisp looks nice and tomorrow we will find out how good it taste.
Now, off we go to a romantic night!

Our lunch salad!
Apple Crisp
Filling: I tossed together 4 peeled/sliced apples with 2 heaping tablespoons brown sugar, 2 tablespoons all-purpose flour and some lemon juice (just so that the apples don’t get brown).
Crisp topping: 1/3 cup flour, 1/3 cup oatmeal, 4 tablespoons butter, 2 tablespoons brown sugar, cinnamon to taste (did not measure), mix it all together with the tip of your fingers until it resembles coarse meal.
Put apples in a glass dish, cover with topping, baked at 375F for 35 minutes (or until golden brown, bubbly, and delicious!)

Enjoy!
Ana

Friday, September 16, 2005

As promised, I am back with the cookies!

This recipe is from Cooking Light magazine, and is called Chocolate Malted Cookies. They are chocolate chip cookies with a few different twists: malted milk powder and some chocolate syrup goes into the batter. At once I thought I had everything around to make them, but forgot about the chocolate syrup… well, what is cooking other than being creative? I did not have the syrup itself, but had some nutella (hazelnut spread) so I added milk to a few tablespoons of nutella to a syrup consistency and voila! I got the best chocolate syrup I have ever tasted! (Who doesn’t like nutella, huh?!) I know it is not real chocolate syrup, but it worked very well in this recipe. The batter was nice and smooth, and the cookies hold their shape while baking. Not to mention the wonderful smell all over the house!
Chocolate chip cookies are not my favorite (They are my sister’s favorite though! I preffer the ones that have oatmeal in the batter), and maybe the nutella made them extra special, or maybe it was the tasty malt flavor, but these were very good cookies indeed!
I am posting the recipe for those who want to give it a try. And other than using the “nutella syrup” I followed the recipe as written.
Ana Claudia, these are for you!
Enjoy!
Ana

Baking Cookies

"Nutella Syrup" anyone?!

Chocolate Malted Cookies
1 cup packed brown sugar
6 tablespoons malted milk powder (such as Carnation)
5 tablespoons butter, softened
3 tablespoons chocolate syrup
1 tablespoon vanilla extract
1 large egg
2 cups all-purpose flour
1 teaspoon baking soda
1/2 teaspoon salt
1/2 cup milk chocolate chips
1/3 cup semisweet chocolate minichips

Preheat oven to 350°. Combine first 6 ingredients in a large bowl; beat with a mixer at medium speed for 2 minutes or until light and fluffy. Lightly spoon flour into dry measuring cups; level with a knife. Combine flour, baking soda, and salt in a medium bowl; stir with a whisk. Gradually add flour mixture to sugar mixture, beating at low speed until well blended. Stir in the milk chocolate chips and semisweet chocolate minichips. Drop dough by heaping teaspoonfuls 2 inches apart onto baking sheets. Bake at 350° for 10 minutes. Cool on pans 2 minutes or until firm. Remove cookies from pans; cool on wire racks.

Yield: 2 1/2 dozen cookies
Cooking Light, May 2005


Chicken Soup

Matheus was running a fever yesterday night. An early morning trip to the pediatrician revealed the beginning of an ear infection. He wasn't feeling well and said he wanted soup for lunch, so there I was in the kitchen gathering some veggies while he watched his new favorite movie, Toy Story!
No recipes today, I just got some vegetables I had in the house, some chicken, chickpeas (which we both love), all went to the pot with some chicken broth and there was our soup. Chicken and vegetable soup with ABC pasta!
A very simple soup, but I have to say it was so good and comforting that it even made me fell better! So good that I decided to post a picture!
And talking about pictures, I made some cookies yesterday and will try to post later some pictures and recipe.
Ana

Thursday, September 15, 2005


My Kitchen!
What a better way to start my blog than by showing my favorite place on the house: the kitchen! It is here that I adventure myself in the art of cooking, by trying and testing, with sometime failures and sometimes success.
It is my Kitchen Space, where we share our meals and talk about everything. It is bright and opened so I can see everything, specially my son playing around!
This is my first post and I am still learning the tricks of the "blogging world", so excuse myself if something does not comes out right.
I hope you will come back soon and have fun with me in my kitchen space!

Posted by Picasa