Monday, November 28, 2005

Cute truck pan…

I found this mini cake pan at a kitchen store with Matheus last week when we were walking at the mall. We both saw it at the same time and grabbed it at once; so cute we could not resist buying! (And it was only $2,50 for two pans!).
They are so cute that I had to share here with you! Matheus loved the idea of making “truck cakes” and we have tested the pan twice already this past weekend. We made oatmeal muffins in it one day and yesterday we decided to make one of my favorite and easiest cakes, Yogurt Cake! Just dump everything in the blender, mix it up and that is it, and you can use the yogurt container to measure the rest of the ingredients - one less thing to clean up! I have made this cake a zillion times and it always come out great, so simple and so good!
Normally I bake it in a bundt pan, but yesterday we baked some in the mini truck pans and the rest of the batter in muffin tins. I have even added fruits to the batter (strawberries, blueberries), and also chocolate chips. You can add pretty much whatever you like, but I like it best when it is plain. It is a very moist cake, tender and delicious. Matheus likes to add chocolate sprinkles to the batter, making what we call in Brazil an “Anthill Cake”!
Try it and I am pretty sure you are going to like it too. It is a very good cake!

Ana

Yogurt Cake
1 cup plain yogurt (one 8oz container - use the yogurt container to measure up the rest of the ingredients)
½ cup oil
1 cup sugar
2 cups all-purpose flour
4 eggs
1 tablespoon baking powder

Put all ingredients in the blender and blend until well mixed. Pour batter in a greased and floured bundt pan. Bake at 350F for about 40 minutes, or until golden on top and toothpick inserted comes out clean.

Notes: the original recipe asks for 2 cups sugar but I find it WAY too much, I have always made it with one cup and it is plenty sweet for us, but yoy can add more sugar to suit your tastes. Also, I have made it using 3 eggs and the cake came out good.

Sunday, November 27, 2005

Lots of Cheesecake...

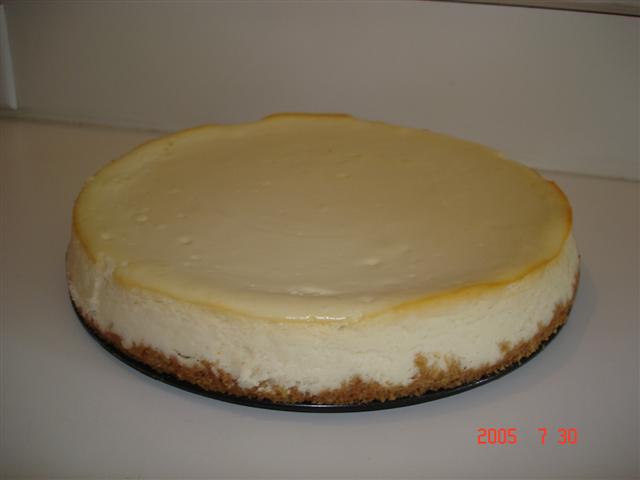
My husband’s favorite dessert is cheesecake, so I make it kind of frequently. There are so many variations for cheesecake but his favorite of all is the plain cheesecake, no sauces, no add ins, no nothing… just plain, he loves it! This weekend he asked me to make a cheesecake for him once more, so I am posting the recipe here for those of you who may like a good cheesecake too!
I have 2 recipes that I make frequently, and as with most cheesecake recipes they are both super easy to make. One of them has the basic ingredients and is very good, the other one has sour cream added to the batter and is delicious, truly the best cheesecake I have ever tasted! The best recipe is called The Ultimate Cheesecake and comes from chef Tyler Florence.
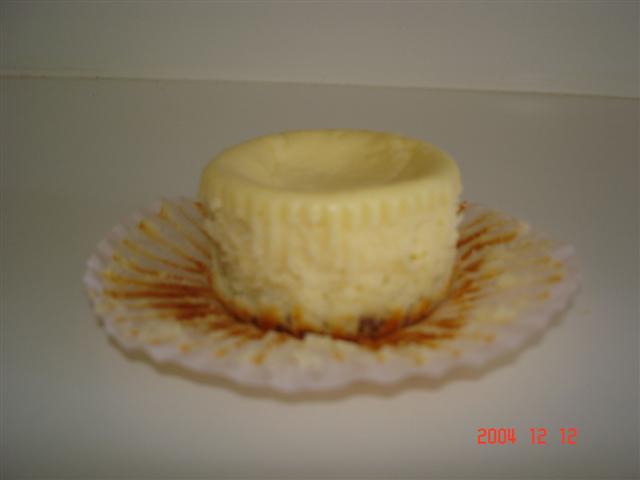
The other one… well… it comes from the cream cheese package, but is also very good! I like to make it and bake in muffin tins, so that we can freeze the leftovers and have “cheesecake muffins” for dessert during the week. The big cheesecake also freezes well, just slice it and wrap each individual slice in plastic wrap, put them into a plastic bag (or plastic container) and pop in the freezer. When ready to eat just let them out for about one hour to defrost.
Also, one of the recipes calls for baking in a water bath, but I found out that baking it without the water bath works very well. I think that the water bath makes a slightly creamier cheesecake; the one that I tested baking without the bath sort of rose in the sides and then sunk after cooled, but the flavor was just as good and everybody ate it smiling happily!
For the mini cheesecakes I use paper liners in the muffin tin, and as “crust” I use a cookie. I have tried with different cookies and the one my boys here like the best are chocolate chip cookies, but those vanilla wafers also work well. Really, any cookie you like will work, and if the cookie you choose is to big just break it a little bit around it until it fits the muffin cup.
You can add some jam on top, or even chocolate sauce to dress up your cheesecake, or if you are like my dear husband you may enjoy it just like it is, plain and delicious!
Enjoy!

Ana

The Ultimate Cheesecake (Recipe from Tyler Florence – foodtv)

Crust:
2 cups finely ground graham crackers (about 30 squares)
1/2 teaspoon ground cinnamon
1 stick unsalted butter, melted

Filling:
1 pound cream cheese, 2 (8-ounce) blocks, softened
3 eggs
1 cup sugar
1 pint sour cream
1 lemon, zested
1 dash vanilla extract

For the Crust:
Preheat the oven to 325 degrees F.
In a mixing bowl, combine the ingredients with a fork until evenly moistened. Lightly coat the bottom and sides of an 8-inch springform pan with non-stick cooking spray.
Pour the crumbs into the pan and, using the bottom of a measuring cup or the smooth bottom of a glass, press the crumbs down into the base and 1-inch up the sides. Refrigerate for 5 minutes.

For the Filling:
In the bowl of an electric mixer, beat the cream cheese on low speed for 1 minute until smooth and free of any lumps. Add the eggs, 1 at a time, and continue to beat slowly until combined. Gradually add sugar and beat until creamy, for 1 to 2 minutes.
Add sour cream, lemon zest, and vanilla. Periodically scrape down the sides of the bowl and the beaters. The batter should be well-mixed but not overbeaten. Pour the filling into the crust-lined pan and smooth the top with a spatula.
Set the cheesecake pan on a large piece of aluminum foil and fold up the sides around it. Place the cake pan in a large roasting pan. Pour boiling water into the roasting pan until the water is about halfway up the sides of the cheesecake pan; the foil will keep the water from seeping into the cheesecake. Bake for 1 hour to 1 hour 15 minutes. The cheesecake should still jiggle (it will firm up after chilling), so be careful not to overcook. Let cool in pan for 30 minutes. Chill in the refrigerator, loosely covered, for at least 4 hours. Loosen the cheesecake from the sides of the pan by running a thin metal spatula around the inside rim. Unmold and transfer to a cake plate. Slice the cheesecake with a thin, non-serrated knife that has been dipped in hot water. Wipe dry after each cut.

Mini Cheesecake!


Easy Cheesecake (from Kraft!)
2 packages (8 oz each) cream cheese
½ cup sugar (can use more if you like it sweeter)
½ teaspoon vanilla
2 eggs
1 pre-made graham cracker piecrust

Preheat oven 325. Beat cream cheese, vanilla, and sugar until well blended. Add eggs and mix until blended. Pour batter into crust. Bake 40 minutes or until center is almost set. Cool. Refrigerate at least 3 hours.
Note: if making the cheesecakes in muffin pan use paper liners sprayed with cooking spray, a cookie for the crust and bake it for only 20 minutes!
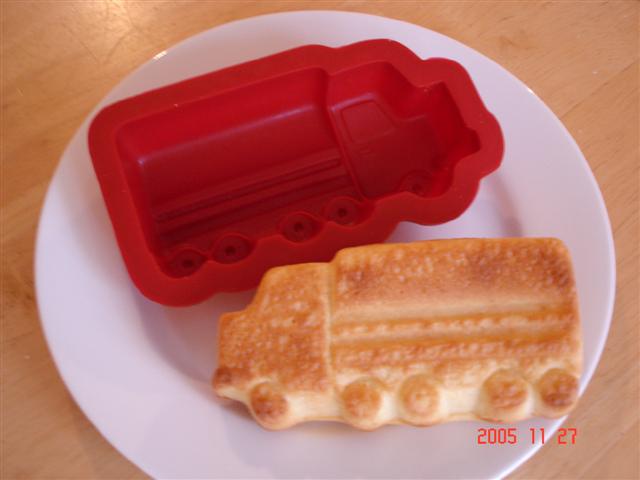
Saturday, November 26, 2005

Sugar Cookies and Good News!

First things first, Happy Thanksgiving!! I know, I am a little late, but still wanted to Thank You All for being part of my virtual and culinary world!
A friend invited us over for Thanksgiving and we had lots of fun, especially Matheus, who played the whole afternoon with the kids and had a very happy day! Since we went to Miriam’s house I did not have to cook much, so no new recipes these past days… to take to her house on Thursday I made Mashed Potatoes and a Barefoot Contessa recipe for Cranberry Fruit Conserve, which is very good and easy to make! (Recipe can be found here: http://www.foodnetwork.com/food/recipes/recipe/0,,FOOD_9936_24930,00.html) My friend made a nice turkey and other guests provided all the trimmings; very nice people, good food, it sure was fun!
Yesterday we did not have much to do; kind of a lazy day (I guess we were still a little stuffed from the day before!) and Matheus asked if we could bake cookies so he could decorate them. Since my definition of “fun things to do” usually involve the kitchen I was more than happy to make cookies with him!
I used a Sugar Cookie recipe that is extremely easy to do and that don’t need to be chilled before rolling, which is a big plus when making cookies with kids, as they don’t have that much patience to wait for dough to chill, cookies to cool, etc.
I have made this recipe numerous times before and it always come out perfect. It is a very basic recipe, but I do not remember where I got it from… oops! The dough is super easy to work with, it rolls smooth, the cookies are not too sweet and they get nice and crisp after they cool, which also makes them great to decorate!
We used some icing tubes I bought a while ago to decorate the cookies (easy for Matheus to play with and does not make a lot of mess), and some melted chocolate too!
Besides the cookies I have some good news… we are going to Brazil!! Yay!!
We were planning to go next year in January, but ended up deciding to go now and spend Christmas with the family. I can’t wait, I miss my family a lot! I will be going with Matheus on December 5, and the husband two weeks after that, and we will all come back home together in January.
The good thing is that in Sao Paulo (at my parent’s house) I will have access to the Internet so I will try to take some pictures and post them here to share a little bit of Brazil with you, so we all have something to look forward during my trip!
Well, that is it for today. I made a cheesecake yesterday and will post picture and recipe later today, plus there are a few recipes I am planning to make during this week, so come back to visit me!
Ana

Sugar Cookies
1 cup butter
1 cup sugar
1 egg
1 teaspoon vanilla
2 teaspoons baking powder
3 cups flour

Preheat oven to 400 degrees F. In a large bowl cream butter and sugar with electric mixer. Beat in egg and vanilla. Add baking powder and flour one cup at a time, mixing after each addition. The dough will be very stiff. Blend last flour in by hand. Do not chill dough. Divide dough into 2 balls, On a floured surface, roll each ball in a circle approximately 12" in diameter and 1/8" thick. Use cutters as guide; the dough should be only slightly thinner than cutter. Bake cookies on ungreased cookie sheet on top rack of oven for 6 to 7 minutes, or till cookies are lightly browned

Sunday, November 20, 2005

Sunday Pasta!

As I have said here before, it is kind of a tradition in our family to eat pasta on Sundays. Now, let me tell you, I am not a big fan of pasta (Sunday is basically the only day of the week I eat it), but lately I have been inspired and trying to make pasta dishes other than the usual penne or spaghetti.
Today it was Lasagna! Very yummy!!
There is a recipe that I like which is very easy to make and yet very flavorful. I used whole-wheat lasagna noodles today and everybody agreed that they were delicious (including the Husband, which could not tell they were actually whole-wheat). I boiled the noodles first (for 8 minutes), and for the meat sauce I sautéed some onions and garlic before adding the ground beef and proceeding with the recipe.
The original recipe asks for 1/3 cup of cheese to top the lasagna, but I think that is way too little cheese, and in my world there is never enough cheese! So I don’t measure my cheese and just add enough to make it all cheesy and delicious! You can vary the recipe to your tastes, using ricotta instead of the cottage cheese, adding veggies to the red sauce, or even replacing the beef with ground turkey (which I have done before and actually prefer).
I like this recipe because although it is lasagna it is not too heavy. Plus, it is versatile, easy to make, and always pleases everybody!!
Enjoy!

Ana

Lazy Lasagna (Adapted from Cooking Light - Sepetember 1997)
1 pound ground beef
1 jar spaghetti sauce

1 (16-ounce) carton cottage cheese
3 tablespoons grated Parmesan cheese
Cooking spray
1 (8-ounce) package precooked lasagna noodles
Shredded mozzarella cheese

Preheat oven to 350°.
Cook meat in a large nonstick skillet over medium-high heat until browned, stirring to crumble. Add sauce; bring to a boil. Reduce heat, and simmer 5 minutes. Combine cottage and Parmesan cheeses in a bowl; set aside.
Spread 1/2 cup meat mixture in bottom of a 13 x 9-inch baking dish coated with cooking spray. Arrange 4 noodles over meat mixture; top with half of cottage cheese mixture, 1 cup meat mixture, and mozzarella cheese. Repeat layers, ending with noodles. Spread remaining meat mixture over noodles. Cover and bake at 350° for 30 minutes. Uncover; sprinkle with mozzarella cheese, and bake 5 more minutes or until cheese melts. Let stand 10 minutes before serving.

Friday, November 18, 2005

Pretzels!

The recipe I am posting today is from the October issue of Cooking Light (my favorite issue this year so far!). Matheus loves those soft and yummy pretzels they sell in the Mall, so when I saw the recipe in the magazine I knew we would try it!
This recipe for Pretzels is very easy to make, the only extra thing here (that some recipes does not ask for) is that you need to quickly cook boil the pretzel in a solution of water and baking soda before you bake them.
The first time we made it I followed the recipe exactly and got great results, the pretzels were very nice and had that distinctive pretzel flavor, which I actually associate to the crispy ones we but at the grocery stores (as opposed to the soft ones at the mall). The second time we made it I decided to bake 2 of the pretzels without the water bath… well, let me tell you, if you are going to make the pretzels go ahead and do the extra step, it is well worth it! The pretzels without the bath came out dry and without much flavor.
Next time I am going to try making some of them sweet, with cinnamon sugar on top instead of the salt. I wanted to do this but Matheus was in charge of sprinkling the salt on top and did not let me the try the sugar variantion.
Another thing, the recipe says 12 pretzels, but they are a lot smaller than the ones from the mall (about half of it I would say...).
Very easy and fun to make, Matheus loved making long snakes with the dough, definitely a nice project to do with kids!
Enjoy!

Ana

Soft Pretzels
1 package dry yeast (about 2 1/4 teaspoons)
1 1/2 teaspoons sugar
1 cup warm water (100° to 110°)
3 1/4 cups all-purpose flour, divided (about 14 1/2 ounces)
1 teaspoon salt
Cooking spray
6 cups water
2 tablespoons baking soda
1 teaspoon cornmeal
1 teaspoon water
1 large egg
2 teaspoons kosher salt

Dissolve yeast and sugar in warm water in a large bowl, and let stand for 5 minutes.
Lightly spoon flour into dry measuring cups; level with a knife. Add 3 cups flour and 1 teaspoon salt to yeast mixture; stir until a soft dough forms. Turn dough out onto a lightly floured surface; knead until smooth and elastic (about 8 minutes). Add enough of remaining flour, 1 tablespoon at a time, to prevent dough from sticking to hands (dough will feel slightly sticky).
Place dough in a large bowl coated with cooking spray, turning to coat top. Cover and let rise in a warm place (85°), free from drafts, 40 minutes or until doubled in size. (Gently press two fingers into dough. If indentation remains, the dough has risen enough.) Punch dough down; cover and let rest 5 minutes.
Preheat oven to 425°.
Divide dough into 12 equal portions. Working with one portion at a time (cover remaining dough to prevent drying), roll each portion into an 18-inch-long rope with tapered ends. Cross one end of rope over the other to form a circle, leaving about 4 inches at end of each rope. Twist the rope at the base of the circle. Fold the ends over the circle and into a traditional pretzel shape, pinching gently to seal. Place pretzels on a baking sheet lightly coated with cooking spray. Cover and let rise 10 minutes (pretzels will rise only slightly).
Combine 6 cups water and baking soda in a non-aluminum Dutch oven. Bring to a boil; reduce heat, and simmer. Gently lower 1 pretzel into simmering water mixture; cook 15 seconds. Turn pretzel with a slotted spatula; cook an additional 15 seconds. Transfer pretzel to a wire rack coated with cooking spray. Repeat procedure with remaining pretzels.
Place pretzels on a baking sheet sprinkled with cornmeal. Combine 1 teaspoon water and egg in a small bowl, stirring with a fork until smooth. Brush a thin layer of egg mixture over pretzels; sprinkle with kosher salt. Bake at 425° for 12 minutes or until pretzels are deep golden brown. Transfer to a wire rack to cool.
Yield: 12 servings
Cooking Light – October 2005

Wednesday, November 16, 2005

My new favorite Muffin

There she comes, with another muffin recipe… I know, I have posted quite a few muffin recipes, but I had to share this recipe here. And it is another recipe that comes from Nic’s blog, theBaking Sheet, called Whole Wheat, Oatmeal and Raisin Muffins. Healthy and yummy whole-wheat muffins made with one of my favorite ingredients of all: oatmeal! The muffins were surprisingly moist inside; the batter needs to sit for a while, so the oatmeal gets a chance to soak up some liquid, becoming pleasantly plump and chewy. Another addition I like is the wheat bran, which gives some sort of nutty flavor to the muffins. (I have a muffin recipe that I love which uses only wheat bran, the taste is amazing, and it is super healthy and full of fiber… but I will post some other time!)
We liked these muffins so much here that I have made it three times already in these past two weeks. I can’t get enough of them; I have been eating them for breakfast and sometimes for a late night snack, sooo good!
I make the batter the night before and let it sit on the fridge overnight, so we can have nice warm muffins out of the oven for breakfast. (It is so nice to smell muffins baking up in the morning!) All three times I made the muffins I used ½ cup of milk instead of the water, and omitted the dried fruits, as I am not a big fan of them (although Matheus loves raisins and asked me to put some in the muffins next time). Also, I used old-fashion rolled oats and did not chop them (I love the pieces of oatmeal in my muffins!), and I got 9 nice sized muffins out of the recipe. Give them a try; they are truly delicious!!
Keeping with the oatmeal theme, I am going to post a recipe I developed for Oatmeal Cake. When I was not feeling good with the nerve pain and all, and able to move a little more, I wanted to bake a cake, but also wanted something a little more nutritious since I was actually going to have cake for diner (you know, not feeling well… cake… comfort food… and to me oatmeal is the perfect comfort food!). I looked over some recipes and based on a CL light recipe for a crumb cake with apples I came out with my own version.
It makes such a small cake that I actually baked it in a 9-inch pie plate (as you can see in the picture above), and let me tell you, I made it for dinner and the cake did not last until next morning’s breakfast. We liked it a lot; it is a very light cake, perfect for an afternoon snack.
Maybe you will like one of these recipes too! And did I already tell you that I love oatmeal?
Enjoy!

Ana

Oatmeal Crumb Cake

1 cup flour
1/3 cup oatmeal
½ cup brown sugar
dash of salt (optional)
¼ cup butter, cut into small pieces
½ teaspoon baking powder
¼ teaspoon baking soda
½ teaspoon cinnamon
1/3 cup milk
1 egg yolk
2 egg whites, beaten into stiff peaks

Pre-heat oven to 350F.
In a bowl combine flour, oats, brown sugar, salt, and butter. Mix with the tips of your fingers until it resembles coarse meal. Reserve ½ cup of this mixture to be used later.
To the remaining mixture add the baking powder, baking soda, cinnamon, milk, and egg yolk. Mix until all ingredients are incorporated. Fold in the egg whites.
Pour batter into a greased pie plate (or a 8-inch cake pan). Sprinkle the reserved mixture on top. Bake in pre-heated oven for 20 minutes.
Note: I sprinkled some chopped walnuts before baking and that added a nice crunch to the cake.

Whole Wheat, Oatmeal and Raisin Muffins
1 cup whole wheat flour
1/4 cup wheat bran
1/4 cup sugar
1/4 cup brown sugar
1 1/2 tsp baking soda
1/2 tsp salt
1 tsp ground cinnamon
1 cup raisins (or other dried fruits)
1 1/2 cups rolled oats, slightly chopped (or quick cooking oats)
1 egg
1 cup buttermilk
1/4 cup vegetable oil
1 tsp vanilla
1/2 cup water

Preheat oven to 375F. Grease a muffin tin, or line with baking cups.
In a large bowl, whisk together flour, wheat bran, sugars, baking soda, salt and cinnamon. Stir in dried fruit and oats. In a small bowl, whisk together egg, buttermilk, vegetable oil, vanilla and water.
Add buttermilk mixture to oat mixture and stir until just combined. Let stand for 15-20 minutes. You may refrigerate the batter, covered, for about a week at this point.
Spoon batter into prepared tins by heaping 1/4 cups (about 1/3 cup).
Bake for 20 minutes, until muffins are golden brown and spring back when gently pressed. Add 5 minutes baking time if batter is cold.
Makes 12 large muffins
(Original Recipe from “Baking in America”)
Note: My muffins were ready after 20 minutes in the oven, and I used the batter straight from the refrigerator.

Tuesday, November 15, 2005

I am back!

After a while without any postings I am finally back! Wow, I did not think I was going to miss posting here so much…

I had a hard time these past weeks with sciatic nerve pain. A few weeks going to doctors, lots of exams trying to figure out what was going on (you know, each doctor you see tells you it is something different… very frustrating), plus one week of basically not being able to do anything… sciatica is definitely not fun.

But, enough of that, I am feeling better now and back to my favorite “sport”: cooking! (The hardest part of having the pain and not being able to move was that I also could not cook…)

And before I post my recipes todayI want to thank everybody that wrote me, sent me e-mails and comments on my blog asking if everything was ok. I was very happy with all the messages and also to see that you are enjoying my blog as much as I am enjoying doing it, all that helped a lot in making me feel better! Thank you so much!

This past week I came back into action in my kitchen and have made quite a few new recipes!

Over the weekend I made gnocchi, so good! I like everything made with potatoes, and gnocchi is definitely one of my favorite potato dishes! I actually made mine without a real recipe. My brother in law makes the best gnocchi, creamy, light, and fluffy, with a delicious rich homemade tomato and meat sauce. Last time we went to Brazil he made it for us and gave me directions on how to make it. So this past Sunday I decided to finally make the dish. Mine came out good, but Fabio’s Gnocchi still is the best!

Also over the weekend I was on a “chocolate thing” and tried two chocolate recipes. The first one I got from Nic’s post about lemon pudding cake on her blog, the
Baking Sheet. She posted a new recipe for lemon pudding cake that looked delicious, but then I saw a link for a Chocolate Pudding Cake and, being the chocoholic that I am, after seeing the picture I just had to make it. It came out very good, with just enough pudding at the bottom to compliment the cake like a chocolate sauce would, and the cake part was delicious! The only thing I am thinking about making different next time is to use milk instead of the water that we pour over the cake. I thought that the pudding had some sort of “watery” flavor to it… maybe milk would make it richer.
The other recipe I tried was for “Nutella Crinkle Cookies”. This one I got from www.recipegoldmine.com. I love nutella and have always thought this kind of cookies look so pretty, so I decided to try this version. The cookies were delicious and we loved them at home! I made half of the recipe and got 36 out of it, oh and I omitted the hazelnuts as I did not had them at home… left out from the cookie batter and rolled them only on powdered sugar. Very nice cookies, crunchy on the outside and chewy on the inside, with a nice “brownie-like” texture, very yummy! And they look great too, aren’t they pretty?!!?!?!
Well, that is it for today, I still have some more recipes and pictures to post so stay tuned, and I promise I won’t be away for so long anymore!

Ana

Nutella Crinkle Cookies
3 cups flour
2 teaspoons baking powder
1/2 teaspoon salt
1 (11 ounce) jar Nutella
1/4 cup shortening
1 1/3 cups granulated sugar
2 eggs
1 teaspoon vanilla extract
1/3 cup milk
1/2 cup chopped, toasted hazelnuts
2 cups finely chopped hazelnuts
Sifted confectioners' sugar

Preheat the oven to 375 degrees F.
Stir together flour, baking powder and salt in a medium mixing bowl.
Beat Nutella and shortening in a large bowl until combined. Add sugar and mix until combined, beat in eggs and vanilla. Add flour and milk alternately and mix until just combined. Stir in the 1/2 cup toasted hazelnuts.
Cover and chill several hours until firm. Shape dough into walnut-sized balls. Roll in finely chopped hazelnuts, then in confectioners' sugar. Place on greased cookie sheet and bake for 8-10 minutes - surface should be cracked and cookies set.
Makes about 70.


Nic’s Chocolate Pudding Cake
3/4 cup ap flour
2/3 cup sugar
1/2 cup cocoa powder, divided
1 1/2 tsp baking powder
1/2 tsp salt
1/2 cup milk
3 tbsp vegetable oil
2/3 cup brown sugar
1/4 cup chocolate chips (miniature, if you have them)
1 tsp vanilla extract
1 1/4 cups hot water

Preheat oven to 350F.
Combine flour, sugar, 1/4 cup cocoa, baking powder and salt in an 8 inch square baking pan and stir with a fork to combine. Mix in milk and oil until batter is uniform.
Sprinkle brown sugar, 1/4 cup cocoa and chocolate chips evenly over batter. Add vanilla to the hot water and pour over everything. Do not mix.
Place pan in oven and bake for 30-35 minutes, until surface of the cake looks dry. The pudding will be bubbling around the edges. Allow to cool for a few minutes before serving. Leftovers, if you have them, may be stored for one day at room temperature. Reheat before serving. Serves 8-9

My Gnocchi!