Monday, July 31, 2006

Refreshing summer dessert

I think gelatin is a pleasant dessert to have during the summer months; it is a light and refreshing treat to have on hot days, when you are already beaten by the heat and having a full stomach is the last thing you need.
That said, it is always nice to change the flavors of jell-o once in a while, and this is exactly what happens with this dessert.
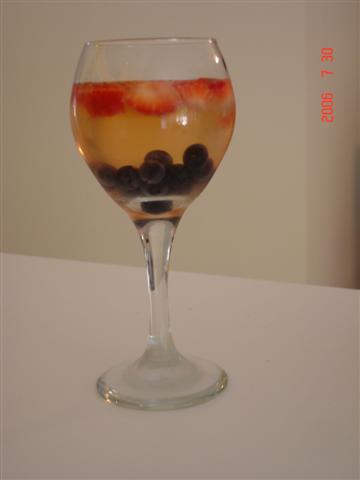
Sparkling Fruit Gelée is an adult version of the child favorite jell-o. Made with sparkling wine and filled with summer berries and fruits, it makes for a nice sweet treat during the afternoon. The picture of this dessert called my attention since I first saw it in the magazine. Juicy fruit with clear gelatin paired in a nice and tall champagne flute, very pretty to look at. It has been on my list to try since last year, and I finally got around to making it this week.
Before I continue my review though I have to comment on the fact that I actually made a “kid-friendly” version at our home; Matheus love jell-o and I didn’t want to make it two different ways. With that said, the dessert was delicious! It looked almost as nice as the one in the magazine, except that my fruits sort of separated and that I actually used a wine glass in place of the flute (don’t have one, can you believe it? Item added to “need to buy” list!), and it tasted even better than it looked!
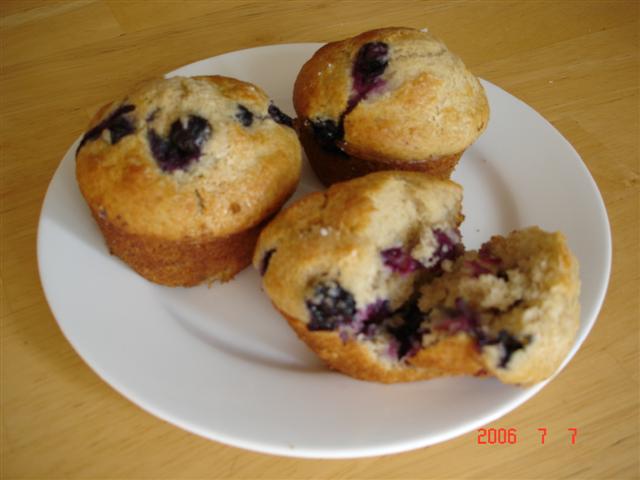
I used a mixed berry flavored sparkling water (which by the way was already sweetened, so I omitted the sugar) that complemented very well the flavor of the fruits. I have made it twice this week, once with blueberries, strawberries and bananas, and the second time with only blueberries and strawberries (pictured above) and, although the one with more fruits was preferred here, both were equally good.
Yummy, sweet, and approved by all; a good option for those who, like me, enjoy fruit and gelatin desserts!
Ana

Sparkling Fruit Gelée
3 1/2 teaspoons unflavored gelatin
2 2/3 cups sparkling wine, divided
2/3 cup sugar
4 teaspoons fresh lemon juice
2 cups sliced strawberries
1 1/3 cups fresh blueberries
2/3 cup sliced banana
2/3 cup fresh raspberries
Sprinkle gelatin over 2/3 cup wine in a small saucepan, and let stand 5 minutes. Place saucepan over low heat; cook 5 minutes or until gelatin dissolves, stirring constantly.

Combine sugar and 2/3 cup wine in a medium saucepan over medium heat; cook 5 minutes or until sugar dissolves, stirring the mixture frequently. Remove from heat; stir in remaining 1 1/3 cups wine. Add gelatin mixture and lemon juice, stirring well.
Divide mixture evenly among 8 (6-ounce) Champagne flutes or wineglasses. Combine the strawberries and remaining ingredients. Stir about 1/2-cup fruit mixture into each glass; cover and chill 6 hours or overnight.
Recipe from Cooking Light magazine, June 2005.

Sunday, July 30, 2006

Playing around with soy!

I only got around to try soy and its by-products after I married and moved to the US. Never actually had soy at home, my mom didn’t cook with it, but my culinary curiosity would not let me alone if I did not try the many different ingredients I came face to face here in the US.
Among the ton of different stuff I found at the American grocery stores there was soy, in various forms, from beans and curds, to milk and cheeses. Soy burgers and even soy crumbles were on my list to try. And little by little I went trough my list and actually got to appreciate most of the previously mentioned items.
I ended up really liking soy burgers, and even more the so delicious edamame, yummy, now that is something I really love now. I also enjoyed trying tofu, and have been experimenting with it a lot lately, and decided that vanilla flavored soymilk is also delicious as well! (I use it almost daily in my fruit smoothies and blended concoctions!)
Besides my adventurous taste buds, I also got to meet, although yet only virtually, some nice girls that also enjoy soy, and that actually had a lot more experience with it and contact with soy through out their life. Karen and Akemi were the ones that inspired me to get my hands on some soybeans and get to work with them at home!
So, after reading their posts, seeing their nice pictures, and drooling over their baked goods at their blogs, I went ahead and adventured myself in some soy experimentation this past week. And it was so worth it!
I had the beans for some time, having bought them thinking about cooking them myself, but they ended up being transformed into soymilk, and the residue that was left over from the milk production, called okara.
Homemade soymilk, Wow, even I can’t believe I made that myself yet. It came out good, and even thicker than the ones I buy at the store. Now, I won’t lie here, I do not really enjoy the soymilk “as is”, so to suit my tastes it does have to be sweetened, or flavored with cocoa (or nesquick), then I can call it good stuff!
With the milk I got a bonus: the okara; basically the processed soybeans that was leftover after being cooked for the milk making procedure. From what I found out, the okara is very nutritious, so I went ahead and followed the lead of my friends and tried out Akemi’s recipe for Okara Bread. And Oh Boy, now this was good!
I made little rolls with the recipe (just so that it would be easy to freeze), and they came out super moist and delicious, both my husband and my son loved the bread and we all came to a consensus declaring that this was one of the best recipe for rolls that I have made. It was just perfect warm out of the oven with a little butter, good, really good!
Here I am again sneaking soy into the boys, sneaking yes, because I never mentioned the okara being in the bread, of course!
I am not sure I will make soy milk again (just because I really like the one I get at the store!), although I will definitely look for the ready okara at Asian markets in order to make more bread and try out more recipes with it, but this was definitely worth trying, the whole process, very fulfilling to my culinary enrichment. Learning new things is always good to me, especially when there is some cooking involved!
So here I leave you with Karen’s recipe for soymilk and Akemi’s recipe for the okara Bread. Thank you guys, both for leading me out to such good food experience!
Ana


Karen’s Soy Milk

300 grams soybeans

About 3 liters water

Soak the beans in water overnight; they will soften and get swollen.
On the next day put 1 liter of water in a big pan and bring it to a boil.

While the water comes to the boil, process the soybeans in a blender, adding the water that it was soaked as necessary.

Add the processed soybean mixture to the boiling water and cook over medium-high heat, stirring frequently so that it does not stick to the bottom of the pan. When the mixture reaches the boil, turn of the heat and let it cool down in the pan. After cooled, strain the milk using either cheesecloth or a very fine sieve. The liquid is your Soymilk, and the residue left in the cloth (or sieve) is the okara.


Akemi’s Oakara Bread


For the sponge: In a large bowl combine together 10 grams dry yeast, 3 tablespoons sugar, and 1 cup warm water (100 to 110 F). Let stand for 15 minutes.

¼ cup oil
3 tablespoons sugar

1 tablespoon salt

2 cups okara

3 to 4 cups flour

Add oil, sugar, salt and okara to the sponge after it bloomed. Mix well together and then start adding flour to the mixture, ½ cup at a time, until you get a smooth dough that doesn’t stick to your hands (you may or may not need all the flour). Put the dough on a bowl, cover with plastic and let it rise until doubled in size, about 1 hour.
Shape dough into desired shape, place it on greased baking sheet and let it rise for 20 more minutes. Bake bread at 350F for 20 to 30 minutes, depending on size of your bread.
Note: I baked mine in muffin tins and it took 20 minutes total. Also, the recipe did not say anything, but I brushed my rolls with egg wash before baking.

Here is the "okara"

Thursday, July 27, 2006

Greek Bulgur Salad with Chicken

Another great recipe for summertime! This is basically a tabbouleh salad with chicken and feta cheese added to it. Could not be bad!
It is refreshing, tasty and filling, perfect for the hot days when we don’t want to get involved with too much cooking. It works great with any kind of leftover chicken you may have roasted or grilled, besides the idea of using rotisserie chicken as the recipes states. And a good thing about this salad is that it gets even better as it sits, so making it ahead of time is a plus in terms of flavors here!
This makes a ton of salad, and the one in the picture I made for a picnic we had with Matheus’ school friends. It was a hit and many asked for the recipe, so we (Matheus and me) were not the only ones to like this one!
In the picture you may notice that there is no cheese, and it is so because a few of the friends were allergic to it, so I actually had the feta cheese in a separate bowl and people added to their salad as they liked. However, if you can eat cheese, by any means throw it in the salad because it sure adds nice flavor to it!
And since we are on the subject of pictures, I want to apologize about my latest photos, something is going on with the camera and the pics are almost all getting sort of blurry… we are trying to figure out what it is, in the meantime I hope you can still get a good image of the goodies.
Ana

Greek Bulgur Salad with Chicken
4 1/2 cups water
3 cups uncooked medium bulgur
3/4 cup fresh lemon juice (about 3 lemons), divided
2 teaspoons salt, divided
2 1/2 cups chopped skinless, boneless rotisserie chicken breast
2 1/2 cups chopped peeled cucumber
2 cups halved grape tomatoes
1 cup chopped fresh parsley
1/2 cup thinly sliced fresh basil
1/2 cup finely chopped red onion
1/2 cup (2 ounces) crumbled feta cheese
1/4 cup extravirgin olive oil
1/2 teaspoon black pepper
10 kalamata olives, pitted and chopped (I added more, as 1 olive per person seemed to little to me!)

Combine water, bulgur, ½ cup juice, and 1-teaspoon salt in a large saucepan; bring to a boil over medium-high heat. Cover, reduce heat, and simmer 5 minutes. Remove from heat; let stand 15 minutes or until liquid is absorbed. Uncover and cool to room temperature.
Combine remaining ¼ cup juice, remaining 1 teaspoon salt, and remaining ingredients in a large bowl; toss to combine. Add cooled bulgur mixture; toss well to combine. Cover and chill.
Yield: 10 servings (serving size: about 1 2/3 cups)

Wednesday, July 26, 2006

Two baked recipes

It is summer here, however, yesterday was one of those boring rainy days and we ended up staying home for most of the time (did a quick trip to the grocery store in between showers though!).
And you know, when you stay at home for too long you start to look for something to eat, right? Or, at least I am like that… and in my case I look for something to cook.

With lots of time to get our meal ready, I decided to get a couple recipes I wanted to make and give them a try. And since it wasn’t ultra hot I turned the oven on.

Zucchini Oven Chips were a delicious side dish, which both Matheus and I liked it a lot! In fact, Matheus liked it so much that he started to pile them in his plate, even before finishing eating his fare, when he saw they were almost gone. The “chips” were super tasty with the crumb coating, but didn’t actually turn out very crisp. Well, crisp or not they were really good and there were none to tell history. A nice change to the vegetable side dish, tasty and yummy, will be made again pretty soon with the abundance of cheap zucchini we can buy during the summer!

Baked Tofu Sticks were another of my recently experimentation with tofu. These were super simple and easy to make and quite tasty too! I liked the fact they were baked, since my previous success involved pan-frying them, which was not bad healthy wise, but did a lot of splattering around the stove.

My tip for these is to not cut them too thin, unless you want them to be really crispy/crunchy. Some of mine were thin and got over browned, ending up almost like french fries. Sounds good, I know, but I was actually aiming for a more “meatier” texture, like a slightly crispy crust with a chewier inside. Plus, I ended up over doing the seasoning and our sticks were a little salty, but all of this won’t happen next time, after all, as I said this was the first experimentation, so there is going to be a next time for sure!

We had the chips and the sticks with macaroni & cheese, and Matheus was in heaven! A fun meal and two more tested recipes, at the end it was not bad having a little rain after all!

Ana

Zucchini Oven Chips
1/4 cup dry breadcrumbs
1/4 cup (1 ounce) grated fresh Parmesan cheese
1/4 teaspoon seasoned salt
1/4 teaspoon garlic powder
1/8 teaspoon freshly ground black pepper
2 tablespoons fat-free milk
2 1/2 cups (1/4-inch-thick) slices zucchini (about 2 small)
Cooking spray

Preheat oven to 425°.
Combine first 5 ingredients in a medium bowl, stirring with a whisk. Place milk in a shallow bowl. Dip zucchini slices in milk, and dredge in breadcrumb mixture. Place coated slices on an ovenproof wire rack coated with cooking spray; place rack on a baking sheet. Bake at 425° for 30 minutes or until browned and crisp. Serve immediately. Yield: 4 servings (serving size: about 3/4 cup)

Cooking Light, August 2005.


Baked Tofu Sticks (adapted from Martha Stewart’s website)
Firm tofu
Olive oil
Salt and pepper to taste

Cut tofu into sticks, put sticks on a double layer of paper towels, cover with more paper towels (you can out something on top to make some weight at this point) and let stand until tofu has released extra liquids, 20 to one hour.
Preheat oven to 375F. Cover baking sheet with foil and brush it well with olive oil (don’t want the tofu to stick to it!). Arrange tofu sticks on baking pan, sprinkle with salt and pepper to taste. Bake until both sides are crisp and golden brown, about 12 to 15 minutes per side.

Tuesday, July 25, 2006

Cookies and Cream Ice Cream

“This is good!” That was the husband’s expression once he first bite into it, and this time I never ever mentioned the “secret ingredient”! Yes, there was tofu in this one, and I would not believe it if I haven’t made it myself. ”Sneaky” soy in a yummy treat!
Perfect consistency, super creamy, and the bits of crushed cookies add not only texture but also a great chocolaty taste to it. Really yummy, we loved it, one of the best ice creams I have made it with our machine, and better than that, a light one! Chocolate is still our favorite ice cream flavor, but this one was a very close second!
I believe the base would be good by itself, and even with chocolate incorporated in some way to make it a chocolate ice cream…. Humm, I guess we need some experimentation on this one!
Meanwhile I will leave the great recipe here and you guys make sure to try it, because this one is no doubt a winner! Really, it was the creamiest ice cream from all the recipes I posted lately here.
Yum!
Ana

Cookies and Cream Ice Cream (adapted from Cooking Light)
1 (12 ounce) package reduced-fat firm tofu
1/2 cup sugar
1/2 cup half-and-half
1 teaspoon vanilla extract
1/4 teaspoon salt
2 cups whipped cream (measure it already whipped)
10 cream-filled chocolate sandwich cookies (such as Oreos), crushed

Combine first 5 ingredients in a food processor or blender; process until smooth. Place tofu mixture in a large bowl and fold in whipped cream. Pour mixture into the freezer can of an ice-cream freezer; freeze according to the manufacturer's instructions. Stir in crushed cookies during last 5 minutes of freezing. Spoon ice cream into a freezer-safe container; cover and freeze 1 hour or until firm.
Yield: 8 servings (serving size: 1/2 cup)
Note: make sure to use silken tofu here, other varieties will make it grainy.

Playing around with cookies and ice cream: coffee and vanilla ice cream sandwiches!

And, before you start wondering, no I didn’t lick the filling off the cookies to make these; there is a brand that sells the “tops and bottoms” of the cookies around here. Pretty neat, huh!?!

Monday, July 24, 2006

Eggplant Lasagna

Lasagna, yes, and believe it or not, there are no noodles in this one! I love eggplant, and basically converted the husband to its goodness after we married. One of the dishes I like most is lasagna made with eggplant, where slices of either boiled or baked (broiled or roasted) eggplant are layered with yummy Bolognese sauce, covered with cheeses, and baked for a bit just until the cheeses are melted, golden and brown!
It is a lighter version of lasagna, which not only makes us feel good about eating it and, but also leaves room for dessert.
I actually don’t have a real recipe for this one, I always make it by using the ingredients accordingly to how many portions I want to make. I usually make layers of eggplant and sauce, but you could also add a layer of seasoned ricotta cheese to make it even better.
Sunday I made it for lunch and as always it was a huge success, I definitely should make this dish more often here!
Not an actual summer dish (although it is sort of eggplant season around here), but hearty comfort food, a dish to be savored year round!
I leave the idea here for those who would like to give it a try.
Ana

Yummy and cheesy before being plated.

Sunday, July 23, 2006

Peach goodness!

When someone gives you peaches… make ice cream! I went to the farmer’s market this week and came back with a box full of peaches, about 30 of them. Most of them were peeled, sliced, and directly into the freezer they went. They are there, patiently waiting to be consumed in smoothies and the like later on. The rest I kept in the counter, some were used in a crumble, others turned into ice cream; summer is by far my favorite time of the year!

The recipe today I got from the website “Epicurious”, which by the way is full of nice recipes. It is the perfect recipe to make with those sweet and ripe summer peaches; this ice cream is pure fresh fruit!

Peach Gelato is easy and simple to make, and since there is no cream or milk it has the added bonus of being a refreshing fat-free dessert.
We definitely enjoyed it here, however, it has to be served as the recipe states: immediately after being churned. Ours was nice and smooth, but the little bit we had leftover was icy after an hour or so, we even ended up tossing it, as it was definitely not edible anymore. I wonder if it had something to do with my freezer, or due to the small amount that I froze, because it didn’t look like a recipe that would end up that way to me.
Anyways, it was very tasty, and one of the “peachiest” (if this words exist, that is) desserts I have had!
Oh, and you can definitely try making it even if you don’t own an ice cream machine. Simply put the final mixture in a bowl and put in the freezer. Stir the mixture every 30 minutes, then every 20 minutes after it starts to freeze more solid. It may not be as smooth, but I am sure it will still taste good! (This is a method I used to make ice cream when I lived in Brazil and didn’t have my machine…)

A good summer treat, plus you get a full piece of fruit in every serving of gelato here! Nice, huh?!

Ana


Peach Gelato (adapted from epicurious)
¾ cups granulated sugar
1/2 cup plus 1 tablespoon water
1 1/2 pounds peaches (I didn’t actually measured, but used 8 peaches)
1 tablespoon fresh lemon juice
1 teaspoon lightly beaten egg white


In a small heavy saucepan heat sugar and water, stirring until sugar is dissolved. Cool syrup. Peel and pit peaches and in a food processor purée until smooth. Transfer 2 cups purée to a bowl, reserving remainder for another use, and stir in syrup and lemon juice. Chill peach mixture until cold and up to 1 day.
Stir in egg white and freeze in an ice-cream maker. Serve gelato immediately or transfer to an airtight container and put in freezer to harden no more than 3 hours.
Makes about 1 quart.

Saturday, July 22, 2006

Super yummy salad!

This was one of the best “complete-meal-salad” dishes I have ever had! Deliciously nutty quinoa is paired with tomatoes, chickpeas, carrots, edamame, and a delicious basil-lemon dressing to complete the goodness! Even tofu was added to the mix, and I was so happy, because this was my most successful attempt to prepare tofu for savory dishes! Yessss! Now we are definitely going to have tofu more often, because Matheus and me really liked it! (The husband tried, said it was good, and when I said it was tofu he did not eat it anymore… men, hopeless, I know… sigh)
The basil-lemon dressing is one of the best salad dressings I have had in a while, I usually make a variety of vinaigrettes to go with our salads, using different kinds of vinegar and all, but this one is super simple and the flavor is just unbeatable, the best in my opinion and for sure is going to be made many and many more times at our home!
It is an amazing salad, complete with vegetables, carbs, and protein; a perfect one-dish meal for the hot summer days, I truly enjoyed it today and could not wait to come post it here!
The original recipe called for black beans, which are not my favorite, and since I loooove chickpeas I used it instead. I also subbed edamame for lima beans, not only because I didn’t have them, but also because I love edamame, and I guessed thee flavor would go well here - and it did!
I am posting bellow my adapted recipe, it was so successful as is that I don’t want to change a thing! And in case you would like to see the original recipe, take a peek at the Cooking Light website and it will be there for the black beans lovers too! Hehe!
By the way, if you are not a tofu fan I am pretty sure this would be just as tasty with some cooked chicken in its place - gotta try it that way too!
Ana

Quinoa and Chickpea Salad with Basil Lemon Dressing
3/4 cups uncooked quinoa
1 1/2 cups vegetable broth
½ package (7-ounce) firm tofu, cut into 1/4-inch cubes
1 1/2 tablespoons olive oil, divided
1/2 cup chopped fresh basil
1 tablespoons fresh lemon juice
1 tablespoons Dijon mustard
1 small garlic cloves, minced
½ cup cooked edamame

2 cups chopped tomatoes
1/4 cup chopped carrot (I blanched mine)
1/2 (15-ounce) can chickpeas, rinsed and drained
Salt and pepper to taste

Bring quinoa and broth to a boil over medium-high heat. Cover, reduce heat, and simmer 15 minutes or until broth is absorbed and quinoa is cooked. Remove from heat.
Place tofu on several layers of paper towels; cover with additional paper towels. Let stand 5 minutes. Heat 1-tablespoon oil in a large nonstick skillet over medium-high heat. Add tofu; sprinkle with salt and pepper. Sauté tofu until lightly browned (about 8 minutes or so). Remove from heat and let cool.
In a small bowl mix 1/2-tablespoon olive oil, basil, lemon juice, mustard, and garlic. Stir in quinoa. Add the edamame, tofu, tomatoes, carrots, and chickpeas to quinoa mixture; stir to combine. Keep in the fridge until ready to serve.

Yield: 5 servings (serving size about 1cup)

Friday, July 21, 2006

Pizza Dough

The boys love pizza here but, with a few exceptions of a couple of good pizza places, we much prefer our pizza being homemade. Plus, half of the fun of pizza is making it, right?! Yes, we enjoy the whole process at our home, making the dough, stretching it and then adding our favorite sauces and toppings, which Matheus especially likes when we make individual pizzas and he can make his own creations!
I love homemade pizza dough because I can roll it thin, bake in the pizza stone, and get nice and crispy crust on my pizza, which I mostly like topped with fresh mozzarella, tomatoes and basil, just like the one pictured above.
However, sometimes we get adventures and make some different pizzas, as is the case with the one in the photo below, made with caramelized onions and bits of goat cheese, one word to describe it: yum!
Pizza dough is pretty simple and easy to make, and the possibility of being made in advance and keep refrigerated (or even frozen for a few days) is just an added bonus.
And after I got the recipe for Whole-Wheat Pizza Dough from the Eating Well magazine, never went back to the plain white flour one. This dough has a nice balance of both flours, which keep the dough nice and stretchy and flavorful at the same time. We all like it here, and to tell the truth, nobody has noticed the difference since I started using this recipe, so it must be a good one!
The only thing I do differently is that I make the dough by hand, as I don’t own a food processor (yet!). But if you do, then go ahead and use it, after all, technology certainly makes life easier!
A nice and healthier alternative to the beloved cheesy snack! Enjoy!
Ana


Whole Wheat Pizza Dough (adapted from Eating Well)
3/4 cup whole-wheat flour
3/4 cup all-purpose flour
1 package quick-rising yeast (2 1/4 teaspoons), such as Fleischmann's RapidRise
3/4 teaspoon salt
1/4 teaspoon sugar
1/2-2/3 cup hot water (120-130°F)
2 teaspoons extra-virgin olive oil

Combine whole-wheat flour, all-purpose flour, yeast, salt and sugar in a food processor; pulse to mix. Combine hot water and oil in a measuring cup. With the motor running, gradually pour in enough of the hot liquid until the mixture forms a sticky ball. The dough should be quite soft. If it seems dry, add 1 to 2 tablespoons warm water; if too sticky, add 1 to 2 tablespoons flour. Process until the dough forms a ball, then process for 1 minute to knead.
Transfer the dough to a lightly floured surface. Coat a sheet of plastic wrap with cooking spray and place it, sprayed-side down, over the dough. Let the dough rest for 10 to 20 minutes before rolling.

- To make ahead: The dough will keep, in a plastic bag coated with cooking spray, in the refrigerator for up to 2 days. Bring to room temperature before using.

Thursday, July 20, 2006

Müsli Cookies

When it comes to cookies I am always looking for healthier recipes to try. Sometimes they come out tasty, sometimes the super-healthy ones do not come very right. You know, sometimes it is a little hard to go from your favorite chocolate chip cookie (although my favorite recipe is a healthy one) to a “healthier” cookie without thinking of it as tasting “light”.
One of my trials involved this Müsli Cookies, which I first saw in a magazine when I was in Brazil. The cookies not only looked good in the magazine’s picture, but were also very healthy when compared to most cookies out there, I could not wait to try. And I did wait, because I only ended up making them here in the US, today.
We were making cookies to take to Matheus’ summer camp “cookie exchange” tomorrow, so I decided to make use of the already hot oven (we made chocolate chip cookies to take there, they are Matheus’ favorites!) and tried this ones out.
They may not be the prettiest looking cookies around, but are indeed very healthy, and tasty too!
I used a müsli I bought in Brazil (the one actually specified in the recipe), however I am pretty sure it would work with any müsli you might like. It is a very basic recipe that makes use of an industrial product, nothing really special about this one. In fact, I believe the cookies would be even better with the sort of müsli I usually buy here in the US, which are more natural than this one I used today. So, I am definitely going to try this recipe again.
All that said, my cookies came out crispy on the outside and sort of cakey in the inside, but in a good way. I liked the fact that it was not overly sweet and that I could taste the crispy bits of oats on the edges and tops. Oh, and I sprinkled mine with brown sugar, which I believe made them even better!
I followed the recipe, except I used some whole-wheat flour (as I always do) for part of the flour asked in the recipe, and I upped the sugar a bit on mine, so feel free to do that in case you try it, because different müslis do have different levels of sweetness – sometimes even being unsweetened (which I actually prefer).
If you, like me, also like to try healthier options, then give this a try, it is not bad if you see it as an occasional treat that can also be good for you!
Ana


Müsli Cookies
1 ¾ cups müsli
4 tablespoons brown sugar
2 teaspoons cinnamon
2 eggs, beaten
1 cup all-purpose flour
½ cup whole-wheat flour
1 teaspoon baking powder
5 tablespoons butter or margarine (the recipe says “light butter”, but I used regular)

Preheat oven to 350F (180C).
Mix all ingredients in a large bowl with a wooden spoon until well blended and a nice cookie dough has formed. Drop dough by spoonfuls on a greased cookie sheet, leaving some space between them. Bake for 15 minutes, or until they are lightly brown.
My note: the dough seemed a little dry to me, and I believe that was because my eggs were on the small side (or maybe even due to the whole-wheat flour, who knows…), so I added 1 tablespoon milk to help it blend together.
(recipe adapted from Boa Forma magazine)

Wednesday, July 19, 2006

Fish

I could keep posting ice cream recipes here for the rest of the week (believe me, I have tested many other recipes lately, gotta love ice cream!), but decided to post today a savory recipe to change the setting here a little. It is looking like I only make desserts!
With the hot weather I haven’t baked or cooked much, mostly we have been having cool salads, sandwiches and wraps, and pasta salads, after all, Matheus loves pasta, which makes it easy for me to cook for him!

And although I am big on salads, during the weekend we end up making some heartier food, as the husband is more of substantial eater and always have the need for some meat and rice as well.

One of the dishes we made recently and liked a lot was called Oven Poached Halibut Provencale. Sort of a fancy name, but easy to make and the end result was very tasty!

I used tilapia for the fish, but just because the halibut was not looking very good at the market and its price not a bit inspiring (more than double the price of the tilapia). With the fish exchange the recipe took a little less time to cook, which ended up being a good thing, making this a nice option for weekday meals.

The fish came out very moist and tender and the sauce was nice and good too. However, we could taste a very pronounced wine flavor; so feel free to reduce the amount of wine to suit your tastes. Oh, and next time I might add some capers to either the sauce or the breadcrumb mixture, as I think it would complement nicely the overall flavor of the dish.

Ana

Oven Poached “Tilapia” Provencale (adapted from Cooking Light)
1 tablespoon olive oil
1 garlic clove, minced
3/4 cups chopped onion
2 cups diced tomato
2 tablespoons chopped fresh basil
2 tablespoons chopped fresh flat-leaf parsley
3 tilapia fillets (or white fish of choice)
½ cup white wine
3 tablespoons dry breadcrumbs
1 tablespoon chopped pitted kalamata olives
1/2 teaspoon dried herbes de Provence
1/2 teaspoon olive oil
Salt and pepper to taste
Fresh flat-leaf parsley sprigs (optional)

Preheat oven to 450°.
Sautee the garlic with olive oil in a skillet; add onion and sauté until lightly browned. Add diced tomato and salt and pepper to taste; cook 2 minutes. Remove from heat; stir in basil and parsley.
Spoon half of tomato mixture into a square baking dish; place fillets over tomato mixture. Pour wine into dish; sprinkle fillets with salt and pepper. Spoon remaining tomato mixture over fillets. Bake at 450° for 8 to 10 minutes or until fish flakes easily when tested with a fork or until desired degree of doneness.
Preheat broiler.
Combine the breadcrumbs, olives, herbes de Provence, 1/2 teaspoon oil, ¼ teaspoon pepper, and 1/4 teaspoon salt in a small bowl. Sprinkle breadcrumb mixture over fillets. Broil 2 to 3 minutes or until lightly browned. Serve immediately. Garnish with parsley sprigs, if desired.
3 servings

Tuesday, July 18, 2006

Lemon Ice Cream

This was the other ice cream recipe I made over the weekend. Lemon-Buttermilk Ice Cream is one of the most refreshing ice creams I have ever tasted, and comes from my favorite magazine, Cooking Light.
It is creamy, lemony and sweet, and has a wonderful tang from the buttermilk, making it even more refreshing. The perfect indulgence for those super-hot summer days we get around here.

It is light and delicious, and makes you want to have more after each time you fill your mouth with it. If you like lemon ice cream you must try it, and I am pretty sure you are going to love it too!
Enjoy!
Ana


Lemon-Buttermilk Ice Cream
3/4 cup sugar
1/2 cup fresh lemon juice
1 cup half-and-half
1 cup whole milk
1 cup buttermilk

Combine sugar and juice in a large bowl, stirring with a whisk until sugar dissolves. Add half-and-half, whole milk, and buttermilk. Pour mixture into the freezer can of an ice-cream freezer; freeze according to manufacturer's instructions. Spoon ice cream into a freezer-safe container. Cover and freeze 1 hour or until firm. Yield: 9 servings (serving size: 1/2 cup)

Adapted from Cooking Light, May 2003

Chocolate Ice Cream

With almost 100 F around here there is nothing better than ice cream! This weekend I made two of our favorite recipes. The first one, that I am posting today, is for Chocolate Gelato. I created this recipe based on other 3 recipes I have read. It makes a creamy concoction without being too heavy, however, it is rich enough to satisfy our chocolate cravings!
I have made it with all milk (use whole milk here, please!) and also with 2 cups milk and 1 cup cream, the later being the best version. You definitely cannot compare this with a normal gelato you find in Italian Ice Cream Parlors, but is so refreshing and satisfying that here in our house is the chocolate ice cream of choice. And I definitely do not complain about making it over and over again!!
Enjoy!

Ana


My Chocolate Gelato
3 cups whole milk (or 2 cups milk and 1 cup cream)
3 tablespoons cornstarch
1/3 cup sugar
3 teaspoons cocoa powder
2 oz semisweet chocolate chopped (or chocolate chips)
1 teaspoon vanilla extract
a pinch of salt

Combine 1/2 cup milk with cornstarch and set aside. In a saucepan add remaining 2 1/2 cups milk, sugar, and cocoa. Heat over medium heat until almost boiling; add milk/cornstarch mixture and cook, stirring constantly, until mixture thickens. Add chocolate chips and whisk until melted. Remove from heat, stir in salt and vanilla.
Strain mixture into a bowl (or plastic container), let cool to room temperature and then put in the fridge until completely cooled. (Or you can put the container on top of a bowl filled with ice water and keep stirring the mixture until cooled enough to put in the fridge)
Freeze in ice cream machine, according instructions.
Note: I put a piece of plastic wrap directly on top of the mixture as soon as I put it on the plastic container to cool, just so that a crust won't form.

Monday, July 17, 2006

Zucchini Bread

Keeping with the theme of quick breads, this weekend I made another one of my favorites, Zucchini Bread! Don’t let the presence of zucchini in the dough prevent you from making this bread/cake. You will not be able to tell the zucchini is there, and it lends so much moisture to the loaf, it is impressive how delicious this is!
We all enjoy this a lot at our home, sometimes it is even preferred over the beloved banana bread! (yes, once I made one of each and the zucchini bread didn’t survive until the next day…).

Try it and I am pretty sure you will like it too!! I like to make it the way it is, the two things I changed from the recipe I got from a friend was to reduce the sugar a little and use half whole-eat, half all-purpose flour (instead of all white). And I have also made it with ¼ cup oil and ¼ cup of either yogurt or applesauce (instead of the 1/2 cup oil) and it works super well, not altering much the texture of the bread.

It can be made into either normal or mini loaf pans, or how we like it best here, in muffin tins. This time I made in both, and believe it or not, the muffins got eaten and the loaf is still there… there is something about muffins that we really love around here!

Super easy, very delicious bread, perfect to eat in the afternoon or for breakfast with a nice glass of milk and a piece of fruit.

Enjoy!

Ana


Zucchini Bread
¾ cups all purpose flour
¾ cups whole-wheat flour
1 large egg
½ cup sugar
½ cup oil
1 teaspoon vanilla
1 teaspoon cinnamon
½ teaspoon baking soda
¼ teaspoon baking powder
1 cup grated zucchini
¼ teaspoon salt
½ cup chopped walnuts (optional)

Mix together egg, sugar, oil and vanilla. Add rest of ingredients and mix until well incorporated.
Pour batter into a loaf pan (8x4”). Bake on a pre-heated oven at 350F for about 1 hour.

Notes: If made in mini loaf pans it will be done in about 40 minutes. For muffins, about 30 minutes

.

Monday, July 10, 2006

Banana Bread

This is one of my favorite recipes for Banana Bread. It is sweet, moist and delicious, freezes beautifully and can be baked into muffins too.
I sort of adapted a couple of recipes and came up with this one. I like to eat my bananas all yellow with no spots at all, but the best bananas for banana bread (and muffins as well) are those that are over ripe and looking nasty and brown in the counter, those are great here, as they help with moisture and give it the best “bananay” flavor to the bread/cake! (I always make banana bread and everyone here says it is banana cake! Hehe!)
This one in the picture I made at my mom’s house while in Brazil and it was a definitely success there too!
Enjoy!
Ana

Banana Bread
2/3 cup sugar
¼ cup canola oil
1 2/3 cups mashed banana
¼ cup milk
¼ cup yogurt
1 egg
1 cup all-purpose flour
1 cup whole wheat flour
1 teaspoon baking soda
½ teaspoon salt

Preheat oven 350F.
Beat sugar and oil in a bowl. Add the mashed bananas, milk, yogurt and egg and beat well.
Add flour, baking soda and salt, mix until all incorporated.
Pour batter into a greased loaf pan and bake for about 1 hour.
It can also be made into muffins, just pour batter into greased muffin cups and bake at same temperature for about 25 minutes, but keep an eye on them after 20 minutes of the baking time has elapsed.

Friday, July 07, 2006

Blueberry Muffins

We are back home, a short visit to the family, and as always it was very nice! Matheus had lots of fun with the grandparents and even more because I enrolled him in swimming lessons, so he also had an activity to do every morning that he loved: going to the pool!
We got here yesterday morning and, although a little tired from the flights, went blueberry picking in the afternoon. It is blueberry season and since I love the fruit I like to make sure I enjoy every bit of it this time of the year. There is nothing like fresh blueberries and since all the muffins I left in the freezer for the husband were gone I went ahead and whipped up this super quick recipe for our breakfast today. Easy and very good! Not the most nutritious of the muffins, but more of a treat for a welcome home breakfast with the three of us together!
You can certainly use whole-wheat flour for part of the flour in this recipe, and I would definitely do that if I had some in the house today. Also, fresh or frozen blueberries could easily be used with nice results here, just make sure to not thaw them if using frozen, that way you avoid getting unappetizing greenish-colored muffins.
I made a few recipes during my trip and will be posting them soon!
Enjoy!
Ana

Blueberry Muffins
2 cups flour
1 tablespoon baking powder
¼ teaspoon baking soda
½ teaspoon cinnamon
½ teaspoon salt
1 egg
½ cup milk
½ cup yogurt
¼ cup oil
½ cup sugar
1 cup blueberries

Combine dry ingredients in a bowl. In another bowl mix together wet ingredients. Add flour mixture to the wet ingredients and mix just until incorporated. Fold in blueberries. Pour batter into greased muffin tins, sprinkle sugar on tops if desired, and bake at 400F for about 18 minutes, or until golden.
Yields 10 muffins.