Sunday, December 31, 2006


HAPPY NEW YEAR!!!
Wishing to all my friends a 2007 full of excitements, happiness, good health, and lots and lots of love!
Thanks for this awesome year in the "blogworld", 2006 was great and I bet 2007 will be even better!
Love you all!
Ana

Ps: I got the puzzle as a Christmas gift from my son, cute!! (It took me 3 hours to finish it, on Christmas Day!)

Friday, December 22, 2006

Panettone

I bet the majority of my fellows Brazilians have come across a Panettone during Christmas time at least once in his/her lifetime. Panettone, a traditional kind of Italian Christmas Bread, is very popular not only around Europe but also very known and loved in Brazil.
We used to have it every single Christmas at my mother’s and grandmother’s houses, and there were always a few loaves around grandma’s house, as she would get them as presents from different friends and family members. And it didn't matter how many she got, we would polished them off before the school break was over; it was just delicious to eat Panettone for breakfast, afternoon tea, or with milk as a late night snack!
It seems that Panettone is now becoming more and more popular in the US, as it was hard to find it when I first got here, 7 years ago, and it was absurdly costly. Now we can find a variety of more affordable breads, not only in specialty Italian stores, but also in warehouses, and even some larger grocery stores (which may even have their own brand of it!)
This year, although we are not going to Brazil for Christmas, I wanted to keep the tradition and have some Panettone around. And since we were staying and celebrating with friends, why not then making some loaves and sharing with them, right?
So I did! I baked a few mini Panettone loaves and gave away to the teachers and closer friends, just to share with them a little of my Christmas traditions.
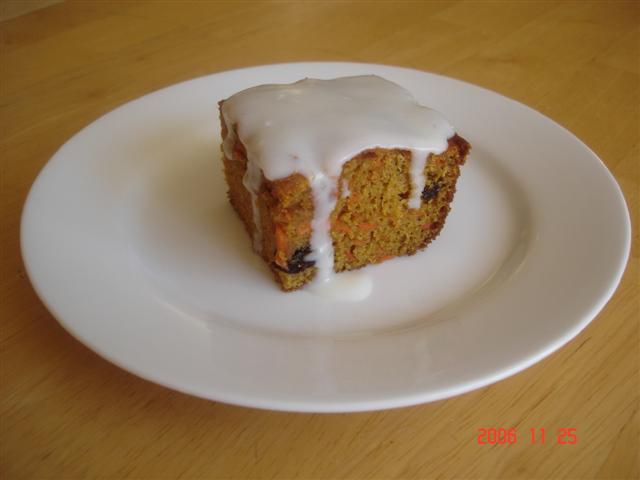
It is a long process to bake Panettone, since it has to rise a couple of times, but it sure was fun to make these little gems and I was totally proud of my bread by the end of the day. I have also made them last year, but this time used a different recipe and it came out just right; perfect and beautiful, with a great taste and texture!
Panettone has its own characteristic texture to it, and it is not the easiest thing to conquer the sort of flaky-full-of-little-tiny-bubbles-aerated inside it should have. But this year I did it, and it got me on a very happy Christmas mood!
And since my fellow bloggers and visitors are constantly present in my life, in each post and each comment, you are now more than my friends, so it is only fair to share here the recipe and spread my Christmas Joy and traditions with all of you.
I wish I could send each one of you a little loaf, and make your day a little more “Christmasy” and “Panettoney”, but you get the idea, and from the heart, my wishes are for all of you to have the best Christmas Ever, and a 2007 full of happiness and joy, and love, and recipes, and posts, and blogs, and friends, of course!!
Ana

Note: Panettone is traditionally made with raisins and dried/candied fruits, however, some companies also make another version of it called “Chocottone”, which is basically the Panettone dough studded with little chocolate morsels, this way getting on the heart of the chocolate lovers-raisins haters.
Deep inside I think it should actually be called “Chocolate Christmas Bread”, as Panettone for me is the real thing, the one with the fruits. But some do like chocolate (including myself!!!), and this has certainly become a success during Christmas time.
Since some of the friends are most fond of chocolate rather the raisins, I divided the dough and made a few of the loaves with chocolate chips (both dark, milk, and white chocolate), and let me tell you, it sure was a success! (And Matheus loooooved it!!)


Panettone
(Adaptation of a recipe by Alvaro Rodrigues)

Starter
30 grams active dry yeast (or 90 grams fresh cake yeast)
100 grams sugar
250 ml warm water
300 grams all-purpose flour
Mix all ingredients in a large bowl with a mixer until you get smooth dough. Cover and let it rise until doubled in volume (about 1 to 1 ½ hours)

Basic Dough
180 grams butter
150 grams sugar
5 egg yolks
1 whole egg
1/3-cup canola oil
100 ml orange juice (or 75 ml juice and 25 ml cognac or rum)
1 teaspoon salt (omit if using salted butter)
2 teaspoons grated orange zest
1 teaspoon grated lemon zest (optional, I did not use)
About 600 grams all-purpose flour

Options for filling
Panettone: 300 grams raisins and 300 grams dried/candied orange peels (or other candied fruits of choice). I like to soak mine in either warm orange juice or rum (But don’t forget to drain the excess liquid before adding the fruit to the batter)
Chocottone
: 500 - 600 grams chocolate chips (dark, milk, white, or a combination of the three!)

Add first nine ingredients to the starter after it has risen. Beat with a mixer using the dough hook until everything is incorporated. Gradually add flour, beating with the hook, until you get a smooth and shiny dough, full of bubbles, and that doesn’t stick to the mixer anymore (sometimes you will use all the flour, sometimes less, so add it slowly and give the dough time to incorporate it after each addition. I first added 400 grams of the flour and then added the last 200 grams slowly until I got the smooth dough).
Put dough on a clean bowl, cover and let rise until doubled in volume, at least 2 hours.
After this rising, punch the dough and add your choice of filling, gently kneading the dough just until the fruits (or chocolate) get incorporated.
Divide dough into Panettone molds filling just until ½ of its height, cover and let rise one more time, until it doubles in volume or start to come out of the tops of the molds.
Bake the Panettone at 375 F until it is golden and brown on top.
I made mini loafs and they took about 25 minutes to bake. Keep an eye on them, but do not open the oven door before 20 minutes. They will be done when your kitchen start to get infused with the sweet bread aroma!

The recipe yields about 16 mini panettones or 2 medium ones.

Here is a picture of them rising inside the molds


And another pic, just after they came out of the oven. Cute!

Wednesday, December 20, 2006

Almond Tofee

Now, I have start my post by saying that if you like toffee, and you like almonds, and you like chocolate, then you absolutely have to try making this candy!
Oh my, it was one of the most delicious candies I have had, and since it was my first time at candy making, it was certainly the best I have made too! :o)
I got this recipe from Anna’s blog Cookie Madness, but I have it on my to try list since I saw a post about it, loaded with great comments about the recipe, back in 2002.
Why did I wait so long to try? I have no idea… at the time I first saw the recipe it was maybe because I was taking care of a newborn, but waiting so many years after that, oh well, there are really no good excuses but me being not as organized as I would like to be and postponing to try such delicious treat.
However, this weekend I finally made and I am sure glad I did! I was quite proud of myself, since it was my first trying with candy making and the toffee turned out perfect!
I got all prepared, bought the ingredients and a candy thermometer, told my husband and my son to go play somewhere else but the kitchen while I was concentrated with this, stayed there, with my nose super close to the pan, watching impatiently for the mercury to rise and the candy to work through its stages of ooey gooey “caramely” goodness. It took a bit of time, but it was worth every second of it.
The toffee is awesome, it tastes rich and buttery and the almonds inside just made it as good as can be. Then comes the chocolate, which melts beautifully on top of the warm candy in the pan and is then sprinkled with even more delicious almonds, which by the way were even better, as they were lightly toasted in the oven before. Let it cool, break into big chunks and…. Yummmmm, PERFECT!
So good, so good, words cannot describe!
And even though some people are afraid to give this kind of candy making a try, it was pretty simple to make. The thing here is to keep focused on the process and watch the temperature carefully; if you cook it properly the toffee will for sure set!
I made it last Sunday, we had some, I gave some for friends and the thing is all gone already. Matheus’ teachers got to enjoy this too and I have even been asked for the recipe. How good is that?!
I guess it did turn out right and certainly was a success! So much so that I am considering making some more in the next couple of days, you know, there are always some friends out there to share the goodies with, right?!
Consider giving this a try, it is a seriously delicious treat!
Thanks Anna, your toffee is perfect, its name says it all, and your blog is great too, I love reading about all those cookies of yours!
Enjoy!!
Ana

I am posting here the recipe, exactly how I got from Anna’s website, as her directions are extremely necessary for the makings of the toffee. And you can also check out her post and pictures at her yummy cookie blog, Cookie Madness!

Best-Ever Almond Toffee
1 1/2 cups sliced almonds, divided use
2 sticks butter (I use salted) -- 1/2 pound
1 cup granulated sugar
1/2 cup warm water
1/2 teaspoon salt
1/2 teaspoon baking soda
8 ounces good quality dark or milk chocolate, chopped

Preheat oven to 350 degrees F. Spread 1/2 cup of the almonds on a non-stick cookie sheet and bake for 6-8 minutes or until toasted and aromatic. Set aside.
Line a 13x9 inch pan with parchment paper and set next to stove.
Place butter in a heavy, medium sized (3 qt or larger) saucepan and melt over medium heat. When butter is mostly melted, stir in sugar, warm water and salt. Set a deep fry thermometer in pan, being careful that bulb is not touching bottom of pan. Cook mixture over medium heat, stirring once in a while (once or twice around), until it reaches 240 degrees F.
At 240 degrees, add the remaining 1 cup sliced almonds to sugar mixture. After adding almonds, stir constantly, keeping heat at medium, until mixture reaches 295 degrees F. If temperature is not rising at a slow and steady rate, raise heat a tiny bit until mercury starts rising. When mixture reaches 295 degrees F, immediately remove from heat and stir in baking soda. Pour into parchment lined pan. The mixture should be kind of a liquid blob at hit point and if you are on track, the pan will be clean when you dump the blog onto the parchment. Mixture will begin to firm, and butter may pool and separate, Do not pour off any excess butter. Do not panic, because if you cooked the toffee to 295, your candy should set. Sometimes it just takes longer.
Scatter chopped chocolate across top of hot almond mixture and let chocolate melt into and over the candy as candy firms. Using back of a spoon, spread melted chocolate evenly over candy. Crush your toasted almonds and sprinkle over melted chocolate. Let candy cool for 1/2 hour at room temperature. Transfer to refrigerator and chill for about 1 hour to firm chocolate.
When chocolate is set is set, lift candy from pan by grasping parchment. Break candy into large chunks.

Parmesan-Crusted Tilapia

This will be just a quick post before I come back here a little later with some pictures and recipes of my Christmas baking adventure this year!
Yes, since we didn’t travel to Brazil this time I ended up having more fun in the kitchen and baking some goodies to share with friends. Not much, but it was enough to keep me busy, and right now I am in the “rising process” of some Christmas Bread.
But these are for another post. Right now I want to leave you all with a quick and easy recipe that although quite simple is an extremely flavorful fish dish!
I made it once and we liked it sooo much that I didn’t even had time to photograph it, the boys were crazy about the fish so of course I ended up making it again. It is one of those simple things that when you make it makes you think “Why didn’t I think about that myself?!!!”.
It is a Rachel Ray recipe, a TV personality around here that most love but some hate. I don’t have a particular opinion about her, and although I don’t watch her show I have bought her magazine, which sometimes do come with some good recipes in it, this being a perfect example of it!
I served ours this time with some roasted veggies and spinach fettuccine. Hope you all like it too, and this is a good opportunity to try some recipe and at the same time keep our meals on the lighter side in between all those Christmas parties and gathering some of us have the pleasure to attend!
And I promise I will come back soon with some good recipes to share!
Ana

Parmesan-Crusted Tilapia
(Adapted from Rachel Ray Magazine)

¾ cups grated Parmesan cheese
1 teaspoon paprika
1 tablespoon chopped fresh parsley
4 tilapia fillets
Salt and pepper to taste
Olive oil for drizzling

Preheat oven to 400º. Combine cheese, paprika, parsley, salt and pepper to taste in a plate or bowl. Drizzle fish with olive oil, dredge in cheese mixture. Place on a baking sheet lined with foil or parchment paper and bake for 10 to 12 minutes or until fish is done. Serve with lemon slices/wedges!

Wednesday, December 13, 2006

Buttermilk Pie

This was the second of two experiments I did on a Buttermilk Pie recipe, proving clearly that our kitchens are more than susceptible to have a few disasters among the so happy successes we usually may have.
I decided to make a buttermilk pie but, although extremely simple and basically fool proof, the first recipe was an unhappy choice. Although it had the creaminess I was looking for, the taste was totally off. I don’t think I did anything wrong as the recipe for this kind of pie is pretty straight forward, but the combination of brown sugar and buttermilk was not the best one for me, and the color was a little too brownish for us, not very appetizing.
But since I am a persistent girl, I decided to give it a second try and make it my way. I invented, used the ingredients I felt would give the taste I was looking for and it was right on, I got a delicious and creamy pie that satisfied our dessert cravings taste wise and visually too!
I thought I had 1 ½ cups buttermilk, but when I went to make the recipe there was only one cup, so I used ½ cup of half-half I had in the fridge that needed to be used up. And also the second time I used white sugar and the flavor was indeed much better.
The pie had a flan taste and consistency, but was embedded in a crunchy piecrust. We all liked it, especially the husband, who is a big flan fan.
I used a nice organic whole-wheat crust that I bought at a local natural market, but you can use your crust of choice. And to be true, I think it would be even better if baked in a graham cracker crust, which is my favorite and first choice for most pies I bake.
However you chose to make it, I am sure most people would like this one. It was simple in flavor, but creamy and very tasty nonetheless.
Enjoy!
Ana

Buttermilk Pie
½ cup white granulated sugar
3 tbsp flour
1/4 tsp salt
3 large eggs
1 tsp vanilla extract
1 1/2 cups buttermilk (or 1 cup buttermilk and ½ cup half-half)
One piecrust or graham cracker crust

Preheat oven to 350F.
Combine all ingredients on a blender and mix until smooth. Pour over piecrust and bake for about 35 minutes. Cool completely before serving. You can serve chilled or at room temperature.

Monday, December 11, 2006

Creamy Farfalle

I am always searching for new pasta dishes to try, as both the husband and Matheus are truly fan of the stuff. We have been adventurous lately with the pasta recipes, and I actually like trying these different dishes, as I usually make it but sometimes end up cooking something else to make up for most part of my meal (Not a big fan of pasta, plus due to my stomach issues I need to limit my consumption of tomato products and cream, both products that my husband adores in his macaroni!)
Last Sunday I made Farfalle With Creamy Mushroom Sauce, which involves a mix of fresh mushrooms, an ingredient that although we enjoy the flavors, I don't use very often. I don't exactly know why, but I guess it is because it is something neither of us grew up eating, so I was not used to cook with it.
Anyways, I saw the recipe and picture at my favorite magazine and knew I was going to try this dish. It looked pretty and seemed to be easy to make, two big pluses in my style of cooking.
So I went ahead, made the dish, and it was a hit! Definitely easy and simple to make, came together fairly quickly, looked pretty on the plate and tasted very good. What else could you ask for?!
It sure does have some heavy cream (not much though) in the sauce, and I believe that you do need this ingredient to give you a good creaminess and smooth texture to the sauce. But the flavors here goes a lot deeper than the cream itself.
The sautéed shallots and garlic imparted great taste to the sauce, and then there was the earthiness of the mix of mushrooms (I used shitakes and creminis), which melded nicely into the onion mix. But the real improvement to me came when the white wine was added and the sauce was reduced. Wow, the flavors here were great, I could have added just this to the pasta and would have been happy with it.
The cream and cheese sure added a lot of flavor, and the parsley some freshness and color as well. A great combination of flavors, it looked like pasta from a restaurant, and tasted just as it should, without being heavy as some pasta dishes we get when eating out.
The husband said he would like it to have a little more sauce, but I found it to be a nice and flavorful dish as is, and all in all it was certainly a success!
Enjoy!
Ana

Farfalle with Creamy Wild Mushroom Sauce (Adapted from Cooking Light, December 2006)
1 pound uncooked farfalle (bow tie pasta)
1 tablespoon butter
12 ounces sliced mushrooms
1/2 cup chopped onion
1/3 cup finely chopped shallots
1 tablespoon minced garlic
1 1/2 teaspoons salt, divided
1/4 teaspoon freshly ground black pepper
1/4 cup dry white wine
2/3 cup whipping cream
1/2 cup (2 ounces) grated fresh Parmesan cheese
2 tablespoons chopped fresh parsley

Cook pasta according to package directions. Melt the butter in a large skillet over medium heat. Add mushrooms, onion, shallots, garlic, 1 teaspoon salt, and pepper; cook 12 minutes or until liquid evaporates and mushrooms are tender, stirring occasionally. Add wine; cook 2 minutes or until liquid evaporates, remove from heat. Add the cooked pasta, cream, cheese, and parsley, tossing gently to coat. Stir in the remaining 1/2-teaspoon salt if needed. You can garnish with minced fresh parsley, and then serve.
Yield: 8 servings

Sunday, December 10, 2006

Roasted Squash, yum!!

This was a dish I made this weekend and came out very good. I don’t have an actual recipe for it, but more a method of preparation for roasting the squash.
Butternut is by far my favorite of the winter squashes. It is sweet and creamy, and when roasted it gets mellow and better tasting yet. I really like this squash, especially when roasted and pureed into a soup, but baked like this, into chunks, it became so soft and intense in flavor that each cube provided the most pleasant taste sensations to my taste buds.
I peeled, deseeded, seasoned with olive oil, salt, and pepper, and roasted the squash at 400F for about 40 minutes. I threw in a diced red pepper into the oven with the squash at the last fifteen minutes of the baking time, just to get an extra flavor in there. The peppers got mellow and sweet, soft and delicious as only red bell peppers can get, plus the flavor went really well with the squash.
After roasting, the squash and peppers can be tossed with simple balsamic vinaigrette, to punch up the flavors even more. I then laid them on top of a bed of fresh spinach (seasoned with salt and pepper) and sprinkled with crumbled goat cheese.
The salad was delicious, tasty, and just talking about it is making my mouth water for some more.
I guess I will have to buy some more butternut squash this week!
Ana

Baked Pasta

Another weekend, and here I come with one more pasta dish... however, this was actually the recipe I made a couple Sundays ago. Yeah, I know, I have been a little slow with my postings, but I had so much going on this past week that among helping friends and taking my son to the doctor (winter is hard on the poor children… I hate cold weather!) I barely had time to get all my things done. But finally it seems that this week things will be better, and I sure have accumulated a few nice recipes to post.
Today it is Three Cheese Baked Pasta. Good, yummy, and if you like pasta as my husband does, then it is pure comfort food. He liked it a lot, and Matheus did too!
It is quite simple to make, and the flavors are the basic Italian ones, with the addition of cubes of provolone cheese that melt into little pockets of goodness throughout the cheesy baked dish. The ingredients blended together really well into an ooey gooey baked pasta concoction, which was easy to make and delicious to eat!
I love ricotta, and it makes for a good part of this dish, so I used my favorite, the homemade one. Make sure you use a good ricotta cheese here, as I am pretty sure it does make a difference.
The one ingredient that I don't actually think added much flavor wise to the dish were the sun-dried tomatoes. They kind of got lost into the sauce and you couldn't taste its flavor unless you bite into one. I guess I would prefer to have used my sun-dried tomatoes in another recipe where they could impart more of their great flavor and be more noticeable to my palate.
A basic baked pasta recipe, that brought happy smiles to the table in both my "boys" faces!
Ana

Three Cheese Baked Pasta (Adapted from Cooking Light, December 2006)
1 tablespoon olive oil
1 1/4 cups diced onion
1/3 cup diced carrot
4 garlic cloves
1/4 cup chopped sun-dried tomatoes (without oil)
1 1/4 teaspoons chopped fresh or 1/2 teaspoon dried thyme
2 (28-ounce) cans diced tomatoes, undrained
1 1/2 cups (6 ounces) grated fresh Romano cheese, divided
1 cup part-skim ricotta cheese
1 tablespoon chopped fresh parsley
1 large egg white, lightly beaten
1 pound uncooked penne
1 cup (4 ounces) diced provolone cheese
Cooking spray

Preheat oven to 400°.
Heat olive oil in a large nonstick skillet over medium heat. Add onion, carrot, cook 10 minutes or until onion is tender, stirring frequently. Add garlic; cook for 1 minute, stirring constantly. Add sun-dried tomatoes, thyme, and diced tomatoes; cook 25 minutes or until thickened, stirring occasionally.
Combine 1 cup Romano, ricotta, parsley, and egg white in a bowl.
Cook pasta according to package directions, omitting salt and fat. Drain; return pasta to pan. Add ricotta mixture to pan, stirring to coat. Add tomato mixture and provolone, tossing just until combined (do not over stir). Spoon pasta mixture into a 13 x 9-inch baking dish coated with cooking spray. Sprinkle with remaining 1/2 cup Romano. Bake at 400° for 25 minutes or until bubbly and top is browned.
Yield: 8 servings

Tuesday, December 05, 2006

Carrot Cake

Since I was in a row with the cake recipes, I will maintain the sequence and post another recipes I tried from Valentina's blog. Last post was the cookie recipe, and today is her Carrot Cake!
As the name states, it is really a moist cake, and very flavorful too! I liked the orange zest added to the batter; it gave the cake a subtle but yet delicious essence that complemented the carrots very well.
Another simple and easy recipe I made that was a success. With each day of cooking it is more and more obvious that simple foods and simple flavors are for sure the best ones!
Next I want to post here about the “Brazilian way” of making a carrot cake. It is even simpler but just as good! But this is another post yet to come. (Stay tuned, ‘cause I will have more cakes posted here!)
For today’s recipe, I have to admit that I didn’t make the frosting stated in the recipe. Although it sounded very good with the ricotta cheese being part of it, I opted for skiping this part as we were having the cake for breakfast, and particularly I do prefer my cake in the simplest form possible. However, I am pretty sure the frosting is delicious and will certainly make the cake taste even better.
Also, the cake asks for golden raisins, but I used dark ones, as it was the only kind I had at home.
For the picture I whipped a little bit of buttermilk glaze, just as the one I used for the pumpkin cake. And it was also good with this one!
So, for this cake you decide: there is the ricotta topping that came with the recipe, the delicious buttermilk glaze, and the more traditional cream cheese frosting. Well, it is clear that there is no need to have a “frostlees” cake with so many options to choose from, right?!
Great recipe, saved with the winners ones, because it will be repeated in a near future for sure!
Enjoy!!

Ana

By the way, you can take a look at Valentina’s picture and recipe here.

Moist Carrot Cake
(Adapted from a recipe from Delia Smith)

175grams brown sugar
2 eggs
120 ml oil
200 grams whole wheat flour
1 teaspoon baking powder
1 ½ teaspoon baking soda
1 teaspoon ground cinnamon
1 teaspoon ground nutmeg (I omitted this one)
1 teaspoon grated ginger (I omitted this too)
Zest of an orange
200 grams grated carrots
175 grams golden raisins

Frosting
250 grams ricotta cheese
20 grams sugar
2 teaspoons vanilla extract
1 tablespoon cinnamon, to sprinkle over the cake after it has been frosted

Syrup
Juice of ½ orange
1 teaspoon lemon juice
40 grams brown sugar

Preheat oven to 350 F (180C).
Cream the sugar, eggs, and oil for 2 minutes, until creamy. Add the flour, baking soda, baking powder, nutmeg, cinnamon, and ginger, beating just until incorporated. With a spoon, fold in the carrots, orange zest and raisins. Put mixture in a greased rectangular pan and bake for 30 minutes, or until a toothpick inserted comes out clean.
To make the frosting, mix all ingredients until fluffy. Keep refrigerated until ready to use.
To make the syrup, mix all ingredients until sugar dissolves completely. Pour the syrup over the top of the cake while still warm (you can poke some holes on top so the syrup can penetrate the cake). Let cake cool, frost and sprinkle with cinnamon.