Wednesday, February 21, 2007

Ratatouille Tart

The moment I saw this recipe I knew I had to try it. Oh my, this was SOOOOO good! I have no words to describe how tasty and yummy this tart is!
I made it today for lunch and just had to come here and post the recipe to share with you guys.
Cornmeal-Crusted Roasted Ratatouille Tart is full of delicious vegetables that are slightly roasted before the tart is assembled, which makes them moist and gives the tart a rich taste at the same time.
Super good, seriously, I looooved this recipe! The cornmeal crust was simple to make and very easy to work with, plus it was delicious! The corn taste complemented the vegetables really well, it was almost as if corn was another veggie in there; the crust was crispy all over, even on the bottom. Pre-baking the crust ensured it turned out crunchy and not soggy, even though the vegetables were nice and moist. Oh, and the recipe says to use a food processor, but since I don't have one I made my dough by hand and it turned out great (again, so yummy!!!).
Matheus loved this as well and even asked if I could repeat the recipe again this weekend! Yay! If I have everything on hand by Saturday, then why not, right?!!
As usual, I followed the recipe but made a few alterations based on what I had at home, but this time they were very minor changes: I used a mix of leeks and onions instead of shallots, and added some garlic to this sauteed onion thing; also, fontina cheese was used instead of mozzarella, and since I did not have fresh basil I sprinkled the veggies with a dried Italian herb mix. Oh, and for the crust I used 1/2 teaspoon kosher salt, and will do it again, as the crust turned out very flavorful this way.
I don't believe my changes were too significant in terms of altering the flavors at the end as the major ingredients were all in there, but I am pretty sure this would taste even better with the fresh basil in it. One thing I did was to sprinkle a bit of salt on each layer of veggies, before adding the remaining ingredients on top, just to make sure that each layer would get the proper amount of seasonings.
We really enjoyed this recipe today! It is perfect for a light lunch, although after 3 pieces I ended up not feeling as light as I should!
Enjoy!!
Ana


Cornmeal-Crusted Roasted Ratatouille Tart
(Recipe by Ellie Krieger)

Crust:
2/3 cup yellow cornmeal
1/3 cup whole-grain pastry flour
1/4 teaspoon salt
2 tablespoons butter
2 tablespoons canola oil
3 tablespoons water

Filling:
2 tablespoons plus 1 teaspoon olive oil
2 shallots, thinly sliced (about 1/3 cup)
Cooking spray
1/2 pound thinly sliced eggplant rounds (about 1/3 medium eggplant)
1 zucchini, sliced into 1/8-inch rounds (about 8 ounces)
3 medium tomatoes, sliced thinly
1/4 teaspoon salt
1/4 teaspoon freshly ground black pepper
3 ounces shredded part-skim mozzarella cheese
1/4 cup shredded fresh basil leaves
1/4 cup freshly grated Parmesan

For the crust:
Preheat the oven to 350 degrees F.
Combine cornmeal, pastry flour, and salt in the bowl of a food processor. Pulse to incorporate. Add butter and oil and pulse about 20 times, until mixture resembles small pebbles. Add water and pulse until mixture forms a loose dough. Remove dough from processor and press into bottom and about 1/8-inch up the sides of a 9-inch tart pan with a detachable rim. Press aluminum foil into the bottom and sides of the pan on top of the dough and weigh down with uncooked rice or pie weights. Place tart pan on a baking sheet and bake for 10 minutes. Remove from oven and remove rice and foil. Return to oven and bake for an additional 5 minutes, or until no longer shiny and wet. Remove from oven and let cool.

For the filling: Increase the oven to 400 degrees F. Heat 1 teaspoon of olive oil in a nonstick pan over medium heat; saute shallots until soft, about 5 to 6 minutes. Spray 2 baking trays with cooking spray. Arrange the eggplant, zucchini and tomato slices on the trays in a single layer and brush with the remaining olive oil. Season with salt and pepper, and roast the vegetables until soft but not browned, about 15 minutes. Remove the vegetables from oven and cool.

Lower the oven temperature to 350 degrees F. Lay the eggplant slices in 2 layers on the bottom of tart; cover with 1/3 of the mozzarella cheese and some of the shredded basil. Add the zucchini and shallots, top with another 1/3 of the mozzarella and basil, then the tomatoes. Top with rest of the mozzarella cheese and the Parmesan. Bake for 25 to 30 minutes, or until cheese is melted and vegetables have further wilted. Remove from oven, let cool for 5 minutes. Serve warm.


Friday, February 16, 2007

Ice Cream Torte

This was one of the goodies I made while visiting my family on our last trip to Brazil. It is a very creamy and yummy molded ice cream dessert that went very well with the hot days we were getting while there. Everyone really enjoyed this treat, so I thought I would share it here with you all!
Yummy and creamy (and sweet too!), a sweetened condensed milk ice cream sort of concoction, what is not to like about this one, huh?!! Make it soon or save the recipe for the summer, whichever is the case I am pretty sure most people will like this too!
Enjoy!
Ana


Ice Cream Torte

1 can sweetened condensed milk
1 cup milk
1 cup heavy cream, chilled (for those in Brazil, use a can of very cold “crème de leite”)
3 eggs, yolk and whites separated
18 tablespoons water
8 tablespoons chocolate mix (such as Nesquick) – you can use cocoa if you prefer
2 tablespoons sugar

First of all, melt about ½ cup sugar in a small saucepan under low flame until it turns into caramel. Carefully pour the caramel on a bundt (those with the hole in the middle) pan, moving it around so that the caramel coats the bottom of the pan completely.
Set the pan aside, and while the caramel sets up put the sugar, water, and cocoa (or chocolate powder of choice) in a small sauce pan and cook over medium heat until it comes to a boil. Let boil for 1 minute, remove from heat and pour the chocolate sauce over the caramel on the already prepared bundt pan. Put the bundt pan in the freezer.

To make the ice cream: In a saucepan mix together the condensed milk, the milk, and the 3 egg yolks. Cook it over medium-low heat, stirring constantly, until it reaches a boil. Remove from heat and let it cool (don’t worry; it will be sort of a thin mixture).
Meanwhile, beat the egg whites until soft peaks, gradually add 4 tablespoons of sugar and keep beating until stiff peaks are reached.
As the first mixture has cooled, mix into it the heavy cream and then fold in the egg white meringue, carefully mix the two together until everything is incorporated.
Pour this ice cream mixture into the prepared bundt pan and return it to the freezer. Let it freeze at least for 4 hours. When ready to serve, take the pan from the freezer and let it defrost a little (about 10 minutes should be enough), or you can set the bottom of the pan on some how water, just so that it will be easy for the ice cream to be released from the pan. Invert the pan onto a platter to unmold the ice cream and serve.

Note: I tried to explain the method of preparation for this dish but I am not sure I was clear enough, so if you have any doubts please contact me and I can try to explain better. It is not difficult to make!

Thursday, February 15, 2007


Stuffed Peppers

It sounds funny, but I believe that almost everyone who cooks on a frequent basis has a recipe for stuffed peppers. I am one of those and I have got to say that I literally threw my old recipe away after making this version last week.
I liked it a LOT and was not the only one to give it five stars at our home. Matheus loved it and made sure I saved the leftovers for him, and my husband could not stop saying that this was definitely a good recipe that I should save and make again.
Yay, lunch that day was definitely a success!!
And the recipe is simple to make, not much fuss and you have yourself a very nutritious and delicious meal in no time! (not counting the baking time, of course...!)
I loved the idea of using bulgur in the filling, it gave the meat a great taste and texture as well. And the addition of spinach and zucchini added a bonus of veggies and vitamins to the dish.
I sort of followed the recipe and made my own alterations, but and am posting the original one here for you all.
The things I did different was to use ground Turkey instead of beef, and I adapted the quantities for the three of us, making 4 stuffed pepper halves (1 was saved for Matheus to have the next day!!). Also, I used my favorite pasta sauce for the tomatoes part (just poured the sauce over the peppers had been stuffed), and added about 1/4 cup of tomato sauce to the meat mixture as I didn't want the filling to be too dry (although the zucchini does add some moisture to it too!).
I also blanched my peppers for a couple of minutes, just to make sure they would be on the softer side after baked, and they came out just perfect for us, husband even mentioned that (yes, he really liked the recipe too!). And since I had boiled some water, I dropped a little ball of meat mixture in it to cook, just so that I could taste the seasonings and see if it had enough salt and spices in it. Easy to taste and help you adjust the seasonings to your like.
We had ours with brown rice since it was cold outside and we wanted a nice homemade meal to warm us up, but I am pretty sure a green salad on the side would also be great with this.
This was definitelly the best stuffed pepper I have had (Husband said that too!), and it will be repeated here for sure. And if you end up trying, I hope you like it as much as we did!
Enjoy!
Ana

Greek Style Stuffed Peppers
(Recipe by Ellie Krieger)


1 pound lean ground beef
1 (10-ounce) package frozen chopped spinach, thawed and squeezed dry
1 medium zucchini, coarsely grated (about 2 cups)
1 small onion, minced (about 1 cup)
1/2 cup bulghur
1 egg, lightly beaten
1/2 teaspoon dried oregano
1/2 teaspoon salt
Freshly ground black pepper
3 red bell peppers, halved lengthwise, cores and ribs removed
2 (14 1/2-ounce) cans low-sodium stewed tomatoes, finely chopped
1/3 cup crumbled feta cheese ( I used goat cheese which was what I had on hand. It was delicious with goat cheese!!)

Preheat oven to 350 F.
In a large bowl combine the beef, spinach, zucchini, onion, bulghur, egg, oregano, salt and a few grinds of pepper. Mix until thoroughly combined.
Arrange the pepper halves cut side up in a 9 by 13-inch baking dish and fill each pepper half with the meat mixture. Pour the tomatoes over the peppers and sprinkle with the feta cheese. Cover with foil and bake for 30 minutes. Uncover and bake until the meat mixture is completely cooked and the peppers are tender, about 25 minutes longer.
Yield: 6 servings.

Wednesday, February 14, 2007

Happy Valentine's Day!!!

As with other holidays Valentine's Day has also turned into something more commercial than anything else, plus everyday is supposed to be a time for showing our fondness for the closest ones. However, who doesn't like celebrations, and being remembered by getting a lovely card?
There is always room for some love, and a heart filled day is certainly always welcome at our home!
By the way, the little hearts on the picture above were some croûtons I made to have with our "romantic" fondue dinner for three (we all love one another, so why not include Matheus in the fun, right?!), so yummy and cheesy, just perfect for the cold days we have been getting lately! (You can get my favorite fondue recipe here)
Ohh, and look what I got from my dear husband, he couldn't have gotten me a better bouquet!
I love him SO MUCH!!
Hope you all had a great and lovely time today too!
Ana

Monday, February 12, 2007

Guess what?!
A couple weeks outside my sweet home and guess what was the first thing I whipped up in my beloved kitchen??? Muffins, of course!
I have said it before, and don't get tired of repeating, I love muffins!! It is so easy and quick to make it, and you can fill them up with all sorts of yummy and healthy things, what is not to like!?!?!
Two days after we got home I just had to make something and whipped up a batch of Apricot Muffins for breakfast! They turned out really good, not very sweet just as we like, and the apricots were just right on, smooth texture and the right amount of fruity sweetness to the little cakes. I got a little inspired when making them and decided to throw in some white chocolate chips I had in the pantry and let me tell you, the white chocolate complemented the apricot flavor really well, I would certainly add the chips when making these muffins again.
They were delicious warm right out of the oven, however they got a little on the dry side after sitting for a day. We had them the next day with a warm glass of milk and it was no problem at all, just as good, but warming the muffins before eating is actually a good idea... I just didn't do it because we are still microwaveless.
Oh, and besides providing us with a nice whole wheat breakfast treat, the muffins also gave me a chance to try my little silicone muffin cups, which by the way worked perfectly well!!
Ana


Whole Wheat Apricot Muffins
(Adapted from Cooking Light)

1
cup all-purpose flour
2/3 cup whole wheat flour
1/2 cup sugar
1 1/4 teaspoons grated orange rind ( I omitted, didn't have at home)
1 teaspoon baking soda
1/4 teaspoon salt
1 cup low-fat buttermilk
1/4 cup butter, melted
1/2 teaspoon vanilla extract
1 large egg
1 cup finely chopped dried apricots
Cooking spray

Preheat oven to 375 F.
Lightly spoon flours into dry measuring cups; level with a knife. Combine flours, sugar, orange rind, baking soda, and salt in a large bowl, stirring with a whisk; make a well in center of mixture. Combine buttermilk, butter, vanilla, and egg; add to flour mixture, stirring just until moist. Fold in apricots.
Spoon batter into 12 muffin cups coated with cooking spray. Bake at 375° for 15 minutes or until muffins spring back when touched lightly in center. Remove muffins from pan, and place on a wire rack.

Saturday, February 10, 2007

We are back home, but a little piece of our hearts is still in Brazil...
It is not easy to come back, every time is the same thing, sad, the goodbye at the airport is hard, and then we get home and there is this huge feeling that we are already desperately missing our family that stayed behind...
But, life is going on, now and here, so we have to take a deep breath and keep going, happy and more than anything, strong.
The trip to Brazil was great!!! We had a ton of fun, spent our time exclusively with our family members, and ate a lot of yummy Brazilian foods!
We brought back with us not only a bag full of Brazilian goodies that will help us stay connected for the months to come, but also a lot of good memories from the awesome time we had there!
It was sunny and warm, the peak of summertime. We went to the pool, had lots of fresh fruit juices, ice cream, and even had time to go fishing with my dad, as you can see above!
This time though I didn't cook much... 21 days was definitely not enough to do all I wanted to, but it certainly was fun. I made a few things while there, some I photographed, but a few others I forgot... including two yummy cakes that I will definitely make again here at home and share the recipe here for sure.
And talking about pictures, here are some of them:

This is a dessert that is as easy to make as it is delicious to eat! It is called "Torta de Sorvete" or Ice Cream Pie, a creamy summertime concoction that everyone enjoyed!


These little cookies brought us back wonderful memories as we sat down to eat them with some coffee. It is a recipe from my grandmother that I haven had in many years... You need real cream from cow's milk (called "Nata" in Brazil) to make them. Nowadays not many people have fresh cow's milk, so it is hard to collect the "nata", but one of my aunts has a cow in her farm and saved some for me so we could make these delicious "Nata Cookies" again! Ohhh, how much I miss my grandma...


One of my Dad's favorite desserts (after Rice Pudding!), Bread Pudding, Brazilian style of course!


Another great moment of my stay in Brazil was a few days before I returned, when I met Karen (from Kafkanapraia) and Miki (from coisascabecagorda). It was super cool! I loved meeting them, they were very nice and we had a great time talking and eating all the delicious things they made! Miki made a wonderful fruit salad with gelatin and vodka that I could not stop eating and can't wait to make myself, and with so many cookies and cakes I didn't even get a chance to try Karen's great looking cocoa cake, which I will also make here at home soon!
Miki was a great host and Karen was such a delicate girl; I had the best time that afternoon learning more about two of the many friends I made through my beloved Kitchen Space!


And can you believe that besides all the yummy goodies I even got little gifts!?! Aren't they really nice?!?!
Thanks Karen and Miki for such a nice time! I just can't wait to go back to Brazil and see you both again!


All in all we had a wonderful time in Brazil, among family and friends, what else can you ask for right?!!
Today I went back to the kitchen and already whipped up two new recipes that turned out really good and will certainly be posted this week to come, and I will also post a few of the recipes from the pictures above! By the way, I have them in both languages, so if my Brazilian friends want them in Portuguese, just let me know!
Ana

Sunday, January 21, 2007

Hello!!

Just a quick post to say Hi and that we got here safe and sound! The airplane trip was nice and calm, everything went well, and now it is just a matter of getting used to the three hour difference.
The weather is nice and warm here, Hooray to summer!! If only it would stop raining for a bit... but being in the warm continent is already great!
The family keep us busy all the time, and although I wanted to post a picture today, I wasn´t able too, I simply forgot to bring my camera... I cannot believe I forgot it, but at least my sister has one and I am going to borrow it soon!!
I made a dessert for today and if it comes out pretty I will snap a pic and post the recipe to share here with you! Oh yes, even away from home I manage to find a friendly kitchen to have some fun, and of course keep my cooking skills sharpened!
Ana

Tuesday, January 16, 2007

Yummy Bread!

I definitely haven't posted enough this year, and I truly miss posting here, but things did go a little crazy this past few weeks around here and I barely had time to sit and plan my menus and figure out the recipes I wanted to try. Plus, since we are going for a few weeks we had to enter the mode "eat what is in the fridge before we leave" and our meals has been quick and simple, but tasty nonetheless!
And although I didn't post much, I just had to come here and give you all a Hello and a quick post before we leave tomorrow, because I know I won't be able to post anything in the next few days.
So, here comes a very simple and quick recipe, which I made not just because I had ham and cheese in the fridge, but also because it looked pretty and delicious at Valentina's blog, which got it originally from Silvia's blog Doce Casinha.
This is a recipe that comes from Silvia's mother in law, and let me tell you, the lady does have great taste! The dough was super easy to work with and after baked it turned into a nice light and fluffy bread, very pleasant to eat. Both my husband and my son loved it, I made half the recipe and got about 5 nice "rolls" filled with ham, cheese, a bit of oregano, and sun dried tomatoes, so be prepared because the whole recipe provides a nice yield.
I didn't know how to properly name the bread, I have so much in my little head going right now that I couldn't think of a way to describe this sort of filled and rolled bread in English, so I am sorry... any suggestion will be appreciated! I guess it is sort of a "Stromboli", right? (not really sure though)
Thank you both so much, Valentina's for pointing me to Silvia's nice blog, and of course thanks Silvia for sharing your great family recipe with us all!!
I used ham and cheese, but the combinations for fillings here are as varied as can be. I bet it would be also good with turkey and cheese, or even spinach and ricotta/some other cheese, yum! (I am planning to try different fillings when I came back from Brazil!)
You know a good recipe when it is very forgiving and let you adapt with the ingredients you have in your own "in-need-to-clean-fridge"!!
Enjoy, and see you all soon, from the sunny and "full of family" Terra Brasilis!!
Ana

Oh, and if you would like to take a peek, the original recipe is posted in Portuguese here.

Silvia's Mother In Law Bread

About 2 pounds all-purpose flour (more or less depending on your dough)
3 eggs
1 tablespoon sugar
1 cup oil
14 grams active dry yeast (2 packages)
2 cups warm water
Salt to taste

For the filling I used shredded mozzarella cheese, pieces of ham, and some sun dried tomatoes that I soaked in some warm water to plump up. I also sort of seasoned my filling with a little bit of salt, pepper, and dried oregano. But use your imagination, because there are definitely other combinations that would taste great here!

Dissolve the yeast in the warm water, add the sugar and let sit for about 5 minutes. Add oil, eggs and salt and mix well. Little by little add the flour until you get a nice workable dough that doesn't stick to your hands. Put dough into a clean bowl and let it rise until it doubles in volume (1 to 2 hours).
Open dough into a rectangle, sprinkle with your filling of choice and roll it like a cake roll. Brush top with egg wash and bake at 350 until golden on top.

Thursday, January 11, 2007

First Post of the Year + A “Flousse” Recipe + News!

Wow, it is my first post this year and it is already January 11th… oh My!
I am sorry I haven’t posted in this much time, because I really do miss sharing my recipes and reading your comments here.
I have certainly not stopped cooking, we actually went out to eat this year just once, and no, we don’t do take out at our home. So yes, I have been cooking! The thing is that I haven’t made many new recipes and most of the time I have been whipping up our meals very creatively based on what’s in the fridge and pantry, so no actual recipes but some tasty stuff for sure!
Then comes the news: we are going to Brazil! Yay, my son is more than happy and ultra excited to go! My husband decided he reeeeeally wanted to go last week, bought tickets and we are going next week. Can you believe it? Well, I still cannot, it was everything decided at the very last moment, and although I am definitely happy to go I am not really sure about the sudden aspect of deciding thing. I am a person who likes to plan things, which obviously my dear hubby is not. But then again, we are happy to be visiting the family!
So, besides school starting back, taking care of life, and figuring out what to take on our trip, I have also been dealing with a leak problem in our fridge. Oh boy, it seems things like to happen all at once, doesn't it?!
My house is a bit messy right now, but It seems things are getting under control, I believe the fridge problem has been resolved, so now we just have to keep an eye on it to make sure everything is really fine. I was glad we found out this problem while we were still here and now hope everything will get fixed before we leave!
After the introduction about what is going on around here, I present you the first recipe I am posting this year, which was actually made in 2006, but are the intentions that count, right?!!

So, you read the title and now might be asking: “Flousse?”
Oh yes, you didn’t read it wrong, after all a combination of "flan" with "mousse" could only end up in a "Flousse”, right?
This one was a basic culinary creation of a “blog-friend”, Dadivosa! She posted a couple of flousse recipes already and this was the first one we tried (other ones are on the endless “to-try list”). And, I must mention here that it was deeply approved at our home!!
Both my husband and my son had seconds on dessert this weekend, plus the husband really commented on the flavors of this one, something he doesn't usually does, unless it is one of his favorite desserts (usually sweet condensed milk pudding or a very sweet dessert, he likes his sweets!).
The making of this flousse is super simple, easy to the core, and the flavors you get are huge. Really, the blackberry flavors come through in a way that it fills your mouth with the creaminess of the yogurt and a deep berry flavor from the fruit, very yummy!
I used a mix of blueberries and blackberries for the sauce I made on top, which was simply frozen fruit cooked with a bit of water and some sugar. I cooked it for just a few minutes, until the fruit became soft and the sauce thickened a bit. Pour over the flousse and enjoy!
Dadivosa, thanks for this light and flavorful dessert! Did I mention it is light?? Oh yeah, extra points for the flousse! This would be a perfect dessert for the summer months, but we enjoyed it even though it is a bit cold outside. Well, who can resist a flousse?
Ana

Recipe by Dadivosa. You can see the original recipe, which was posted in Portuguese, here.

Blackberry Flousse

1 package blackberry jell-o
250 grams (1/2 pound) frozen blackberries
12 grams unflavored gelatin
5 tablespoons water
2 cups plain yogurt
1 1/2 cups warm water
2 tablespoons Splenda sweetener, or sugar to taste.

Put the frozen blackberries and the 1 1/2 cups water in a small pan and heat over medium heat just until the fruit becomes soft.
Hydrate the unflavored gelatin in the 5 tablespoons of water in a small pan, let stand 5 minutes. Put pan over low heat and warm it up just until the gelatin is completely dissolved, but don't let it boil. (You can also put the gelatin and water into a glass bowl and warm it up in the microwave).
In the blender add the warm fruit with the water, the dissolved unflavored gelatin, the blackberry jell-o
(The powder), and the sweetener of choice. Whiz the mixture until well mixed and there is almost no noise coming from the seeds. Add the yogurt and blend a little more to incorporate. Taste and adjust the sugar if necessary. Pour mixture into a gelatin mold, or into individual cups and put in the fridge to cool and set up. Note: you can pass the mixture through a sieve when pouring it on the molds. But just like my friend Dadivosa, I too enjoy to have the little seeds throughout my flousse; it adds a very interesting and pleasant (in my opinion) contrast to the creaminess of the dessert. And no one else seemed to be bothered by them here at my home.

Serve with sauce of choice, or even a chocolate ganache I only though about this when I was eating my piece... it should be good to pair the flousse with chocolate, right? What do you think?

Sunday, December 31, 2006


HAPPY NEW YEAR!!!
Wishing to all my friends a 2007 full of excitements, happiness, good health, and lots and lots of love!
Thanks for this awesome year in the "blogworld", 2006 was great and I bet 2007 will be even better!
Love you all!
Ana

Ps: I got the puzzle as a Christmas gift from my son, cute!! (It took me 3 hours to finish it, on Christmas Day!)

Friday, December 22, 2006

Panettone

I bet the majority of my fellows Brazilians have come across a Panettone during Christmas time at least once in his/her lifetime. Panettone, a traditional kind of Italian Christmas Bread, is very popular not only around Europe but also very known and loved in Brazil.
We used to have it every single Christmas at my mother’s and grandmother’s houses, and there were always a few loaves around grandma’s house, as she would get them as presents from different friends and family members. And it didn't matter how many she got, we would polished them off before the school break was over; it was just delicious to eat Panettone for breakfast, afternoon tea, or with milk as a late night snack!
It seems that Panettone is now becoming more and more popular in the US, as it was hard to find it when I first got here, 7 years ago, and it was absurdly costly. Now we can find a variety of more affordable breads, not only in specialty Italian stores, but also in warehouses, and even some larger grocery stores (which may even have their own brand of it!)
This year, although we are not going to Brazil for Christmas, I wanted to keep the tradition and have some Panettone around. And since we were staying and celebrating with friends, why not then making some loaves and sharing with them, right?
So I did! I baked a few mini Panettone loaves and gave away to the teachers and closer friends, just to share with them a little of my Christmas traditions.
It is a long process to bake Panettone, since it has to rise a couple of times, but it sure was fun to make these little gems and I was totally proud of my bread by the end of the day. I have also made them last year, but this time used a different recipe and it came out just right; perfect and beautiful, with a great taste and texture!
Panettone has its own characteristic texture to it, and it is not the easiest thing to conquer the sort of flaky-full-of-little-tiny-bubbles-aerated inside it should have. But this year I did it, and it got me on a very happy Christmas mood!
And since my fellow bloggers and visitors are constantly present in my life, in each post and each comment, you are now more than my friends, so it is only fair to share here the recipe and spread my Christmas Joy and traditions with all of you.
I wish I could send each one of you a little loaf, and make your day a little more “Christmasy” and “Panettoney”, but you get the idea, and from the heart, my wishes are for all of you to have the best Christmas Ever, and a 2007 full of happiness and joy, and love, and recipes, and posts, and blogs, and friends, of course!!
Ana

Note: Panettone is traditionally made with raisins and dried/candied fruits, however, some companies also make another version of it called “Chocottone”, which is basically the Panettone dough studded with little chocolate morsels, this way getting on the heart of the chocolate lovers-raisins haters.
Deep inside I think it should actually be called “Chocolate Christmas Bread”, as Panettone for me is the real thing, the one with the fruits. But some do like chocolate (including myself!!!), and this has certainly become a success during Christmas time.
Since some of the friends are most fond of chocolate rather the raisins, I divided the dough and made a few of the loaves with chocolate chips (both dark, milk, and white chocolate), and let me tell you, it sure was a success! (And Matheus loooooved it!!)


Panettone
(Adaptation of a recipe by Alvaro Rodrigues)

Starter
30 grams active dry yeast (or 90 grams fresh cake yeast)
100 grams sugar
250 ml warm water
300 grams all-purpose flour
Mix all ingredients in a large bowl with a mixer until you get smooth dough. Cover and let it rise until doubled in volume (about 1 to 1 ½ hours)

Basic Dough
180 grams butter
150 grams sugar
5 egg yolks
1 whole egg
1/3-cup canola oil
100 ml orange juice (or 75 ml juice and 25 ml cognac or rum)
1 teaspoon salt (omit if using salted butter)
2 teaspoons grated orange zest
1 teaspoon grated lemon zest (optional, I did not use)
About 600 grams all-purpose flour

Options for filling
Panettone: 300 grams raisins and 300 grams dried/candied orange peels (or other candied fruits of choice). I like to soak mine in either warm orange juice or rum (But don’t forget to drain the excess liquid before adding the fruit to the batter)
Chocottone
: 500 - 600 grams chocolate chips (dark, milk, white, or a combination of the three!)

Add first nine ingredients to the starter after it has risen. Beat with a mixer using the dough hook until everything is incorporated. Gradually add flour, beating with the hook, until you get a smooth and shiny dough, full of bubbles, and that doesn’t stick to the mixer anymore (sometimes you will use all the flour, sometimes less, so add it slowly and give the dough time to incorporate it after each addition. I first added 400 grams of the flour and then added the last 200 grams slowly until I got the smooth dough).
Put dough on a clean bowl, cover and let rise until doubled in volume, at least 2 hours.
After this rising, punch the dough and add your choice of filling, gently kneading the dough just until the fruits (or chocolate) get incorporated.
Divide dough into Panettone molds filling just until ½ of its height, cover and let rise one more time, until it doubles in volume or start to come out of the tops of the molds.
Bake the Panettone at 375 F until it is golden and brown on top.
I made mini loafs and they took about 25 minutes to bake. Keep an eye on them, but do not open the oven door before 20 minutes. They will be done when your kitchen start to get infused with the sweet bread aroma!

The recipe yields about 16 mini panettones or 2 medium ones.

Here is a picture of them rising inside the molds


And another pic, just after they came out of the oven. Cute!

Wednesday, December 20, 2006

Almond Tofee

Now, I have start my post by saying that if you like toffee, and you like almonds, and you like chocolate, then you absolutely have to try making this candy!
Oh my, it was one of the most delicious candies I have had, and since it was my first time at candy making, it was certainly the best I have made too! :o)
I got this recipe from Anna’s blog Cookie Madness, but I have it on my to try list since I saw a post about it, loaded with great comments about the recipe, back in 2002.
Why did I wait so long to try? I have no idea… at the time I first saw the recipe it was maybe because I was taking care of a newborn, but waiting so many years after that, oh well, there are really no good excuses but me being not as organized as I would like to be and postponing to try such delicious treat.
However, this weekend I finally made and I am sure glad I did! I was quite proud of myself, since it was my first trying with candy making and the toffee turned out perfect!
I got all prepared, bought the ingredients and a candy thermometer, told my husband and my son to go play somewhere else but the kitchen while I was concentrated with this, stayed there, with my nose super close to the pan, watching impatiently for the mercury to rise and the candy to work through its stages of ooey gooey “caramely” goodness. It took a bit of time, but it was worth every second of it.
The toffee is awesome, it tastes rich and buttery and the almonds inside just made it as good as can be. Then comes the chocolate, which melts beautifully on top of the warm candy in the pan and is then sprinkled with even more delicious almonds, which by the way were even better, as they were lightly toasted in the oven before. Let it cool, break into big chunks and…. Yummmmm, PERFECT!
So good, so good, words cannot describe!
And even though some people are afraid to give this kind of candy making a try, it was pretty simple to make. The thing here is to keep focused on the process and watch the temperature carefully; if you cook it properly the toffee will for sure set!
I made it last Sunday, we had some, I gave some for friends and the thing is all gone already. Matheus’ teachers got to enjoy this too and I have even been asked for the recipe. How good is that?!
I guess it did turn out right and certainly was a success! So much so that I am considering making some more in the next couple of days, you know, there are always some friends out there to share the goodies with, right?!
Consider giving this a try, it is a seriously delicious treat!
Thanks Anna, your toffee is perfect, its name says it all, and your blog is great too, I love reading about all those cookies of yours!
Enjoy!!
Ana

I am posting here the recipe, exactly how I got from Anna’s website, as her directions are extremely necessary for the makings of the toffee. And you can also check out her post and pictures at her yummy cookie blog, Cookie Madness!

Best-Ever Almond Toffee
1 1/2 cups sliced almonds, divided use
2 sticks butter (I use salted) -- 1/2 pound
1 cup granulated sugar
1/2 cup warm water
1/2 teaspoon salt
1/2 teaspoon baking soda
8 ounces good quality dark or milk chocolate, chopped

Preheat oven to 350 degrees F. Spread 1/2 cup of the almonds on a non-stick cookie sheet and bake for 6-8 minutes or until toasted and aromatic. Set aside.
Line a 13x9 inch pan with parchment paper and set next to stove.
Place butter in a heavy, medium sized (3 qt or larger) saucepan and melt over medium heat. When butter is mostly melted, stir in sugar, warm water and salt. Set a deep fry thermometer in pan, being careful that bulb is not touching bottom of pan. Cook mixture over medium heat, stirring once in a while (once or twice around), until it reaches 240 degrees F.
At 240 degrees, add the remaining 1 cup sliced almonds to sugar mixture. After adding almonds, stir constantly, keeping heat at medium, until mixture reaches 295 degrees F. If temperature is not rising at a slow and steady rate, raise heat a tiny bit until mercury starts rising. When mixture reaches 295 degrees F, immediately remove from heat and stir in baking soda. Pour into parchment lined pan. The mixture should be kind of a liquid blob at hit point and if you are on track, the pan will be clean when you dump the blog onto the parchment. Mixture will begin to firm, and butter may pool and separate, Do not pour off any excess butter. Do not panic, because if you cooked the toffee to 295, your candy should set. Sometimes it just takes longer.
Scatter chopped chocolate across top of hot almond mixture and let chocolate melt into and over the candy as candy firms. Using back of a spoon, spread melted chocolate evenly over candy. Crush your toasted almonds and sprinkle over melted chocolate. Let candy cool for 1/2 hour at room temperature. Transfer to refrigerator and chill for about 1 hour to firm chocolate.
When chocolate is set is set, lift candy from pan by grasping parchment. Break candy into large chunks.

Parmesan-Crusted Tilapia

This will be just a quick post before I come back here a little later with some pictures and recipes of my Christmas baking adventure this year!
Yes, since we didn’t travel to Brazil this time I ended up having more fun in the kitchen and baking some goodies to share with friends. Not much, but it was enough to keep me busy, and right now I am in the “rising process” of some Christmas Bread.
But these are for another post. Right now I want to leave you all with a quick and easy recipe that although quite simple is an extremely flavorful fish dish!
I made it once and we liked it sooo much that I didn’t even had time to photograph it, the boys were crazy about the fish so of course I ended up making it again. It is one of those simple things that when you make it makes you think “Why didn’t I think about that myself?!!!”.
It is a Rachel Ray recipe, a TV personality around here that most love but some hate. I don’t have a particular opinion about her, and although I don’t watch her show I have bought her magazine, which sometimes do come with some good recipes in it, this being a perfect example of it!
I served ours this time with some roasted veggies and spinach fettuccine. Hope you all like it too, and this is a good opportunity to try some recipe and at the same time keep our meals on the lighter side in between all those Christmas parties and gathering some of us have the pleasure to attend!
And I promise I will come back soon with some good recipes to share!
Ana

Parmesan-Crusted Tilapia
(Adapted from Rachel Ray Magazine)

¾ cups grated Parmesan cheese
1 teaspoon paprika
1 tablespoon chopped fresh parsley
4 tilapia fillets
Salt and pepper to taste
Olive oil for drizzling

Preheat oven to 400º. Combine cheese, paprika, parsley, salt and pepper to taste in a plate or bowl. Drizzle fish with olive oil, dredge in cheese mixture. Place on a baking sheet lined with foil or parchment paper and bake for 10 to 12 minutes or until fish is done. Serve with lemon slices/wedges!

Wednesday, December 13, 2006

Buttermilk Pie

This was the second of two experiments I did on a Buttermilk Pie recipe, proving clearly that our kitchens are more than susceptible to have a few disasters among the so happy successes we usually may have.
I decided to make a buttermilk pie but, although extremely simple and basically fool proof, the first recipe was an unhappy choice. Although it had the creaminess I was looking for, the taste was totally off. I don’t think I did anything wrong as the recipe for this kind of pie is pretty straight forward, but the combination of brown sugar and buttermilk was not the best one for me, and the color was a little too brownish for us, not very appetizing.
But since I am a persistent girl, I decided to give it a second try and make it my way. I invented, used the ingredients I felt would give the taste I was looking for and it was right on, I got a delicious and creamy pie that satisfied our dessert cravings taste wise and visually too!
I thought I had 1 ½ cups buttermilk, but when I went to make the recipe there was only one cup, so I used ½ cup of half-half I had in the fridge that needed to be used up. And also the second time I used white sugar and the flavor was indeed much better.
The pie had a flan taste and consistency, but was embedded in a crunchy piecrust. We all liked it, especially the husband, who is a big flan fan.
I used a nice organic whole-wheat crust that I bought at a local natural market, but you can use your crust of choice. And to be true, I think it would be even better if baked in a graham cracker crust, which is my favorite and first choice for most pies I bake.
However you chose to make it, I am sure most people would like this one. It was simple in flavor, but creamy and very tasty nonetheless.
Enjoy!
Ana

Buttermilk Pie
½ cup white granulated sugar
3 tbsp flour
1/4 tsp salt
3 large eggs
1 tsp vanilla extract
1 1/2 cups buttermilk (or 1 cup buttermilk and ½ cup half-half)
One piecrust or graham cracker crust

Preheat oven to 350F.
Combine all ingredients on a blender and mix until smooth. Pour over piecrust and bake for about 35 minutes. Cool completely before serving. You can serve chilled or at room temperature.

Monday, December 11, 2006

Creamy Farfalle

I am always searching for new pasta dishes to try, as both the husband and Matheus are truly fan of the stuff. We have been adventurous lately with the pasta recipes, and I actually like trying these different dishes, as I usually make it but sometimes end up cooking something else to make up for most part of my meal (Not a big fan of pasta, plus due to my stomach issues I need to limit my consumption of tomato products and cream, both products that my husband adores in his macaroni!)
Last Sunday I made Farfalle With Creamy Mushroom Sauce, which involves a mix of fresh mushrooms, an ingredient that although we enjoy the flavors, I don't use very often. I don't exactly know why, but I guess it is because it is something neither of us grew up eating, so I was not used to cook with it.
Anyways, I saw the recipe and picture at my favorite magazine and knew I was going to try this dish. It looked pretty and seemed to be easy to make, two big pluses in my style of cooking.
So I went ahead, made the dish, and it was a hit! Definitely easy and simple to make, came together fairly quickly, looked pretty on the plate and tasted very good. What else could you ask for?!
It sure does have some heavy cream (not much though) in the sauce, and I believe that you do need this ingredient to give you a good creaminess and smooth texture to the sauce. But the flavors here goes a lot deeper than the cream itself.
The sautéed shallots and garlic imparted great taste to the sauce, and then there was the earthiness of the mix of mushrooms (I used shitakes and creminis), which melded nicely into the onion mix. But the real improvement to me came when the white wine was added and the sauce was reduced. Wow, the flavors here were great, I could have added just this to the pasta and would have been happy with it.
The cream and cheese sure added a lot of flavor, and the parsley some freshness and color as well. A great combination of flavors, it looked like pasta from a restaurant, and tasted just as it should, without being heavy as some pasta dishes we get when eating out.
The husband said he would like it to have a little more sauce, but I found it to be a nice and flavorful dish as is, and all in all it was certainly a success!
Enjoy!
Ana

Farfalle with Creamy Wild Mushroom Sauce (Adapted from Cooking Light, December 2006)
1 pound uncooked farfalle (bow tie pasta)
1 tablespoon butter
12 ounces sliced mushrooms
1/2 cup chopped onion
1/3 cup finely chopped shallots
1 tablespoon minced garlic
1 1/2 teaspoons salt, divided
1/4 teaspoon freshly ground black pepper
1/4 cup dry white wine
2/3 cup whipping cream
1/2 cup (2 ounces) grated fresh Parmesan cheese
2 tablespoons chopped fresh parsley

Cook pasta according to package directions. Melt the butter in a large skillet over medium heat. Add mushrooms, onion, shallots, garlic, 1 teaspoon salt, and pepper; cook 12 minutes or until liquid evaporates and mushrooms are tender, stirring occasionally. Add wine; cook 2 minutes or until liquid evaporates, remove from heat. Add the cooked pasta, cream, cheese, and parsley, tossing gently to coat. Stir in the remaining 1/2-teaspoon salt if needed. You can garnish with minced fresh parsley, and then serve.
Yield: 8 servings

Sunday, December 10, 2006

Roasted Squash, yum!!

This was a dish I made this weekend and came out very good. I don’t have an actual recipe for it, but more a method of preparation for roasting the squash.
Butternut is by far my favorite of the winter squashes. It is sweet and creamy, and when roasted it gets mellow and better tasting yet. I really like this squash, especially when roasted and pureed into a soup, but baked like this, into chunks, it became so soft and intense in flavor that each cube provided the most pleasant taste sensations to my taste buds.
I peeled, deseeded, seasoned with olive oil, salt, and pepper, and roasted the squash at 400F for about 40 minutes. I threw in a diced red pepper into the oven with the squash at the last fifteen minutes of the baking time, just to get an extra flavor in there. The peppers got mellow and sweet, soft and delicious as only red bell peppers can get, plus the flavor went really well with the squash.
After roasting, the squash and peppers can be tossed with simple balsamic vinaigrette, to punch up the flavors even more. I then laid them on top of a bed of fresh spinach (seasoned with salt and pepper) and sprinkled with crumbled goat cheese.
The salad was delicious, tasty, and just talking about it is making my mouth water for some more.
I guess I will have to buy some more butternut squash this week!
Ana

Baked Pasta

Another weekend, and here I come with one more pasta dish... however, this was actually the recipe I made a couple Sundays ago. Yeah, I know, I have been a little slow with my postings, but I had so much going on this past week that among helping friends and taking my son to the doctor (winter is hard on the poor children… I hate cold weather!) I barely had time to get all my things done. But finally it seems that this week things will be better, and I sure have accumulated a few nice recipes to post.
Today it is Three Cheese Baked Pasta. Good, yummy, and if you like pasta as my husband does, then it is pure comfort food. He liked it a lot, and Matheus did too!
It is quite simple to make, and the flavors are the basic Italian ones, with the addition of cubes of provolone cheese that melt into little pockets of goodness throughout the cheesy baked dish. The ingredients blended together really well into an ooey gooey baked pasta concoction, which was easy to make and delicious to eat!
I love ricotta, and it makes for a good part of this dish, so I used my favorite, the homemade one. Make sure you use a good ricotta cheese here, as I am pretty sure it does make a difference.
The one ingredient that I don't actually think added much flavor wise to the dish were the sun-dried tomatoes. They kind of got lost into the sauce and you couldn't taste its flavor unless you bite into one. I guess I would prefer to have used my sun-dried tomatoes in another recipe where they could impart more of their great flavor and be more noticeable to my palate.
A basic baked pasta recipe, that brought happy smiles to the table in both my "boys" faces!
Ana

Three Cheese Baked Pasta (Adapted from Cooking Light, December 2006)
1 tablespoon olive oil
1 1/4 cups diced onion
1/3 cup diced carrot
4 garlic cloves
1/4 cup chopped sun-dried tomatoes (without oil)
1 1/4 teaspoons chopped fresh or 1/2 teaspoon dried thyme
2 (28-ounce) cans diced tomatoes, undrained
1 1/2 cups (6 ounces) grated fresh Romano cheese, divided
1 cup part-skim ricotta cheese
1 tablespoon chopped fresh parsley
1 large egg white, lightly beaten
1 pound uncooked penne
1 cup (4 ounces) diced provolone cheese
Cooking spray

Preheat oven to 400°.
Heat olive oil in a large nonstick skillet over medium heat. Add onion, carrot, cook 10 minutes or until onion is tender, stirring frequently. Add garlic; cook for 1 minute, stirring constantly. Add sun-dried tomatoes, thyme, and diced tomatoes; cook 25 minutes or until thickened, stirring occasionally.
Combine 1 cup Romano, ricotta, parsley, and egg white in a bowl.
Cook pasta according to package directions, omitting salt and fat. Drain; return pasta to pan. Add ricotta mixture to pan, stirring to coat. Add tomato mixture and provolone, tossing just until combined (do not over stir). Spoon pasta mixture into a 13 x 9-inch baking dish coated with cooking spray. Sprinkle with remaining 1/2 cup Romano. Bake at 400° for 25 minutes or until bubbly and top is browned.
Yield: 8 servings

Tuesday, December 05, 2006

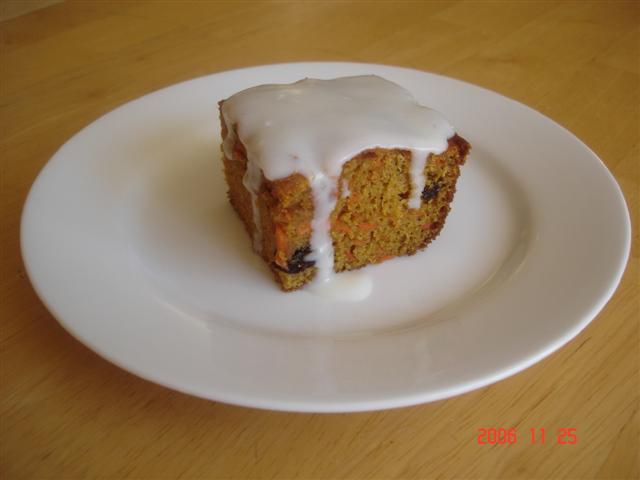
Carrot Cake

Since I was in a row with the cake recipes, I will maintain the sequence and post another recipes I tried from Valentina's blog. Last post was the cookie recipe, and today is her Carrot Cake!
As the name states, it is really a moist cake, and very flavorful too! I liked the orange zest added to the batter; it gave the cake a subtle but yet delicious essence that complemented the carrots very well.
Another simple and easy recipe I made that was a success. With each day of cooking it is more and more obvious that simple foods and simple flavors are for sure the best ones!
Next I want to post here about the “Brazilian way” of making a carrot cake. It is even simpler but just as good! But this is another post yet to come. (Stay tuned, ‘cause I will have more cakes posted here!)
For today’s recipe, I have to admit that I didn’t make the frosting stated in the recipe. Although it sounded very good with the ricotta cheese being part of it, I opted for skiping this part as we were having the cake for breakfast, and particularly I do prefer my cake in the simplest form possible. However, I am pretty sure the frosting is delicious and will certainly make the cake taste even better.
Also, the cake asks for golden raisins, but I used dark ones, as it was the only kind I had at home.
For the picture I whipped a little bit of buttermilk glaze, just as the one I used for the pumpkin cake. And it was also good with this one!
So, for this cake you decide: there is the ricotta topping that came with the recipe, the delicious buttermilk glaze, and the more traditional cream cheese frosting. Well, it is clear that there is no need to have a “frostlees” cake with so many options to choose from, right?!
Great recipe, saved with the winners ones, because it will be repeated in a near future for sure!
Enjoy!!

Ana

By the way, you can take a look at Valentina’s picture and recipe here.

Moist Carrot Cake
(Adapted from a recipe from Delia Smith)

175grams brown sugar
2 eggs
120 ml oil
200 grams whole wheat flour
1 teaspoon baking powder
1 ½ teaspoon baking soda
1 teaspoon ground cinnamon
1 teaspoon ground nutmeg (I omitted this one)
1 teaspoon grated ginger (I omitted this too)
Zest of an orange
200 grams grated carrots
175 grams golden raisins

Frosting
250 grams ricotta cheese
20 grams sugar
2 teaspoons vanilla extract
1 tablespoon cinnamon, to sprinkle over the cake after it has been frosted

Syrup
Juice of ½ orange
1 teaspoon lemon juice
40 grams brown sugar

Preheat oven to 350 F (180C).
Cream the sugar, eggs, and oil for 2 minutes, until creamy. Add the flour, baking soda, baking powder, nutmeg, cinnamon, and ginger, beating just until incorporated. With a spoon, fold in the carrots, orange zest and raisins. Put mixture in a greased rectangular pan and bake for 30 minutes, or until a toothpick inserted comes out clean.
To make the frosting, mix all ingredients until fluffy. Keep refrigerated until ready to use.
To make the syrup, mix all ingredients until sugar dissolves completely. Pour the syrup over the top of the cake while still warm (you can poke some holes on top so the syrup can penetrate the cake). Let cake cool, frost and sprinkle with cinnamon.

Tuesday, November 28, 2006

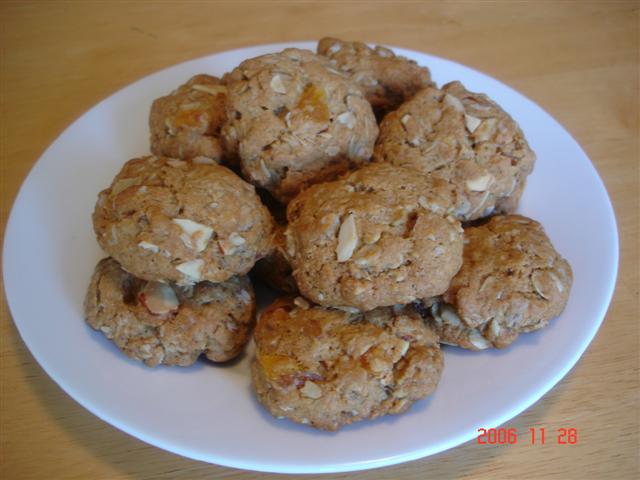
One of the Best Oatmeal Cookies Ever!

I mentioned cake recipes being posted this week, and there is still a couple more to come. But first I had to come here and post about these cookies I tried today. They were the absolutely BEST!
So, before I keep going I need to thank my friend Valentina, because this recipe was an adaptation of a recipe she posted on her blog, Trem Bom. Thanks Valentina!!
The recipe is for Oatmeal Cookies with Almonds and Apricots, and really, these were one of the best cookies I tried lately; they hit the spot for a nice afternoon treat and at the same time are filled with healthy and wholesome ingredients.
Oatmeal and whole-wheat flour are paired with some butter and brown sugar; deliciously chewy chopped apricots and slivered almonds are added to the batter finishing up the goodness with the yummiest combination of all! I guess other dried fruits and nuts could be used in many different combinations here, but these were ingredients I had on hand and to be true, it was so good that I am not even thinking about modifying this recipe any longer.
The base of the cookie was just perfect, simple but yet flavorful, and held it together nicely without being dry. The cookies came out nicely browned and crispy on the outside, with a consistent inside, making, in my opinion, for the perfect healthy cookie!
And if you have kids around you too might be wondering if this would work with chocolate chips inside… well, being the chocoholic I am this is definitely what I am going to try next, and I bet they are going to be great!
I loved the texture, the crisp and crunchy outside, and was really surprised with how nice and soft the apricots got during baking; it was truly delicious. I used sliced almonds and really liked that they became crispy and toasty in the oven, giving the cookies a slight crunch without interfering with the cookie as whole, as some big chunks of almonds sometimes do.
These cookies were not only delicious but also super easy to make; a great recipe that will certainly be repeated here many and many times to come!
By the way, Valentina’s original recipe is posted in Portuguese at her blog. I made a few adaptations myself, and that is what I am translating and posting in my kitchen space, but you can certainly take a peek at the original recipe here. And even if you don’t understand the language, it is still worth to take a look over the great collection of recipes and pictures that she has posted there!
Ana

Oatmeal Cookies with Almonds and Apricots

1 ¼ cups oatmeal
1 ½ cups whole-wheat flour
½ cup all-purpose flour
½ cup brown sugar
½ cup chopped dried apricots
1 teaspoon baking soda
½ cup toasted sliced almonds
1 stick of butter (113 grams / 8 tablespoons), melted
1 egg, slightly beaten

Preheat oven to 325F.
Add dry ingredients in a bowl, including almonds and apricots. Add melted butter and egg and mix well until everything is well incorporated.
Shape dough into balls and place on a cookie sheet. Bake for about 18 minutes or until golden and delicious!

Even Matheus' army guys agreed that these cookies were worth fighting for!

Monday, November 27, 2006

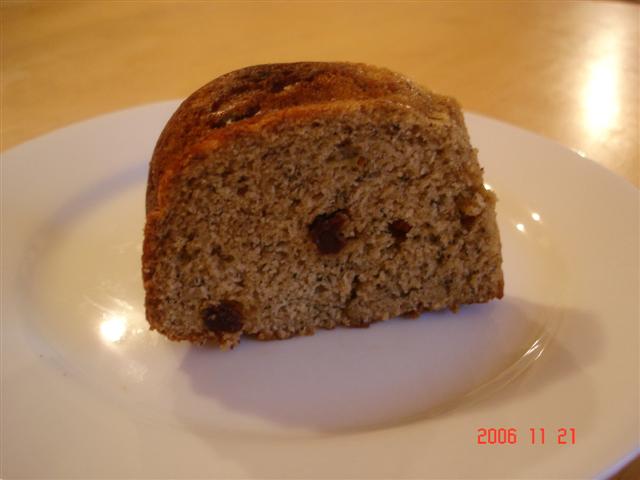
Banana Cake

It seems every time I want to make some healthy cake for breakfast we all agree to make it a banana cake! If it is not cake, then it is muffin, and which one is the favorite around here? Oh yes, banana muffins!!
I had three very ripe bananas sitting on the counter last week and decided to make a cake on an afternoon. What a great idea it was. We had cake for snack and on the next couple days for breakfast, and the cake was not just very moist but deliciously tasty too!
I sort of created the recipe based on what I had on hand and on previous cake recipes I made. And since it came out so good I wrote down the recipe later on so that I could post it here and share with you all!
The picture is definitely not the prettiest one, but I have to say that the cake was one of the best I have made!
Simple, easy and so good! Perfect when you have excess of bananas, or just when that little cake craving hits on the afternoon but you just want some comforting flavors without ruining the healthy eating habits you are so hardly trying to conquer.
The boys here raved about this one, I hope you like it too! Oh, and I used raisins (per Matheus request), but chocolate chips would be just as good here!!
Ana

Simple Banana Cake

About ½ cup raisins soaked in some warm water or apple juice (just to make them plump!)
1 ½ cups whole wheat flour
½ cup all-purpose flour
½ teaspoon salt
1 teaspoon baking powder
1 teaspoon baking soda
1 teaspoon ground cinnamon
½ cup brown sugar
4 tablespoons butter (1/4 cup), at room temperature
1 teaspoon vanilla
2 eggs
3 very ripe bananas
½ cup buttermilk

Preheat oven 350F.
With a mixer, beat butter and sugar until creamy. Add vanilla, eggs, bananas, and buttermilk and beat until well mixed. Add flour, salt, baking powder, baking soda and cinnamon. Mix until everything is incorporated. Add raisins and mix with a wooden spoon.
Pour batter into a greased bundt pan and bake for about 30 to 35 minutes, or until it is golden and a toothpick inserted comes out clean.