
HAPPY HALLOWEEN!!
May all the kids have lots of fun, get lots of candy, and have a safe and happy halloween!!
Ana
May all the kids have lots of fun, get lots of candy, and have a safe and happy halloween!!
Ana
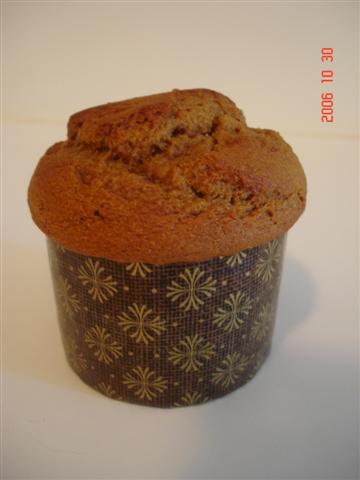 Pumpkin Bread
I roasted another small pumpkin today and got about 6 cups of pumpkin puree from it. Yumm!
Matheus asked for pumpkin soup, which we happily had for lunch and used about 2 cups of puree. Another cup was used in the recipe below, and the rest are already in the freezer, although they won’t stay there too long, as we are definitely in a pumpkin mood and I already have plans for them!
The recipe I am posting today and so easy, but very yummy! I adapted a recipe for Pumpkin Bread and came out with this one. Simple ingredients, and it is basically the same recipe I use for banana bread, just using pumpkin in its place.
I still want to get it a little bit spicier, but it is just a matter of adjusting the amounts and maybe even adding something else in there the next time I make it. I will probably be making this recipe one more time soon, so if I get better results I will certainly report back!
You can add chocolate chips, dried fruits, and even nuts to this bread. Chocolate goes surprisingly well with the pumpkin flavors, and another great combination are dried cranberries and walnuts; I think they really add another dimension of flavors and textures to the finished product!
Today I actually baked my cake (yes, I do think it had a cake texture, and still don’t see this or the banana breads as being actual breads… they are really cake to me!) into some mini panettone molds that I recently got from the Internet. Aren’t they cute??
I bought them to make panettone for the holidays (for ourselves and to give out to the dearest friends!), and couldn’t wait longer to see how something baked in them would look like. And I have to say that I really liked the looks of the pumpkin bread in it, and the molds do have a certain “holidayish” feel, don’t they?!
Enjoy!
Ana
Pumpkin Bread
3/4-cup brown sugar
1-cup pumpkin puree
1/4 cup canola oil
1/4 cup plain yogurt
1/2 teaspoon vanilla
1 egg
3/4 cup all-purpose flour
¾ cup whole-wheat flour
1 teaspoon ground cinnamon
A pinch of ground cloves
1/2 teaspoons salt
1/2 teaspoon baking soda
Cooking spray
Preheat oven to 350°.
In a bowl combine sugar, pumpkin, oil, yogurt, vanilla, and egg. Add flours, cinnamon baking soda, and salt to the bowl, and mix just until moist.
Pour batter into 1 greased loaf pan (8x4inches). Bake at 350° for 1 hour, or until a toothpick inserted comes out clean. Remove from pan after about 10 minutes and let cool on a wire rack.
 Espresso Cake
The recipe I am posting today if for a cake that really impressed me last week. It is a super simple and easy cake to make; however the flavor is intense and extremely pleasant.
Espresso Cake first called my attention because the recipe had another recipe that came with it where the leftover cake could be used to make truffles (more on this latter). Second I liked the idea of trying a new Chocolate Cake recipe!
And what a chocolate cake that was! Delicious, moist, and with a great flavor distributed all over it. I would say it is sort of a “grown up chocolate cake”, but have to add that Matheus just loved it too! He said it was one of the best chocolate cakes, which by the way is his favorite cake!
The husband liked it too, but being the “coffee hater” he is, he really pointed out that the coffee flavor was rather strong. I on the other hand really loved this cake, it was not too sweet, and ultra moist, which is a plus for me, and chocolate cakes in general. I have tried a few simple chocolate cake recipes and this one was by far the best one I made.
I will certainly make this cake again, even more because Matheus already asked for it and I also want to try the alternative recipe that came with it. And next time I make it I will probably use half coffee and half water, or maybe even substitute milk for the coffee, just to please my lovely hubby!
I got this recipe from a book called “Conscious Cuisine” by Cary Neff. The author is a spa chef and the book is full of delicious and nutritious recipes. I borrowed the book from the library and am now considering buying it for myself, as I liked and still want to try a few more recipes from it (and I already renewed it once, so I am running out of time with the library here!).
As I mentioned earlier, there is another recipe in the same book that uses this cake to make truffles! I loved the idea, but unfortunately didn’t have the time to make it sooner and when I went to take a look at the leftover cake, other than not having much left, it was also sort of smelling weird, with a pronounced prune smell and flavor. So I decided to toss it (oh no!) and will definitely make the truffles the next time I make the cake (which I am planning to do pretty soon). And I promise to post the recipe and reviews for that here, of course!
I used prune puree when I made my cake but you can also use applesauce, which I plan to try next (I opted for the prunes since it was a chocolate cake, and I do believe it contributed to the cake rich dark color too). You can easily make your own prune puree, but I saved time by using the baby food little jars, which for my surprise came in little plastic containers, with lids and all. I though they were really nice (usually when I was young there were only the glass jars…), and the prune puree was also very good!
Right now I will leave the cake recipe and some pictures here. It is a very nice cake, really really easy, super moist and incredibly tasty! Plus, another light recipe, each slice has only 80 calories, can you believe that? See why I loved the book? Yummy and healthy recipes, what else can you ask for?!
Ana
Espresso Cake
(Conscious Cuisine, by chef Cary Neff)
2/3 cup whole-wheat pastry flour
1/4 cup all-purpose flour
1 cup sugar
2/3 cup unsweetened cocoa powder
1 1/2 teaspoons baking powder
1/4 teaspoon baking soda
1/4 teaspoon salt
1/2 cup pureed prunes or unsweetened applesauce
3 large egg whites
1 teaspoon pure vanilla extract
1 cup coffee
Preheat the oven 350 degrees F. Spray a 9-inch cake pan with cooking spray and dust with additional cocoa powder, set aside.
In a medium bowl, combine the flours, sugar, cocoa, baking powder, baking soda, and salt; set aside. In another bowl, combine the prune puree, egg whites, vanilla, and coffee. Mix the wet ingredients into the dry ingredients and pour into the prepared cake pan.
Bake for 20 to 25 minutes or until a toothpick inserted in the middle of the cake comes out clean. Cool the cake in the pan on a wire rack for 10 minutes. Run a knife around the edge of the cake and invert onto a wire rack to cool completely.

And the prune puree I used.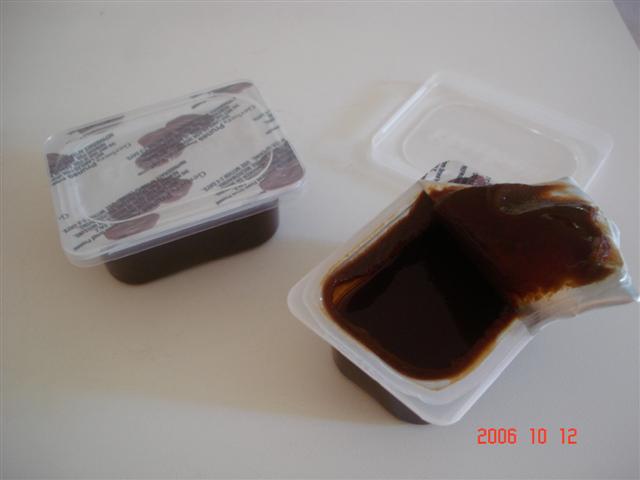
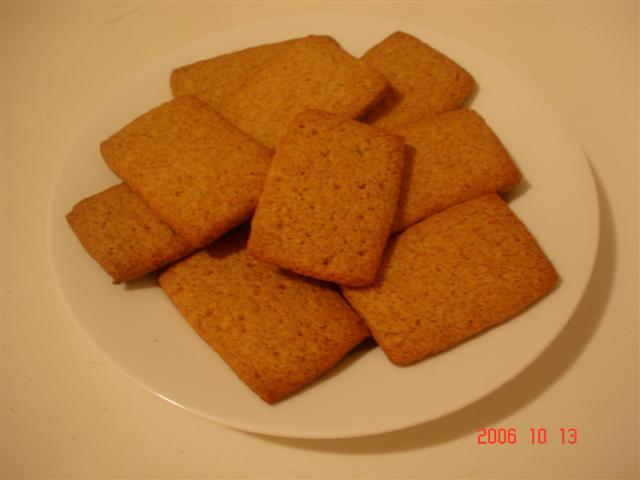 Graham Crackers
I have seen recipes, pictures, and more about homemade graham crackers, but every time I needed it I would run to the store and buy a box of them, and always trying to make sure I would get a reasonably healthy cracker, without much fat or sugars in it (that meant a lot of experimentation with healthy brands of the stuff – some were good, some not so great).
Last weekend though, I decided to try making my own Graham Crackers, and boy was it worth it!
Did it look like the boxed stuff? Not much, and I actually didn’t try to make it look like that in appearance either. Did it taste like the store bough ones? No…. it was MUCH BETTER and superior in taste than the boxed stuff. It was easy to make, used simple ingredients, but the end result was amazingly good. Definitely and for sure the best Graham Crackers I have had! And I do like graham crackers a lot, so that is where my enthusiasm about it comes from.
I actually tried two different recipes on that weekend, and it was a consensus that this one was the best. The other recipe I made used oil, as opposed to this one, which has butter in it, and the end result was simply “not a graham cracker” at all.
This recipe in the other hand was just right, it tasted great, and the texture was perfect, plus the dough really easy to work with. It did score a perfect 10 with Matheus and I, the official cracker’s consumers of the house!
If I have the time, I will certainly make these over and over again, when I need them for a recipe, or simply to eat with milk, which is how we ate almost our entire batch in two days… Really, I loved the crackers, and knowing it doesn’t have any of the HFCS, colorings, and added stuff of the commercial variety, is the best thing ever. I now can enjoy my crackers and feed them to my son without feeling guilty about it.
It is worth a try! And I am making more today, as both Matheus and I are already craving them again!!
Ana
Note: I changed the recipe slightly (with more than good results!), but you can find the original recipe here.
Homemade Graham Crackers
1/2 cup all-purpose flour
1 3/4 cups whole-wheat flour
1/2 cup sugar
1 teaspoon baking powder
1/2 teaspoon baking soda
1/2 teaspoon salt
1/2 cup (1 stick) cold butter, cut into pea-size bits
2 tablespoons honey
1/4 cup cold water
1 teaspoon vanilla extract
In a large bowl mix the flour, sugar, baking powder, baking soda, and salt. Add the cold butter and with a pastry blender, two knifes, or your fingers (as I did) work the butter into the flour until the mixture resembles coarse meal. Add the honey, water, and vanilla. Mix until the dough comes together in a ball.
Between 2 sheets of waxed paper or plastic wrap, roll the dough 1/2-inch thick. Chill for 1 hour, until firm. Set a rack in the middle of the oven and preheat to 350 degrees F. Lightly flour the dough and roll 1/8-inch thick. With a sharp knife or cookie cutter, cut into 2-inch squares. Arrange the crackers on nonstick or parchment lined cookie sheets. With a fork, prick several holes in each cracker. Bake for 15 minutes, until lightly browned at the edges. Remove from the oven and let cool in the pan.
Yield: 48 crackers
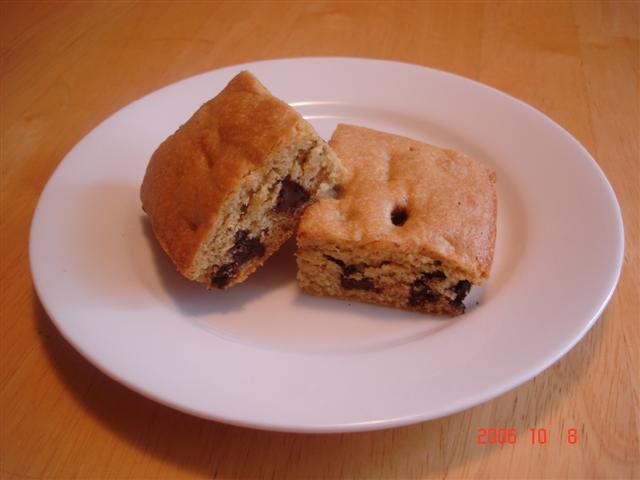 Peanut Butter Brownies
Matheus has a thing with the peanut butter grinder of our local natural store. He think is the coolest think to turn it on and see zillions roasted peanuts inside become peanut butter! Does he like peanut butter? Well, not really… but the always begs for me to buy some for him when we go to this particular store, just because of the machine. Most of the time I won’t buy it, but there are some days I end up giving in.
He is always hearing about peanut butter and pb&J sandwiches from his friends; he has tried it several times, but definitely doesn’t care for it at all. Neither my husband nor me grew up eating the stuff ourselves, so we are not crazy for it either (although we all like to eat salted peanuts!). I don’t even buy peanut butter, unless I am making one of my husband’s favorite ice creams, which by the way I should post here, in another post, of course.
The other day Matheus went to the grocery store with me and he had to have his little peanut butter/grinding machine fix, so I bought the smallest amount for him, and we all came home happy.
However, after one week, the thing was still sitting there, at the corner of the refrigerator shelf, completely isolated and ignored. So I decided to use it up in come sort of recipe, and hope that at least someone would eat my baked good.
I then found a recipe for Peanut Butter Chocolate Chip Brownies, and decided to give it a go, as Matheus declared that he would eat a cake with the peanut butter in it, and oh yes: “I love chocolate chips mommy”!
He indeed ate the brownies, and said he liked it, but nothing major as some other cakes and stuff I make that he really likes (one piece and then it was the brownie’s turn to be forgotten and left in the corner by itself…)
I have to say that this is not my favorite recipe. First of all, because to me brownies should be chocolate! It was actually interesting trying this recipe, as the texture of the finished cake (yes, to me this should be called cake, but anyways…) was exactly like that of a chocolate brownie: was moist and sort of fudgy in the middle. The peanut flavor however was very subtle, so I believe that the amount of PB could be increased here, or maybe adding some crushed peanuts to the batter might help too.
It is super easy and quick to make, so I will post the recipe and the improvement options for you all, in case someone would like to try it! ‘Cause for me… if I want brownies, I will make brownies, and by that I mean chocolate brownies, of course!
Oh, and before I go, I just wanted to say that the chocolate chips were a good complement here, and just as Matheus, I liked them too!
Ana
Peanut Butter-Chocolate Chip Brownies (Adapted from Cooking Light – Jun/00)
1 cup all-purpose flour
1/4 cup semisweet chocolate minichips
1/4 teaspoon baking soda
1/8 teaspoon salt
3/4 cup granulated sugar
1/4 cup packed dark brown sugar
1/4 cup creamy peanut butter
1 tablespoon vegetable oil
1 teaspoon vanilla extract
1 large egg
1 large egg white
Preheat oven to 350°.
Coat bottom of an 8-inch square baking pan with cooking spray (do not coat sides of pan).
Lightly spoon flour into a dry measuring cup; level with a knife. Combine flour, chocolate chips, soda, and salt in a bowl.
Combine sugars and remaining ingredients in a bowl; stir until well-blended. Add flour mixture, stirring just until blended. Spread batter in bottom of prepared pan. Bake at 350° for 25 minutes or until a wooden pick inserted in center comes out almost clean. Cool on a wire rack.
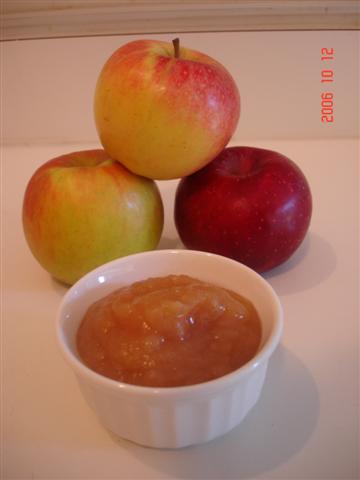 Apple Season, Yay!!
Every year during fall season, I can’t wait to go to the farmer’s market and come home with a basket full of apples! To eat, to make pie, muffins, and especially to make applesauce!
It is super simple, the easiest thing to make. You can use applesauce in many recipes, and I keep thinking I am going to use some in my baked goods (in my favorite apple muffins, for example), but we always end up eating most of it warm, right after it is ready and pureed, and the aroma of apples and cinnamon is still wonderfully infusing the kitchen!
As Matheus says, “This is the best applesauce, ever!” And, I have to agree!
Ana
Homemade Applesauce
Peel apples and cut them into chunks. Put apples and rest of ingredients in a big plastic container that can be microwaved. Cover with a lid, but open up one of the corners, so steam can escape.
Microwave the apples for 10 minutes, until they are very soft. Remove from microwave and puree to your desired consistency.
My Notes: the sweetest apples are the best for making this, as they break down easily and produce the moistest and sweetest applesauce. I always use a mix of apples for making applesauce, as I think the variety of flavors makes up for a tastier end product. But really, you can use whatever apples you like!
I use an immersion blender for pureeing the apples, and if I think there is too much liquid in the container, I will drain part of it into a cup and reserve. Then I puree the apples and if needed I can add more of the yummy liquid (and in case there is liquid leftover, well, then I drink it, it is delicious, just as hot mulled cider!)
Also, you can use the peels in here if you want to, and I usually do. If I opt for not using them in the applesauce, them I put them in a small Ziploc container, keep in the fridge, and eat them as a snack! The peels have a lot of goodies in them, vitamins, fiber, and I think they are just as tasty as the apples themselves!
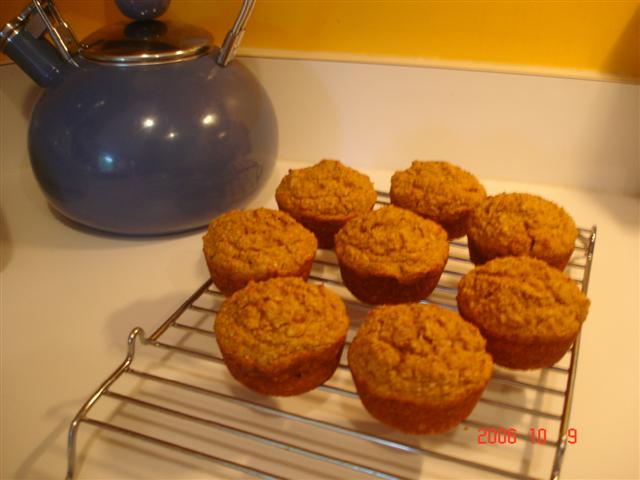 Pumpkin Oat Bran Muffins
Just a quick post… since we are still on the pumpkin subject, I decided to come here and report that I have tried the previously posted “Apple Oat Bran Muffins” with Pumpkin, and it is absolutely delicious too!!
I tried a couple of pumpkin recipes already and I think this might be my favorite so far! (besides the pumpkin muffin I posted last year) Matheus and my husband liked it too! Here is the Pumpkin version. Enjoy!!
Ana
Pumpkin-Oat Bran Muffins
1 1/2 cups oat bran
2/3 cup brown sugar
1/2 cup all-purpose flour
2 teaspoons baking powder
1 teaspoon cinnamon
A pinch of ground cloves
¼ teaspoon allspice
1/4 teaspoon salt
1 cup mashed pumpkin, cooked
1/2 cup milk (I used buttermilk)
1 egg
2 tablespoons vegetable oil
Combine dry ingredients in a large bowl (oat bran through salt) and stir well. In another bowl, mix together pumpkin and next three ingredients; stir well. Add to dry ingredients, stirring just until moistened. Spoon into greased muffin pans. Bake at 375 degrees for about 20 minutes.
Note: I got 9 muffins out of this batter.

Matheus and I have been in a “pumpkin kick” lately, we made pumpkin pie, pumpkin muffins (twice already!), and yesterday was Pumpkin Soup!
I usually make winter squash soup using either butternut or acorn squashes during the winter, not just because it is my absolutely favorite soup, but also because it is really easy to make, and Matheus like it too.
However, I have seen a couple soup recipes with the combination of either pumpkin or butternut squash and leeks, and both sounded so good that got me curious enough to go ahead and try it. And I am glad I did!
I don’t cook much with leeks, as it is not that affordable here where I live. However, I do love the flavor that the leeks impart to food, it is a mellow and sweet onion flavor, not strong, not overpowering, it is a smooth flavor that I truly enjoy, especially on soup bases.
In this soup I was amazed with how much the leeks went well with the pumpkin flavor, it was so good! And the combination of white pepper and nutmeg were just perfect with this soup, I really loved those flavors here! Thyme is an herb that goes really well with winter squashes in general, but you have to be cautious because it can sometimes be overpowering (I actually used half the amount asked in the recipe, because I have a strong thyme growing in my backyard).
This soup is super simple to make and the end result was really delicious! Smooth and creamy, tasty and rich, what else could you ask in a warm bowl of soup?
I have to say that I didn’t even added the half-and-half, and it was so great this way that I will probably not use it when I make it again. I used a little more pumpkin than the recipe stated (I wasn’t going to keep a tiny amount of pumpkin puree leftover, right?!), and I guess that the extra pumpkin made up for the richness lost with the omitted half-half. Oh, and I used olive oil instead of butter, and maybe not even 2 tablespoons of it.
I had the leftovers today for lunch and am already looking forward to making some more of this soup! And I don’t know if it is because he really likes the fall season, and pumpkins, and Halloween, but Matheus simply loved the soup too! When you hear a “Thank you mommy for making this yummy pumpkin soup”, then you know it is a keeper recipe and that it will certainly be made again, soon!
Ana
Cucina's Pumpkin Leek Soup (CLBB, posted by Darla - Dgeevanson)
4 Tablespoons butter
2 large leeks, white part only, cleaned and thinly sliced
2 teaspoons dried thyme
1/2 teaspoon freshly grated nutmeg
1 teaspoon kosher salt
1/4 teaspoon white pepper
2 cups pumpkin puree
4 cups vegetable broth (or chicken broth - not vegetarian then)
2 Tablespoons brown sugar
1 1/2 cups half and half
Garnish - dollops of sour cream, grated Monterey jack cheese, chives
In a large saucepan, heat burner and sauté the leeks for 8-10 minutes on low heat, stirring often. Leeks should be soft and lightly golden. Add the thyme, nutmeg, salt, white peper, pumpkin puree, chicken broth and brown sugar. Stir, cover and simmer for 15 minutes. Taste for seasoning. Add half and half and simmer another 10 minutes.
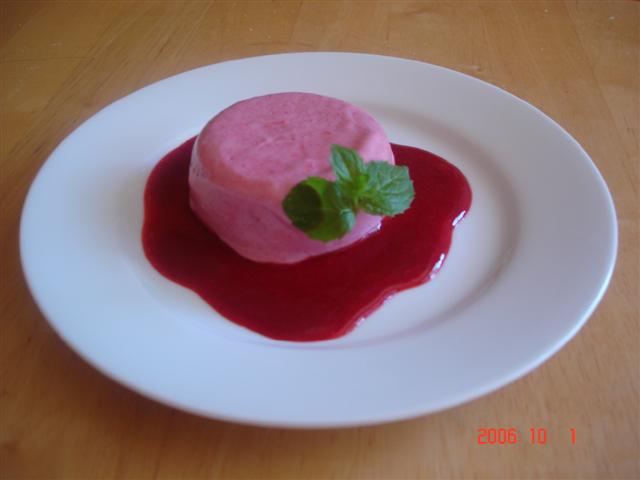 Frozen Raspberry Mousse
This is a super delicious recipe that I have made before and didn’t even get a chance to take a picture (yes, it was that good!).
I made it when it first appeared in the magazine, last year, and just had to make it this year again. Besides being so good, this one also presents very well when you have company, especially if you remember to save a few extra berries to garnish the plate (which of course I forgot…). It is not too hard, and you can make it in advance. I made it once when my mom and sister were visiting and they loved it as well!
It is a little more laborious to make than the recipes I usually make, but it is well worth the extra effort, as the end result is a cold, creamy and delectable dessert. Really yummy this one!
The recipe calls for dried egg whites, which I happen to keep in my pantry, but if you don’t have and don’t mind, you may substitute real whites here. Or, use those pasteurized egg whites, but make sure they are the whipping kind, as some of them will not whip up into a meringue.
You can make it with raspberries or with a combination of berries, as I have made before (using both strawberries and raspberries). And I believe blackberries would not only make for a pretty looking mousse but also a very tasty one. Even blueberries might work, which I want to try sometime, as they are my favorite berries.
This time I made half recipe and it worked very well. Oh, and I also divided mine into individual molds, instead of a big one.
Yummy, creamy, cold and satisfying, plus it is light too! I normally don’t put nutritional stats on my recipes, but this one is worth mentioning, as each serving has only 168 calories, with 3 grams protein and 6 grams fiber, nice, huh?!?!
Ana
Frozen Raspberry Mousse (Adapted from Eating Well)
6 cups fresh raspberries or two 12-ounce packages unsweetened frozen raspberries, thawed
1/4 cup confectioners' sugar or Splenda Granular (see Ingredient note)
2 tablespoons orange juice
1 teaspoon unflavored gelatin
8 teaspoons dried egg whites (see Ingredient notes), reconstituted in 1/2 cup warm water according to package directions (equivalent to 4 egg whites)
2/3 cup sugar
1/3 cup whipping cream
2 cups fresh raspberries, blueberries, blackberries and/or strawberries for garnish
Mint sprigs for garnish
Place a small mixing bowl in the freezer to chill for Step 5.
Puree raspberries in a food processor until smooth. Pass through a fine sieve set over a large bowl; discard seeds. Measure out 1 cup raspberry puree, whisk in confectioners' sugar (or Splenda), cover and set aside in the refrigerator for sauce.
Place orange juice in a small saucepan. Sprinkle in gelatin. Let soften for 1 minute. Place over low heat and stir until the gelatin has completely dissolved. Let stand for 5 minutes.
Meanwhile, beat reconstituted egg whites in a large mixing bowl with an electric mixer until soft peaks form. Gradually add sugar, beating until the meringue is stiff and glossy.
Beat cream in the chilled bowl until soft peaks form.
Add the melted gelatin to the remaining raspberry puree and whisk until blended. Set the bowl over a bowl of ice water and stir just until the mixture starts to thicken slightly, 5 to 10 minutes. Add one-fourth of the meringue to the raspberry puree and whisk until blended. Using a whisk, fold in the remaining meringue. With a rubber spatula, fold in the whipped cream. Scrape the mousse into a 6-cup metal bowl (or other decorative mold) or a 9-by-5-inch metal loaf pan. Cover with plastic wrap and foil and freeze until firm, at least 6 hours.
To serve, fill a bowl or basin (large enough to hold the mold comfortably) with very hot water. Run a knife around the edges of the mold. Quickly dip the mold in hot water, and then invert a serving platter over the top. Grasping the mold and platter, jerk downward several times. If the mousse does not release, dip in hot water again and repeat. Cut the mousse into wedges or slices. Serve with the reserved raspberry sauce and garnish each serving with a scattering of berries and a mint sprig.
Yield: 8 servings
 Shrimp and Orzo Pasta
Shrimp and Orzo with Cherry Tomatoes and Romano Cheese
(Adapted from Cooking Light – April/05)
1 cup uncooked orzo (rice-shaped pasta)
2 tablespoons olive oil, divided
3/4 teaspoon salt, divided
1/4 teaspoon black pepper, divided
1 pound medium shrimp, peeled and deveined
1 cup chopped onion
1 tablespoon minced garlic
1/4 teaspoon crushed red pepper
2 cups cherry tomatoes, halved
1/3 cup (about 1 1/2 ounces) grated fresh pecorino Romano cheese
1/3 cup chopped fresh basil
Cook the pasta according to package directions, omitting salt and fat.
While pasta cooks, heat 1 tablespoon oil in a large skillet over medium-high heat. Sprinkle 1/2 teaspoon of salt and 1/8 teaspoon of black pepper evenly over shrimp. Add shrimp to pan; cook 1 1/2 minutes on each side or until done. Remove from pan.
Add remaining 1 tablespoon olive oil to pan. Add onion, garlic, and red pepper; cook 2 minutes, stirring frequently. Add tomatoes, and cook 3 minutes or until tomatoes begin to soften, stirring occasionally. Stir in pasta and shrimp; cook 1 minute or until thoroughly heated. Remove from heat, and stir in 1/4 teaspoon salt, 1/8 teaspoon black pepper, cheese, and basil.
Yield: 4 servings (serving size: 1 1/4 cups)
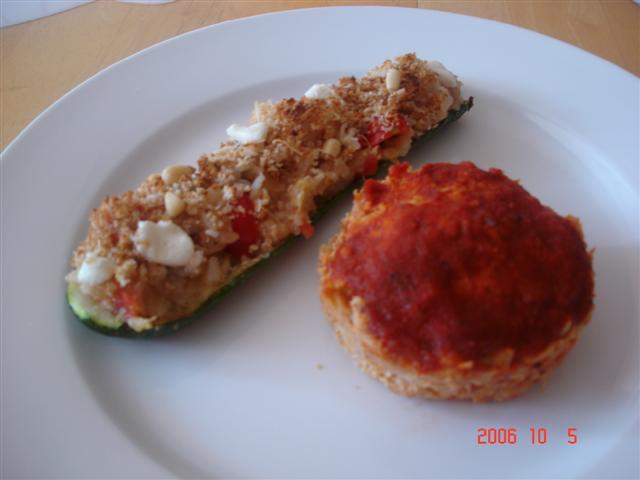
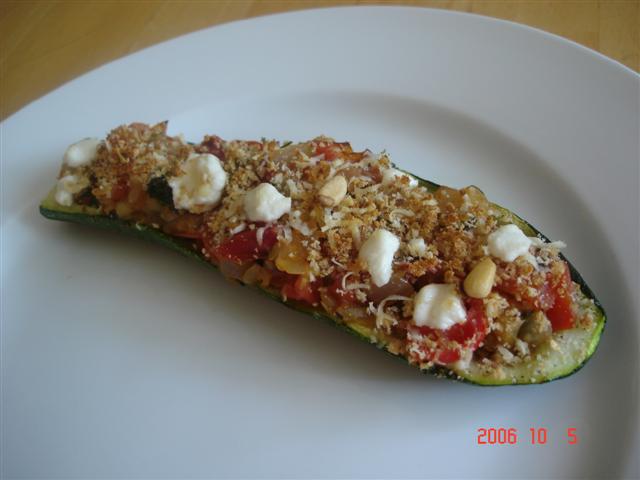 Stuffed Zucchini ala Ana’s mode!
Following Karen’s idea for stuffed zucchini, today I created my own concoction!
I had a zucchini in the fridge and didn’t know what to do with it, so I remembered Karen’s advice and made it a stuffed veggie thing!
It turned out super delicious and I will definitely make it again, even more because this was a great way to get Matheus to eat zucchini and be really happy about it too!
I guess he is growing up on his food tastes too. Before he didn’t care much for stuffed veggies, and I love it, tried many times to make it for us (love stuffed eggplant and bell peppers!) without much success of him eating it. But today he really enjoyed it!
At first he asked “Mommy, how do I eat this?”, then I chopped it up for him and he loved the flavors and the idea of eating a “Zucchini Boat”, yes, that’s how I got him to eating and liking it, boats are fun!
He ate his whole half and said “Mmmmmm” through the process, really devoured his piece and I was very proud of my creation, and of feeding healthy meals to my kiddo too, of course!
I made mine a little different though. First I cut the zucchini in half, slathered it with olive oil and put, cut side down, in a baking sheet. Put it in the oven at 400 for about 10 minutes so it would soften and roast a bit.
Then I scooped out the pulp and sautéed it in olive oil with some chopped onions and garlic. Added a few cherry tomatoes I had from the garden sitting in my counter, some oregano and fresh parsley. Seasoned it with salt and pepper and back to the “boats” it went. Oh, I also added some brown rice to the mixture too, as the filling wasn’t enough by itself to fill both halves, and it actually turned out great with the rice in it!
I then sprinkled with a mixture of bread crumbs and grated parmesan cheese, and to complete it all, added some crumbles of goat cheese on top. Back to the oven for a few minutes at 350 (about 5 minutes, just to warm it up), a couple minutes under the broiler and there you have it, my “Stuffed Zucchini Boats”, great stuff!! Yummm!!
We had ours with some mini turkey loafs that I made, soo good! Check out the recipe here, it is awesome!
Ana
 One recipe lead to another, which lead to another, and…
Don’t you hate when you start to make something just to find out that you are out of an ingredient? And it is most probably an important one? I guess it happens to all of us, right? Or at least it does to me…
I was pretty sure I had condensed milk at the house when I settled on a recipe on Saturday. However, I could not find a can in the pantry, not a small tiny can of the stuff. And since I decided for that recipe just because I didn’t have another ingredient for a different recipe, I had to figure out how I would finish what I had already started.
And that’s when the Internet comes in handy! By simply typing a few words into a search engine and voila, all the solutions for your (culinary) problems are right there in front of you. Great!
So here I go to make my Homemade Sweetened Condensed Milk, which by the way I tried before with a different recipe and didn’t get much success. Well, I believe the other recipe was out of proportions then, because this one was PERFECT!! I could not believe how much this tasted and had the same texture as the canned milk. No wait, it actually tasted BETTER than the canned stuff!
Really, I was surprised and more than happy with my results for both the condensed milk and the recipe I used it for. It tasted so good, and worked so well in my recipe that I can’t wait to make more and try in other recipes too.
Now, all that said, I have to mention that my homemade condensed milk had a slight milk powder taste to it, which is why I loved it so much, because I really love milk powder. Is this too weird??
I do, it is so good, sweet and milky! I love making hot chocolate in the winter (milk, cocoa, sugar), and then adding a couple tablespoons of milk powder to my milk, just to get that yummy taste and make my cocoa even more rich and creamy, yum!
All in all, the homemade condensed milk was great, and Matheus though so too! Hehe!
Now you must be asking, what did you use it for?
Before I forget, I used it to make ice cream! A super simple and easy No-Cook Vanilla Ice Cream recipe that turned out "yummylicious"!
Really, it was a success, both recipes I tried that day worked out really well! Yay! (And to think that I did have a couple disasters during the week… but that's another post).
The ice cream was very tasty, a perfect soft serve consistency right out of the machine, and I opted for this recipe because I didn’t have any cream in the house to make the more traditional recipe. I had to use skim milk because it was what I had on hand (and by now you could tell I wasn’t in the mood to go to the grocery store, right?), but I am sure it would have been much better with whole milk, which I am planning to try next. (skim milk makes more of an "ice milk" rather than ice cream, and it gets too icy after being completely frozen)
Oh, and the original recipe of the day was in reality a Peach Crisp, which is one of my favorite desserts, but the Husband and Matheus enjoy it much more when accompanied by a nice scoop of ice cream. And that is why I decided to make vanilla ice cream, and that’s how I ended up making homemade sweetened condensed milk. Ufff…
I did go all the way with the trouble just for my boys, so they could be happy, and ate my crisp plain, but only because because that is how I like it… Am I a sweet girl or what??
Now, wish me luck, because it will probably be a couple days until I get to post again, as I am having an endoscopy procedure done tomorrow. Ouch, another day of soup and crackers to come…
Ana
Homemade Sweetened Condensed Milk (posted on Cooking Light BB)
1 cup skim milk powder
2/3 cup sugar
3 tablespoons butter
1/3 cup boiling water
In bowl, combine milk powder with sugar. Stir butter into boiling water until melted; pour into sugar mixture. Using electric mixer, beat for about 2 minutes or until smooth and creamy. Cover and refrigerate for 8 hours or until thickened.
Yield:"1 1/4 cups"
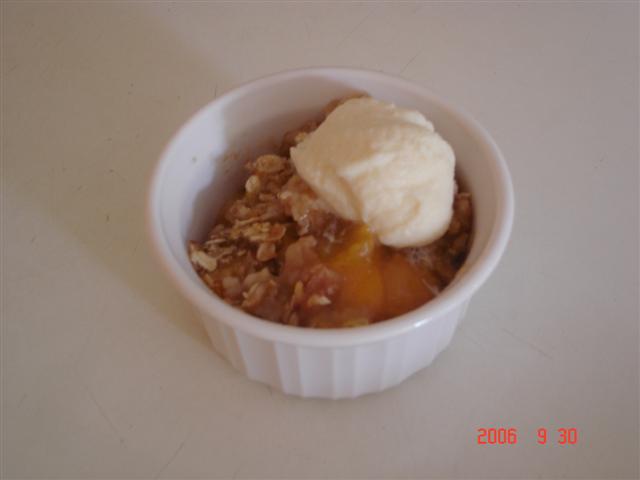
No-Cook Vanilla Ice Cream
(Adapted from Southern Living, AUGUST 2004)
1 can sweetened condensed milk -- (14-ounce)
1 can evaporated milk -- (5-ounce)
2 tablespoons sugar
2 teaspoons vanilla
2 cups whole milk
Whisk all ingredients in a 2-quart pitcher or large bowl until blended. Cover and chill 30 minutes.
Pour milk mixture into freezer container of a 1-quart electric ice-cream maker, and freeze according to manufacturer's instructions. (Instructions and times will vary.)
Remove container with ice cream from ice-cream maker, and place in freezer 15 minutes. Transfer to an airtight container; freeze until firm, about 1 to 1 1/2 hours.
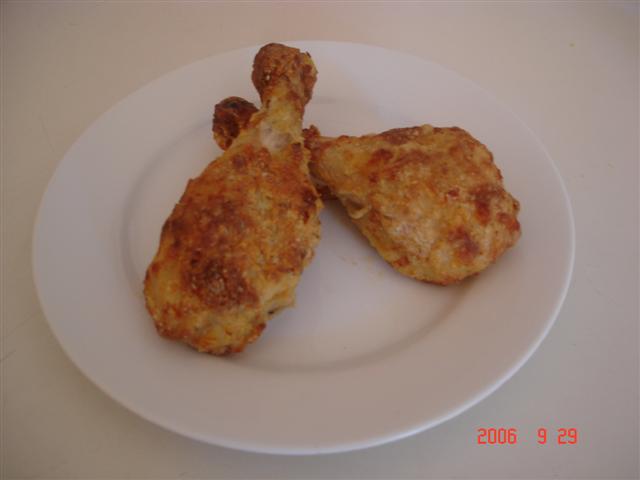 Oven-Fried Chicken
“Yum, this is crispy and crunchy!” This was Matheus phrase as we were eating this chicken today at lunch!
Oven-fried Chicken was a great change to our usual oven baked chicken! I was really amazed with the end results, considering it was so simple and easy to make.
Skinless chicken pieces are first dipped in a combination of buttermilk and egg whites, then they are dredged into a mixture of flour and cornmeal, which were seasoned with salt and pepper. I actually added some paprika and a touch of garlic powder to my dry mix, and also salted my chicken pretty well before coating, which I guessed would add some more flavors to it.
After being coated, the chicken is quickly sautéed in a skillet and then into the oven it goes, and about 30 minutes later you have oven-fried chicken! Yummy!
The chicken was really moist and yummy, and the crust was surprisingly crispy, even more since it didn't have a skin underneath. Yes, healthy and good for you too!
We really enjoyed this! I made ours using drumsticks and bone-in chicken breast (which I halved to make smaller pieces). Oh, and next time I will try to get a thicker coating on the chicken, as it was definitely the best part of it!
Ana
Oven-Fried Chicken
(Cooking Light, October 2006)
1 cup low-fat buttermilk
2 large egg whites, beaten
1 cup all-purpose flour (about 4 1/2 ounces)
1/3 cup cornmeal
1 teaspoon salt, divided
3/4 teaspoon freshly ground black pepper
1/4 teaspoon ground red pepper
2 chicken breast halves, skinned (about 1 pound)
2 chicken thighs, skinned (about 1/2 pound)
2 chicken drumsticks, skinned (about 1/2 pound)
2 tablespoons canola oil
Cooking spray
Preheat oven to 425°.
Cover a large baking sheet with parchment paper. Combine buttermilk and egg whites in a shallow dish; stir well with a whisk. Combine flour, cornmeal, 1/2-teaspoon salt, black pepper, and red pepper in a separate shallow dish; stir well. Sprinkle chicken evenly with remaining 1/2 teaspoon salt. Dip chicken in buttermilk mixture; dredge in flour mixture.
Heat oil in a large nonstick skillet over medium-high heat. Add chicken to pan; cook 4 minutes on each side or until lightly browned. Place chicken on prepared baking sheet; lightly coat chicken with cooking spray. Bake at 425° for 30 minutes or until chicken is done.
Yield: 4 servings (serving size: 1 chicken breast half or 1 drumstick and 1 thigh)
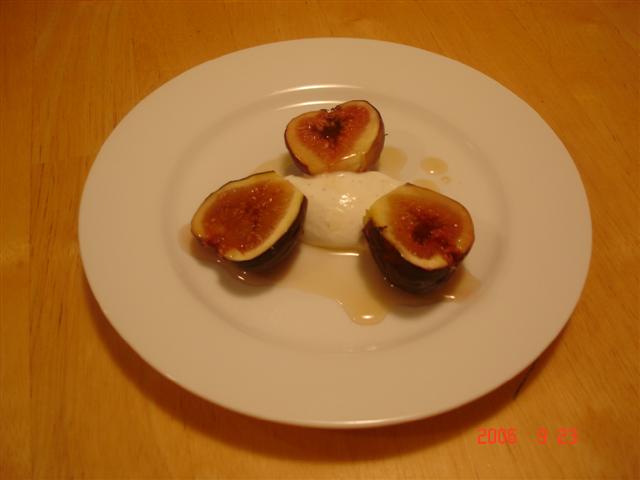 One of the best dessert… ever!
Not really a recipe, but I created this “dessert” the other day and it was so good that I had to share!
I wanted to make a nice and sort of fancy dessert the other day for me and the husband so that we could have a little time together (after Matheus went to bed) to try the nice bottle of wine I got for him as an anniversary present.
The day before I found some fresh figs at a very decent price at the store and bought a ltitle box. Oh my, so good were those figs, nice, soft, sweet. Perfect!
I halved them, sprinkled just a tiny bit of brown sugar on top, and broiled them for 3 minutes, just to get them warm a little softer. Then I mixed up some Greek yogurt (and I bet mascarpone would be even better here, in place of the yogurt) with honey and a little scraped vanilla beans, formed into “quenelles” (did I spell it right?) and placed them on a plate. I then put 3 pieces of fig on each plate and drizzled some warmed up honey. Was it good! Super tasty, sooooo delicious! Perfect paired with our wine, and so romantic!
I would choose this dessert over any other at any time, without blinking.
Simple, yet decadent. Fresh figs are so good on their own that I don’t even like to use them in recipes, preferring to eating them as they are. But this little creation of mine did embellish them beautifully!
Ana
 Pumpkin Pie
As soon as Matheus saw the mounds of fall pumpkins in front of the market last week, he started to beg me to buy one for him (and he wanted the huge one!) in order to make pumpkin pie.
We were definitely going to buy some pumpkins, but I wanted to wait a little more, you know, it is not even October yet… Plus I wanted to get the pumpkins at the farmers market, as there are a variety of them and they look very nice there too.
Trying to explain all that to a 4-year old didn’t actually worked well, and Matheus started to ask me every day when we were going to buy our pumpkin to make some pie. So, in order to keep my sanity, I finally gave in and we both headed to the kitchen to make the so desired dessert.
Now, I have got to say: it was so worth it! Pumpkin pie is soooo easy to make, and so delicious, that there was no reason to wait until we “feel like fall”. Matheus was definitely right, it was time for pumpkin pie, and we really enjoyed ours over the weekend!
I opted to make a cookie crust instead of the more traditional pie dough, but it is just a matter of personal preference. I am not a big fan of piecrust (except for apple pies!), but do enjoy the traditional cookie-crumb crust used for pies and cheesecakes alike, so I decided to use that instead. For this crust I used a cookie called Vanilla Snaps, which I recently discovered and liked a lot, but the regular graham cracker will work perfectly here. And, for those who like ginger, I bet ginger snaps would work really well here too.
I didn’t follow an exact recipe, but sort of made mine based on other recipes I have previously seen, and since it was a basic traditional pie filling, it worked very well. The filling was very creamy, and nicely complemented by my yummy cookie crust!
As I said, this was so easy to make that Matheus went ahead and mixed up the filing all by himself; my only help was opening the can of evaporated milk to him.
I don’t even need to mention that he was very proud of his pie, and was more than happy when eating his share. It was definitely time for Pumpkins around here!!
Ana
Note: If, like me, you also don’t care for the crust and feel like the filling is the best part, then check out my pumpkin custard recipe, it is really good!
Pumpkin Pie with cookie-crumb crust
About 2 cups cookie crumbs
3 tablespoons butter, melted
2 eggs (I used 4 egg whites)
½ cup brown sugar
1 1/2 teaspoons cinnamon (you can use pumpkin pie spices)
1 can evaporated milk
1 (15oz) can unsweetened pumpkin (or 1 3/4 cups pumpkin puree)
Preheat oven to 325 F.
Mix cookie crumbs and melted butter together in a bowl. Press mixture into bottom and sides of a pie plate and bake for 5 minutes. Let cool.
In another bowl combine the rest of the ingredients until smooth. Pour into pre-baked piecrust and bake at 325 for 50 minutes to 1 hour, or until center of pie is almost set. Let cool and serve!
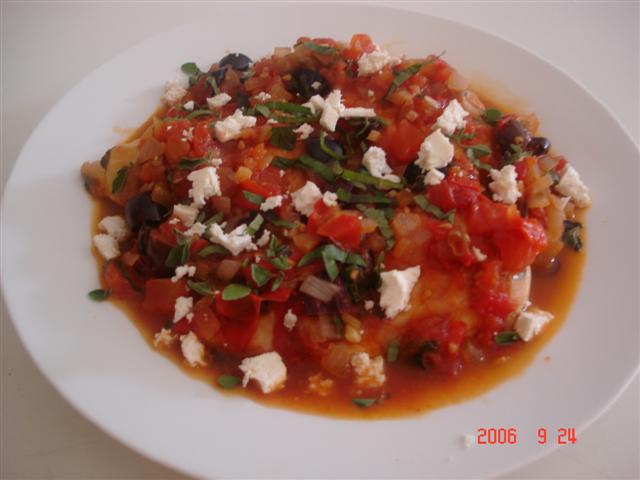 Greek Chicken
I can’t even start talking about how good this dish was. Oh my, this was without a doubt one of the best meals I had lately. Extremely full of flavor, the sauce was amazing, and the chicken perfectly cooked and full of the yummy flavors of the wine and lemon juice from its marinade.
Truly a dish to make when you have company over, as it wasn’t hard to make and you can have all things chopped up and ready in advance (as I did!). Just assembling and putting the dish together doesn’t take much time at all and could easily be done while you chat with your friends enjoying some wine.
I really loved this chicken dish; it was for me perfect in all senses. The tomatoes, onions, garlic, olives and the lemon juice, oregano, and wine from the marinade just blended together wonderfully making a scrumptious sauce, so flavorful that I literally licked my plate clean.
Awesome, awesome dish! We don’t go out to eat much (once a month, maybe…?), and this was better than many chickens I have had at restaurants.
I am so happy that I know how to cook, and I love doing it!
Ana
Note: if you haven’t seen the book this recipe came from then go check it out. It is so pretty, full of yummy recipes and nice looking pictures, I love this book! Even more today; after having my delicious Greek chicken! You can take a look at the book here.
(adapted from Fresh Every Day by Sara Foster)
4 boneless, skinless chicken breast halves
Zest and juice of 1 lemon
1 cup dry white wine
2 tablespoons chopped fresh oregano
½ teaspoon salt
½ teaspoon ground black pepper
1 tablespoon olive oil
1 tablespoon butter
1 small onion, diced
4 tomatoes, chopped
2 garlic cloves, minced
½ cup pitted olives
6 basil leaves, cut into strips
2 ounces feta cheese, cut into cubes (1/2 cup)
Place chicken in a glass baking dish. Combine the lemon juice, zest, wine, oregano, salt and pepper in a small bowl. Pour mixture over chicken and let marinate (in the refrigerator) for a few hours or overnight.
Heat oil and butter in a large skillet; remove chicken breasts from marinade and place in the skillet. Reserve marinade to make the sauce.
Cook chicken turning only once, 5 minutes per side. Remove chicken from pan, put in a plate and cover with aluminum foil to keep warm. Put onions, garlic, and tomatoes in the skillet and cook until tomatoes and onion are soft, about 4 minutes. Add the reserved marinade and bring to a boil. Reduce heat; simmer sauce for 3 minutes, until it reduces by half. Season with additional salt and pepper if desired.
Return the chicken to the skillet and add olives and basil to the sauce. Simmer on low heat for about 6 to 8 minutes, or until chicken is cooked through and feels firm to the touch.
Transfer chicken and sauce to a platter, garnish with fresh basil and oregano. Sprinkle the feta cheese and serve.
Serves 4.
 Multibean Salad
I wanted to make a different salad this week for our lunch, you know, we have had so many tomatoes and zucchini salad over the summer that I decided to change things a bit.
This salad was exactly what I wanted, nice and refreshing, colorful and very tasty, all in one bowl! It was a very happy mix of veggies in my opinion, and the vinaigrette complemented it all nicely. I followed the recipe, but omitted the bell pepper (didn’t have) and used a different kind of vinegar (what I had on hand). To be true, I don’t think that made a difference at all, because at the end the salad was very flavorfull just the way I made!
Ana
Multibean Salad
(Adapted from Cooking Light, April/05)
2 cups green beans (about 8 ounces)
2 cups wax beans (about 8 ounces)
1 cup frozen shelled edamame (green soybeans)
1 cup grape or cherry tomatoes, halved
1/2 cup finely chopped orange bell pepper
1/2 cup thinly sliced red onion
2 tablespoons sherry vinegar
1/2 teaspoon sugar
1/4 teaspoon Dijon mustard
2 teaspoons olive oil
1/4 cup chopped fresh parsley
1/4 teaspoon salt
1/4 teaspoon freshly ground black pepper
Cook or steam beans and edamame until they are crisp-tender. Drain and put beans into ice water; drain. Combine beans, tomatoes, bell pepper, and onion in a large bowl.
Combine vinegar, sugar, and mustard, stirring with a whisk. Gradually add oil to vinegar mixture, stirring constantly with a whisk. Stir in parsley, salt, and black pepper. Drizzle vinaigrette over bean mixture; toss gently to coat. Yield: 6 servings (serving size: about 1 cup)
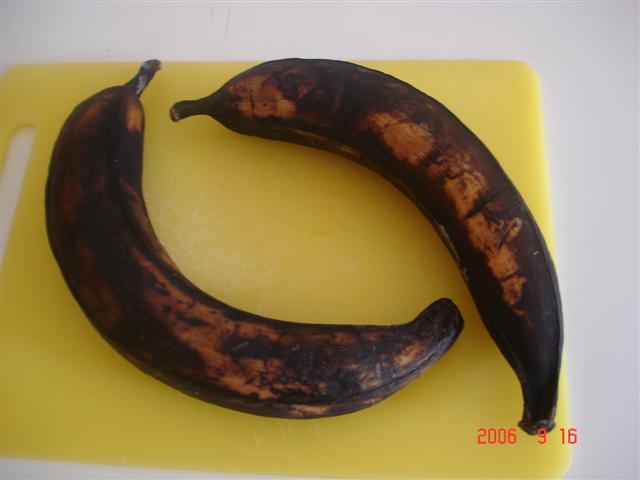 Big Bananas!
Well, not really bananas, but Plantains! These are a cousin of the regular bananas, found in the tropics and used a lot in Latin cooking. Its flavor is similar to that of a banana, however as far as I know, yellow, green, or black, these are always cooked before being eaten. (Does anyone know if they can be eaten raw?)
I had eaten them before, but this was my first time cooking with plantains. They are used in cooking more as a vegetable, rather than as a fruit, but there are desserts made with very ripe plantains also.
The recipe I made stated that the plantains should be black all over, so I had to wait almost a month for it to ripe in my counter (inside a paper bag) before I was able to use them. Yes, I bought them green, and had no idea it would take so long for a plantain to ripen; they were all green at the store, and you know, bananas usually turn black within a few days, so I guessed these would be similar…well, living and learning!
When green the plantains are starchier, even a little glutinous, almost like a potato. And since sweetness has not developed at this stage, they are used to make plantain chips and other savory concoctions.
As they get a little riper and turn yellow, these big bananas start to get sweeter, making them suitable for an array of savory dishes, where they can be fried, sautéed, baked, etc.
Black plantains have a softer skin and are the sweetest ones. When cooked they retain their shape more than a ripe banana does though, and are delicious browned in a skillet with some butter. Which by the way is how I made today’s recipe!!
Maduros, as this dish is called, is basically very ripe plantains sautéed in some butter with sprinkles of salt and pepper. Easy to make and so flavorful! My husband enjoys eating plantains at a local Cuban restaurant, so he really liked when I decided to make them at home. Plus, I believe these were a lot healthier, as the ones he likes are usually deep-fried.
The taste reminds me a lot of bananas of course, however these have a deeper flavor and texture than its familiar counterpart.
We liked it and now I will certainly adventure myself more into the world of plantains, as I know I still have a lot to learn about them. Any recipes suggestions out there?!
Ana
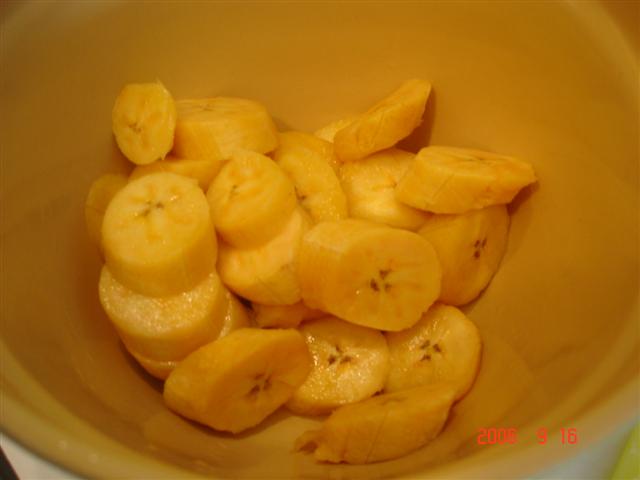
 4 cups (1/2-inch-thick) slices soft black plantains (about 6)
3 tablespoons sugar
1/4 teaspoon salt
1 1/2 tablespoons butter
Combine first 3 ingredients in a large bowl; toss well.
Melt butter in a large nonstick skillet over medium-high heat. Add plantains; sauté 5 minutes or until browned and tender. Yield: 12 servings (serving size: about 1/3 cup)
Source: Cooking Light, September 2006

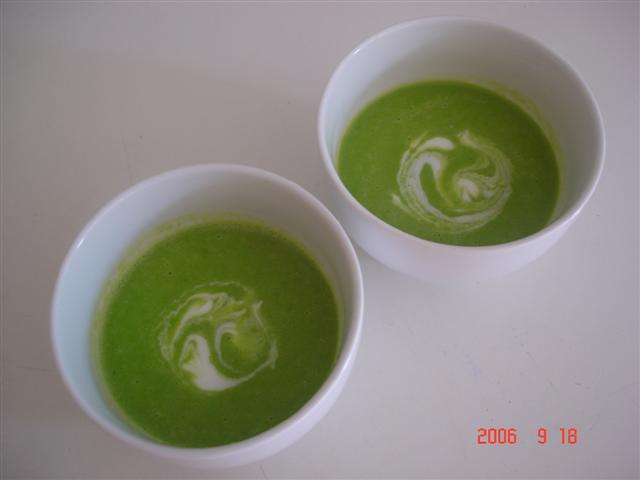
Pea Soup!
After a couple “anniversaries”, we are back to normal posts!
Last week was so hard on me that I am ready to move on. I got some sort of stomach bug that just messed me up. Not fun, and hard to eat much aside saltine crackers and some plain rice. Even harder is having to cook and feed the husband and Matheus when I could not eat much of what they wanted… argh! I like to cook, and I like to eat what I cook, so I am just glad to be feeling better now!
We saw today’s recipe being made in a cooking show a while ago and since then Matheus had been asking me to make it. We both like all vegetables and fruits a lot, and lately he discovered the wonders of green peas! It is sort of funny, because a few years ago, peas were his least favorite baby food. Luckily we all learn to like good foods!
This soup is super simple to make and yet very delicious! I halved the recipe, and my only complain is that it wasn’t enough… half of the recipe yielded about 1 ¾ cups of soup, as opposed to 2 ½ as it states. So both of us ended up wishing for more at the end of our meal (of course we had other side dishes to go with it), which was not bad, as we can make it soon again!!
It was delicious a little chilled, and the yogurt swirl complemented it well. Sweet and simple flavors here, and I bet it would be also nice with a touch of fresh mint in it too!
An easy and versatile recipe, which can be served during both warm and colder months. We sure enjoyed it; and best of all: Matheus loved the soup!
Hope you like it too!
Ana
Green Pea Soup (Ellie Krieger – foodtv)
1 teaspoon olive oil
1 large onion, sliced (about 1 1/2 cups)
2 1/2 cups low-sodium chicken broth
3/4 teaspoon dried tarragon
1/2 teaspoon salt
Freshly ground black pepper
1 (10-oz) bag frozen peas
4 teaspoons plain nonfat yogurt, optional
In a large pot, heat the olive oil over moderately-low heat. Add the onion, cover and cook, stirring occasionally, until softened, about 5 minutes. Add the broth, tarragon, salt and a few turns of freshly ground black pepper and bring to a boil. Add the peas and cook just until defrosted.
In a blender, puree the soup in 2 batches until very smooth. If serving hot, return the soup to the pot and bring just to a simmer. If serving cold, transfer to the refrigerator to chill. Ladle into bowls. Stir the yogurt so that it is smooth and top each serving with a swirl of yogurt.
Yield 4 servings (1 ¼ cups each)