Thursday, May 04, 2006

Homemade Ricotta

I tried this recipe for Homemade Ricotta a while ago and just fell in love with it. Homemade cheese is totally different from the store bought ones, especially ricotta. The one I found at grocery stores around here are very thin and a lot sweeter than the cheese made at home. Some Italian markets do carry nice and fresh cheeses, including good ricotta, but the store bought ones don’t even get an inch close in flavor and quality as the homemade version.
This is super easy to make, there is no way you can go wrong. I have been making it basically every week since I first tried it and after a couple times I didn’t even needed the thermometer to know it was at 190 F anymore.
I have made ricotta a couple different ways already, using milk and lemon juice, using whey (from fresh cheese I make) and rennet, even using a combination of milk and whey, but none of them was as good as this one, made with milk and buttermilk.
The ricotta’s soft curds are rich and creamy, with a nice milky taste to it, not acidic or sweet as some I have had. This was the perfect cheese to me!
And it can be used it in many different recipes, both savory and sweet. I have flavored mine with kosher salt, pepper and olive oil and used as a dipping for crispy veggies and crackers, creamy and delicious, so good!

It can also be used in sweet recipes, from a simple sweetened ricotta and fruits parfait to a delicious cheesecake, or even a lighter version of tiramisu (I have a delicious recipe for tiramisu that uses ricotta for part of the mascarpone). Oh, and I don’t add the salt to my ricotta, so I can use it in any recipe I want.
Very versatile, and better of all, delicious and good for you! Calcium rich too!! Hehehe!!
Tomorrow I will post a recipe for a Butternut Squash Lasagna that I made with the ricotta and was really good!
Ana

Homemade Ricotta

1 gallon 2% reduced-fat milk
5 cups low-fat buttermilk
1/2 teaspoon fine sea salt

Line a large colander or sieve with 5 layers of dampened cheesecloth, allowing the cheesecloth to extend over outside edges of colander; place colander in a large bowl.
Combine milk and buttermilk in a large, heavy stockpot. Attach a candy thermometer to edge of pan so that thermometer extends at least 2 inches into milk mixture. Cook over medium-high heat until candy thermometer registers 170° (about 20 minutes), gently stirring occasionally. As soon as milk mixture reaches 170°, stop stirring (whey and curds will begin separating at this point). Continue to cook, without stirring, until the thermometer registers 190°. (Be sure not to stir, or curds that have formed will break apart.) Immediately remove pan from heat. (Bottom of pan may be slightly scorched.)
Using a slotted spoon, gently spoon curds into cheesecloth-lined colander; discard whey, or reserve it for another use. Drain over bowl for 5 minutes. Gather edges of cheesecloth together; tie securely. Hang cheesecloth bundle from kitchen faucet; drain 15 minutes or until whey stops dripping. Scrape ricotta into a bowl. Sprinkle with salt; toss gently with a fork to combine. Cool to room temperature. Store in refrigerator up to 4 days.

Yield: About 3 cups
Cooking Light, April 2005

Wednesday, May 03, 2006

Pasta on Wednesday?

As you know the usual “pasta day” around here is Sunday. Since I am not a big fan of the noodles I don’t usually make it on weekdays, but pasta is my boys favorite food, so over the weekend we always have some sort of macaroni around.
However, I saw a pasta dish on a TV show the other day that looked amazingly good, with lots of vegetables and some interesting cheeses, smoked mozzarella being one of those.
The husband was working from home today, so the dish seemed appropriate, as I could get a one-dish meal with all of our favorite flavors in it. And it was a hit!
We liked the Baked Penne with Roasted Vegetables a lot! The dish is chock full of yummy roasted veggies (my favorite!!), marinara sauce and three kinds of cheese. I loved the flavors of the vegetables, the combination of roasted squashes, red pepper, onions and mushrooms was just perfect, I could have had just that for my lunch! Hehe!
The marinara sauce added body, and even the peas were delicious, but the smoked mozzarella definitely lends the most flavor to the dish. We could taste it in every bite, not in an overpowering way, but in a very delicious and tasty way, it sort of flavored the tomato sauce. We all agreed it was a very nice dish with the smoked mozzarella flavor, which is something we don’t eat very often.
I made half-recipe and served it with sautéed chicken breasts (carnivores here…otherwise it would have been a nice vegetarian meal). Also, I used white cheddar in place of the fontina (did not find it), and forgot to dot the top with butter. For the first 15 minutes I baked it with foil on top, then removed it for the final 10 minutes of baking (just in case, I didn’t want the top to get dry)
Now I have to find some other dish with smoked mozzarella, to use up what I have left. Any suggestions?!
Enjoy!
Ana

Baked Penne With Roasted Vegetables
(Recipe courtesy Giada De Laurentiis)

2 red peppers, cored and cut into 1-inch wide strips
2 zucchini, quartered lengthwise and cut into 1-inch cubes
2 summer squash, quartered lengthwise and cut into 1-inch cubes
4 cremini mushrooms, halved
1 yellow onion, peeled and sliced into 1-inch strips
1/4 cup extra-virgin olive oil
1 teaspoon salt, divided
1 teaspoon freshly ground black pepper, divided
1 tablespoon dried Italian herb mix or herbs de Provence
1 pound penne pasta
3 cups marinara sauce (store bought or homemade)
1 cup grated fontina cheese
1/2 cup grated smoked mozzarella
1 1/2 cups frozen peas, thawed
1/4 cup grated Parmesan, plus 1/3 cup for topping
2 tablespoons butter, cut into small pieces

Preheat the oven to 450 degrees F.
On a baking sheet, toss the peppers, zucchini, squash, mushrooms, and onions with olive oil, 1/2 teaspoon salt, 1/2 teaspoon pepper, and dried herbs. Roast until tender, about 15 minutes.
Meanwhile, bring a large pot of salted water to a boil over high heat. Add the pasta and cook for about 6 minutes. Since you will be cooking the pasta a second time in the oven, you want to make sure the inside is still hard. Drain in a colander.
In a large bowl, toss the drained pasta with the roasted vegetables, marinara sauce, cheeses, peas, 1/2 teaspoon salt, and 1/2 teaspoon pepper. Using a wooden spoon, gently mix, until all the pasta is coated with the sauce and the ingredients are combined.
Pour the pasta into a greased 9 by 13-inch pan. Top with the remaining 1/3 cup Parmesan and butter pieces. Bake until top is golden and cheese melts, about 25 minutes
Yield: 6 servings

Monday, May 01, 2006

Cinnamon Rolls

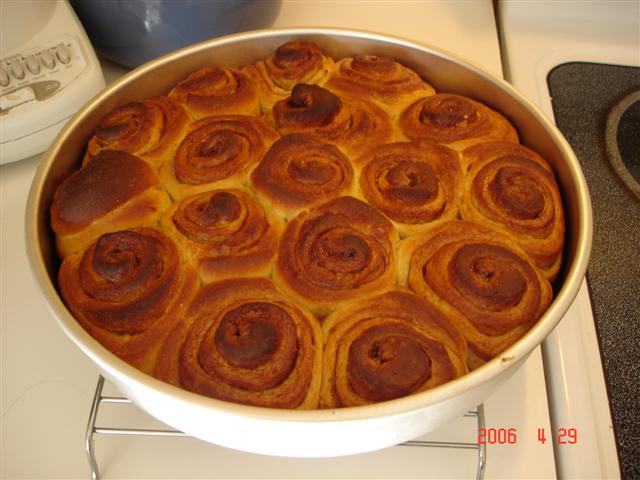
Even though he had never tried it before, Matheus asked me to make Cinnamon Rolls. He saw it a couple weeks ago in a stand at a hockey game and simply got curious to know how they tasted. He asked if I could make some for him and so we did over the weekend. (Oh yes he helped, and we had lots of fun!! Not to mention a “flour-covered kitchen”! Hehe!!)
I chose a recipe that was easy to make and also very convenient, as we made it Friday night and let it rise in the fridge overnight. Saturday we woke up and just popped them into the oven, after 22 minutes the house smelled wonderful and we had a very yummy and comforting breakfast! Matheus simply loved the rolls!
It was definitely a nice way to start my birthday!
Ana

Overnight Cinnamon Rolls (adapted from allrecipes.com)
1 cup milk
1/3 cup butter
1 (.25 ounce) package active dry yeast
1/2 cup white sugar
1 cup whole wheat flour
3 cups all-purpose flour
1 teaspoon salt
3 eggs

Filling
3/4 cup brown sugar
1 tablespoon ground cinnamon
1 tablespoon melted butter

Heat the milk in a small saucepan until it bubbles, remove from heat, add the butter and stir until melted; let cool until warm.
In a large mixing bowl, dissolve the yeast in the milk mixture. Add the sugar, the whole-wheat flour, 2 cups of the all-purpose flour, salt and eggs; stir well to combine. Add the remaining all-purpose flour, 1/2 cup at a time, stirring well after each addition. When the dough has pulled together, turn it out onto a lightly floured surface and knead until smooth and supple, about 8 minutes.
Lightly oil a large mixing, place the dough in the bowl and turn to coat with oil. Cover with a damp cloth and let rise in a warm place until doubled in volume, about 1 hour.
Deflate the dough and turn it out onto a lightly floured surface and roll into a 10x 14 inch rectangle. Lightly brush the dough with melted butter. In a small bowl combine the cinnamon and 3/4 cup brown sugar and sprinkle over the rectangle. Roll up the dough into a log and seal the seam.
Cut the dough into 12 equal pieces; place the pieces in a greased 9x13 inch baking pan, or 12 inch deep dish pizza pan. Cover with plastic wrap and place in the refrigerator to rise overnight.
The next morning, preheat oven to 375 degrees F (190 degrees C). Take the rolls out of the refrigerator and let stand at room temperature for 30 minutes.

Bake the rolls for 25 minutes or until golden, serve warm.

Happy Birthday…

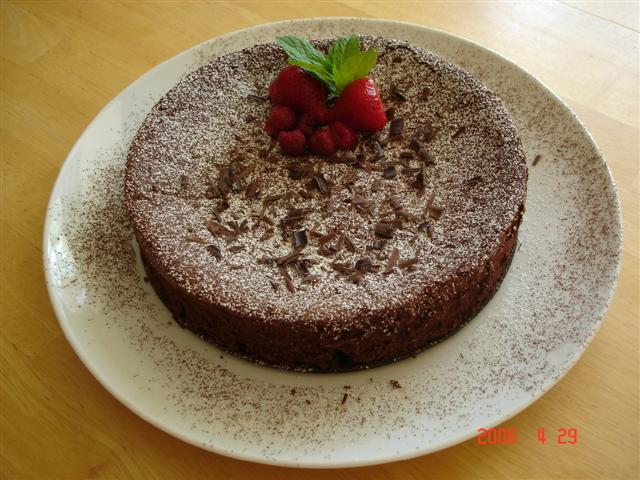
to me!!! Not that I am happy to be getting older, but it was my birthday last weekend, and with a 4-year old at home there was no way I could go through the day without a birthday cake! And being the chocoholic I am, I opted for a yummy chocolate one, which ended up pleasing everybody else at home.
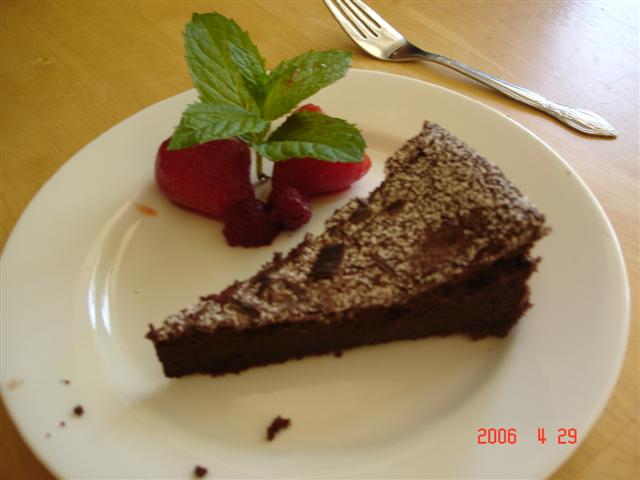
I had this recipe on my to try pile for years, and I am glad I finally decided to try it. Dark Chocolate Soufflé Cake is delicious and yet quite simple to make. The cake rises well during baking, but falls on itself after cooling, just like a soufflé. However, it did not tasted like one. It had a rich chocolate taste and a very light texture at the same time.
We all enjoyed it at home, and since it was a pretty nice cake we did not need anything else with it, apart from a few berries and some powdered sugar for decoration! Yummy cake, worth trying at any time!
As usual I made a few changes… I used only semisweet chocolate (4 oz total – it was what I had at home), and only ½ the sugar asked in the recipe. Also, I did not add the Kahlua, because unfortunately I did not have any (subbed 2 tbsp milk – gotta buy some liqueur here!). The sweetness was just perfect to us, but if you prefer your desserts on the sweeter side then maybe you should keep the sugar as it was.
All in all, I had a good cake and a very happy birthday!
Ana

Dark Chocolate Souffle Cake
1/2 cup granulated sugar
1/2 cup packed dark brown sugar
3/4 cup water
1 tablespoon instant espresso or 2 tablespoons instant coffee granules
2/3 cup Dutch process or unsweetened cocoa
1/4 teaspoon salt
2 ounces semisweet chocolate, chopped
2 ounces unsweetened chocolate, chopped
2 tablespoons Kahlúa (coffee-flavored liqueur)
3 large egg yolks
1/3 cup sifted cake flour (such as Swan's Down)
6 large egg whites (at room temperature)
1/4 teaspoon cream of tartar
1/3 cup granulated sugar
1 tablespoon powdered sugar
1/4 cup raspberries (optional)
Chocolate curls (optional)

Preheat oven to 300°.
Coat bottom of a 9-inch springform pan with cooking spray. Set aside.
Combine 1/2 cup granulated sugar, 1/2 cup brown sugar, water, and espresso in a large saucepan; stir well and bring to a boil. Remove from heat; add cocoa, salt, and chocolates, stirring with a whisk until chocolate melts. Stir in Kahlúa and egg yolks. Stir in flour; cool to room temperature. Set aside.
Beat egg whites and cream of tartar at high speed of a mixer until foamy. Add 1/3 cup granulated sugar, 1 tablespoon at a time, beating until stiff peaks form. Gently fold one-fourth of egg white mixture into chocolate mixture; repeat procedure with remaining egg white mixture, one-fourth at a time. Spoon into prepared pan. Bake at 300° for 1 hour or until a wooden pick inserted in center comes out almost clean. Cool completely on wire rack. Remove sides from pan; sift powdered sugar over cake. Garnish with raspberries and chocolate curls, if desired.
Note: A substitution of 1/4 cup all-purpose flour may be used in place of 1/3 cup cake flour.

Cooking Light, November 1997.

Wednesday, March 29, 2006

Blueberries so tiny…

They are not in season yet, I know, but I like blueberries so much that I keep buying them frozen throughout the winter months. It is not the same as fresh, but they are so healthy and good for you that even frozen I enjoy my blueberries as if it was summer again.
Blueberry is a fruit I discovered here in the US, we did not used to have them in Brazil, but with its growing popularity I have heard that they are now trying to cultivate it over there too (and if I am not wrong the name in Brazil would be “mirtilos”).
Speaking of cultivated blueberries, I have always heard people talk about wild blueberries and how much better they were supposed to be when compared to their cultivated counterparts. Well, now I know what the experts were talking about.
I happened to find frozen blueberries for the first time at BJs a couple months ago, and for my surprise they were the wild variety. I more than quickly grabbed a bag and run to the register, just as if someone would come and take my new discovery away from me. I was finally going to try wild blueberries!
And you know what, they DO taste better. Much better indeed, they are a lot more flavorful than the regular frozen blueberries I used to buy. I loved it!!
They are so tiny, much smaller than the cultivated variety, but they pack in the smaller ones the entire flavor that the huge ones at the store have to offer. They are also sturdier, meaning that they don’t burst easily when heated up (yes, I like to eat them heated up with a sprinkle of sugar, oh so good!).
I have been eating them straight out of the package, heated up, mixing them into smoothies, and in baked goods, and they are always great, especially on my favorite: blueberry muffins!
However, yesterday I tried them on a very easy recipe for Blueberry Pie!
I wanted to make something with blueberries that would be just as flavorful as it would be easy to make. I have seen a few recipes for blueberry pies and a couple of them called my attention, as they were actually no-bake pies. I sort of combined both recipes and created my own pie, and it turned out very good!
Since I actually prefer them to regular pastry, I used a cookie crumb crust for my pie, but a regular pie shell would definitely work well here too.
The recipe is easy, and you can make it in a pinch when using a store-bought crust. I made mine using frozen blueberries, and can’t wait to try it with the fresh ones over the summer months. Easy and delicious, definitely going to be repeated over here!
Ana

Blueberry Pie
One pre-baked piecrust
4 cups blueberries (you can use more or less according to the size of your pie crust)
½ cup water
¼ cup sugar
1 ½ tablespoons cornstarch
2 tablespoons water
1 teaspoon lemon juice

In a saucepan combine 1 cup of the blueberries with the water, cook over medium heat just until the blueberries heats up and the liquid reduces a little. Add the sugar and cook one minute more. Add lemon juice, dissolve the cornstarch on the 2 tablespoons water and add to the pan, stirring constantly. Cook for one more minute or until mixture thickens. Remove from heat and add the remaining blueberries to the pot, folding them gently into the cooked mixture. Pour blueberry mixture into the prepared crust. Let cool and then refrigerate for a couple hours before serving.

Tuesday, March 21, 2006

Sunday’s Pasta

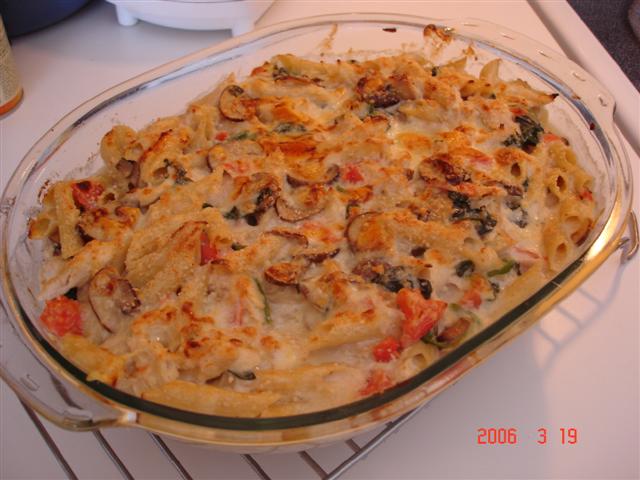
We were all sneezy with our alergies at its peak this weekend, so to make us a little happier I decided to make something different than our usual Sunday' pasta with either red or white sauce. Three-Cheese Chicken Penne Florentine came out perfect, creamy and cheesy! It was delicious, and the best thing is it was a one-dish meal, with starch, vegetable and protein included in one yummy bowl!
I used whole-wheat penne and white cheddar cheese. Also, I don’t actually like these canned soup things, so for the canned soup I substituted 1 1/4 cup evaporated milk + 1 tablespoon cornstarch + a little bit of chicken bouillon, which I put in a pan and cooked over medium heat just until thickened, let it cool a bit and added to the dish as indicated for the soup. (I used evaporated milk but I am pretty sure regular milk would work nicely here)
Very good dish, comfort food at its best! We all enjoyed it and hope you will too!

Ana

Three-Cheese Chicken Penne Florentine
1 teaspoon olive oil
Cooking spray
3 cups thinly sliced mushrooms
1 cup chopped onion
1 cup chopped red bell pepper
3 cups chopped fresh spinach
1 tablespoon chopped fresh oregano
1/4 teaspoon freshly ground black pepper
1 (16-ounce) carton 2% low-fat cottage cheese
4 cups hot cooked penne (about 8 ounces uncooked tube-shaped pasta)
2 cups shredded roasted skinless, boneless chicken breast
1 cup (4 ounces) shredded reduced-fat sharp cheddar cheese, divided
1/2 cup (2 ounces) grated fresh Parmesan cheese, divided
1/2 cup 2% reduced-fat milk
1 (10 3/4-ounce) can condensed reduced-fat, reduced-sodium cream of chicken soup, undiluted

Preheat oven to 425°.
Heat olive oil in a large nonstick skillet coated with cooking spray over medium-high heat. Add mushrooms, onion, and bell pepper; sauté 4 minutes or until tender. Add spinach, oregano, and black pepper; sauté 3 minutes or just until spinach wilts.
Place cottage cheese in a food processor; process until very smooth. Combine spinach mixture, cottage cheese, pasta, chicken, 3/4 cup cheddar cheese, 1/4 cup Parmesan cheese, milk, and soup in a large bowl. Spoon mixture into a 2-quart baking dish coated with cooking spray. Sprinkle with remaining 1/4 cup cheddar cheese and remaining 1/4 cup Parmesan cheese. Bake at 425° for 25 minutes or until lightly browned and bubbly.

Cooking Light, March 2006

Tuesday, March 14, 2006

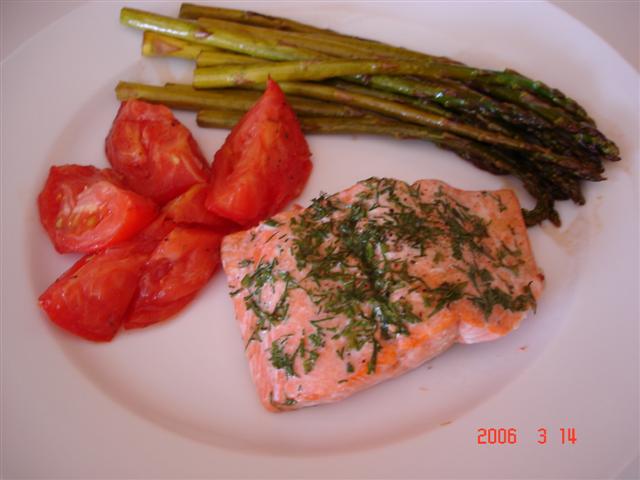
Simply Salmon

I like fish a lot, but only discovered salmon a few years ago. Fish used to be more of a treat when I was growing up and since salmon is not an affordable type of fish I only came to try it after I got married. It is an acquired taste I guess, as it has its own flavors, very different from the white fish fillets I was used to.
I could not even smell it (and other fishy foods) when I was pregnant, and it took me a few years after that to be able to enjoy salmon again (although white fish, such as tilapia, would not bother me).
It has been a couple of weeks since I got a craving for salmon, but did not get to prepare it until today.
I sprinkled the salmon fillets with salt, pepper, olive oil, chopped dill, and fresh lemon juice. Just that, and baked it in the oven (350) for 10 minutes. Served it with brown rice, roasted tomatoes and asparagus (which went in the oven at the same time the fish baked, seasoned with salt, pepper, olive oil, and balsamic vinegar). Easy and delicious!!
Matheus loved and ate every last bit of it, so we were both happy after a nice and healthy lunch!
Enjoy

Ana

Saturday, March 11, 2006

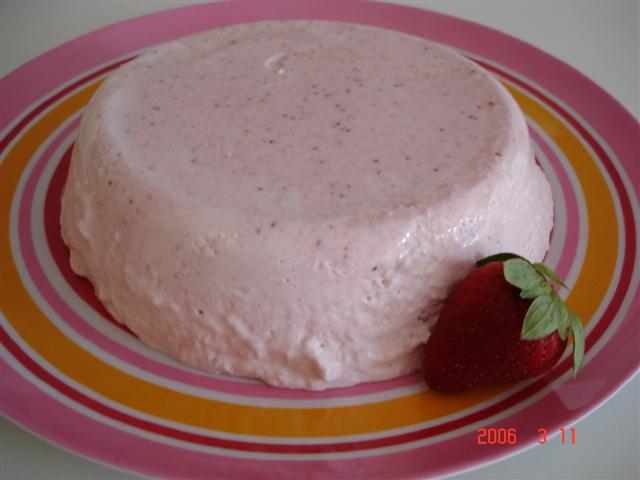
Bavaroise

Once again I got inspired by a “blog friend” and made a winner recipe! I got today’s recipe from Akemi’s blog, Pecado da Gula.
I saw the recipe and picture and immediately copied it down, putting it on top of my to try pile of recipes. The Strawberry Bavaroise looked so good, plus I love creamy desserts.

And this one was delicious! A perfect dessert, just the way I like. Light and creamy, with just the right amount of sweetness, it had a mousse-like texture, but wasn’t as aerated. It was highly approved here at our home, being declared one of the best desserts that I made lately!

It is very simple and easy to make, and the end result is worth any effort.
I will make this again for sure, especially during the summer months. I think that this might also be good frozen, and am just wondering how other fruits would perform here. I guess a mix of berries would be awesome, and even mangoes might be good, yummy! Can’t wait to make it again! Thanks Akemi!

Enjoy!

Ana

Check out Akemi’s blog for the recipe in Portuguese http://pecadodagula.blogspot.com/

Strawberry Bavaroise
360 grams Strawberries
250 ml milk
200 ml whipping cream
100 grams sugar
10 grams unflavored gelatin
1 tablespoon lemon juice

In a small cup sprinkle the gelatin over 4 tablespoons water to hydrate, reserve.
Puree the strawberries and lemon juice in a blender.
Put the milk in a pan and heat over medium-high heat, just until it starts to bubble on the sides, but do not let it boil. Remove from heat; add sugar and the gelatin to the pan, stirring until it dissolves.
Add the strawberry puree to the milk mixture in the pan.
Fill up a big bowl (or the kitchen sink) with ice-cold water, and put the pan over the ice water to cool up the mixture. Keep stirring with a spatula, until the strawberry mixture starts to thicken.

In a separate bowl whip the cream to soft peaks. Add half of the whipped cream to the strawberry mixture and mix to incorporate. Add the rest of the whipped cream and gently fold it in the mixture. Pour mixture on a deep Pyrex dish and refrigerate for at least one hour. Serve with strawberries and whipping cream if desired.

Friday, March 10, 2006

Chicken is good!

My favorite animal protein has definitely to be chicken, chicken breasts, that is. I like meat and adore fish, but chicken is the number one. It is light and doesn’t have strong flavor, which allows for a ton of different dishes, accepting a variety of seasonings and spices, and cooking methods as well.
However, as versatile as it is, I always seem to go for chicken recipes with simple flavors and sauces. For example, I love grilled chicken, seasoned with salt, pepper, olive oil and herbs, my favorites being basil or rosemary. Sometimes I will add yogurt to the marinade for a delicious tang. So good!
The only thing about chicken breasts is that you cannot overcook it, or you get very dry meat and that is not fun to eat. Plus, for oven roasting I learned that the best way is to do it with bone-in, skin-in breast, this way the chicken is sure to stays moist.
Today’s recipe is done on the stovetop, uses chicken breasts and has a very flavorful sauce. And being the garlic fan I am I could not wait to try the Skillet Chicken Breast Aglio Olio. As soon as I saw the recipe I knew I had to make it. And I am glad I did; it was delicious, so much flavor in it, and yet very simple to make!
No secrets here, the ingredients are as simple as can be, and the end result is a very yummy and moist chicken, covered in a sauce infused with the saltiness of the capers and a very subtle garlic flavor, nothing strong at all.
I omitted the hot pepper and did not add the extra salt, but did the rest just as the recipe says. (Since I liked the look of the hot peppers in the magazine picture, I added some chopped red bell pepper to mine, just so that it would look pretty!) At first I wasn’t sure about the addition of breadcrumbs to the sauce but I loved it at the end. The crumbs added such a pleasant texture and thickened the sauce without making it gummy, I will try adding breadcrumbs to thick similar sauces from now on.
I served it sautéed vegetables (carrots and chayote), brown rice and beans. A very good recipe, yummy and tasty, one that will surely be repeated here!

Ana

Skillet Chicken Breast Aglio e Olio
6 (6-ounce) skinless, boneless chicken breast halves
1/2 teaspoon salt, divided
1/3 cup all-purpose flour (about 1 1/2 ounces)
1 tablespoon olive oil
2 tablespoons butter
8 garlic cloves, thinly sliced
2 to 3 tablespoons capers, drained
4 pickled hot cherry peppers, halved and seeded
1 cup organic vegetable broth (such as Swanson Certified Organic)
1 tablespoon dry breadcrumbs
3 tablespoons chopped fresh flat-leaf parsley

Sprinkle chicken with 1/4 teaspoon salt. Dredge chicken in flour.
Heat oil and butter in a large nonstick skillet over medium heat. Add chicken; cook 4 minutes on each side or until browned. Add garlic; cook 30 seconds. Add capers and peppers; cook 30 seconds. Add broth; bring to a boil. Reduce heat, and simmer 5 minutes or until chicken is done. Stir in breadcrumbs; cook until liquid thickens (about 1 minute). Taste sauce, and add remaining 1/4 teaspoon salt, if needed. Remove from heat; sprinkle with parsley.Yield: 6 servings.

Cooking Light, March 2006

Thursday, March 09, 2006

Spoon Bread

See, I am not a big fan of “eggy” dishes (quiche, for example), but I sometimes enjoy eating soufflé. I actually like making soufflé, as it is easy and complex at the same time. You need a flavorful base, and mine usually involves some kind of cheese and/or spinach, and then the egg whites, which should be beaten to stiff peaks, but not too stiff or they will be pretty dry.
Today’s recipe reminded me a lot of a soufflé when I first saw the picture, however the ingredient that caught my attention in this one was cornmeal. I have never had spoon bread before, so I have nothing to compare this one to, but we liked it a lot!
It does have a sort of a souffleish characteristic to it, but with an even nicer texture (in my opinion). It was almost like a cross between a soufflé and a cornbread, but much, much lighter. The texture was what I liked the most; it was sort of creamy, moist and light, all at same time, without being soggy (you know, sometimes my soufflés get a little soggy in the bottom, especially after sitting for a few minutes), and not dry enough to actually resemble bread. Hard to describe, but it was very nice, I really liked this dish and will probably make it again!
Sautéing the ham beforehand brought a lot more flavor to this dish than if it was just thrown in there as is. I did however sauté the onions and ham together, as I don’t see a purpose of doing it in two separate batches. Next time I will try making it with different cheeses, as I like the cornmeal cheese combination and believe I would prefer it without the ham.
The recipe makes a lot; I made half recipe, and it was devoured at dinner! If you like soufflé you may like it too!

Ana

Ham and Two-Cheese Spoon Bread
2 3/4 cups milk
2 teaspoons sugar
1 teaspoon dried thyme
1/8 teaspoon ground red pepper
3/4 cup yellow cornmeal
2 large egg yolks, lightly beaten
Cooking spray
1 cup chopped onion
8 ounces 33%-less-sodium ham, diced
1 cup (4 ounces) shredded reduced-fat sharp cheddar cheese
1/4 cup (1 ounce) grated fresh Parmesan cheese
4 large egg whites

Preheat oven to 375°.
Combine milk, sugar, dried thyme, and pepper in a medium saucepan over medium-high heat. When mixture begins to simmer, gradually add cornmeal in a slow, steady stream, stirring well with a whisk. Cook 3 minutes or until thickened and smooth, stirring constantly. Transfer cornmeal mixture to a large bowl. Add yolks, stirring with a whisk. Let mixture stand 10 minutes.
Heat a large nonstick skillet over medium-high heat. Coat pan with cooking spray. Add onion; sauté 6 minutes or until tender. Add to cornmeal mixture. Recoat pan with cooking spray. Add ham; sauté 5 minutes or until ham begins to brown. Add to cornmeal mixture. Stir cheeses into cornmeal mixture.
Beat egg whites with a mixer at high speed until stiff peaks form (do not overbeat). Gently stir one-third of egg white mixture into cornmeal mixture; gently fold in remaining egg white mixture. Using a rubber spatula, scrape cornmeal mixture into a 1 1/2-quart soufflé or deep baking dish coated with cooking spray. Bake at 375° for 50 minutes or until puffed, golden brown, and just set in center. Serve immediately.

Yield: 8 servings (serving size: about 1 cup)
Cooking Light, January 2006

Tuesday, March 07, 2006

I am still here…!

Not many new recipes, but I am still here, cooking and all! Last week I made mostly repeated recipes that we really enjoy and did not try many new things, so I ended up not posting much.
I got inspired on my fellow bloggers as was trying some recipes that they made. However, I went to make a strawberry recipe that looked very good and half-way through the recipe I found out I was missing one of the ingredients… oh, I hate when that happens. But it is ok, I got everything I need today and soon there will be pictures and reviews around here!
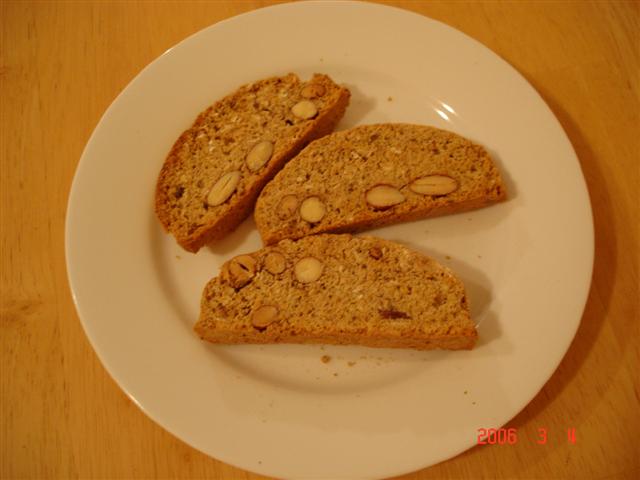
I saw Karen’s post about making biscotti with whole-wheat flour and decided to try. You know, we all try to eat healthy and white flour is one ingredient I try to substitute when it is not extremely necessary. I make all my muffins with whole-wheat flour, and we all love it at home! So, I decided to try it in the biscotti too, and let me tell you, it worked very well!
I tried her recipe, which is very easy, and then went looking for recipes that would have the same principles. And I found a good one. Power Biscotti is full of healthy ingredients and the end result is a very satisfying biscotto, nice and crunchy with a delicious nutty flavor to it! I halved the recipe and used whole almonds on mine, but other than that I followed the recipe as it is. Next time I may try using the slivered almonds, or at least will buy the blanched ones, as I think they look and taste better without the skin in the biscotti.
Sunday we had one of Matheus’ favorite pasta: ravioli! So good, and could not be easier it was actually store bought. I am not the biggest fan of pasta, but some day I will try making the noodles at home, I have heard tons of comments of how much better the homemade version is, plus, pasta is the Husband’s favorite dish of all!
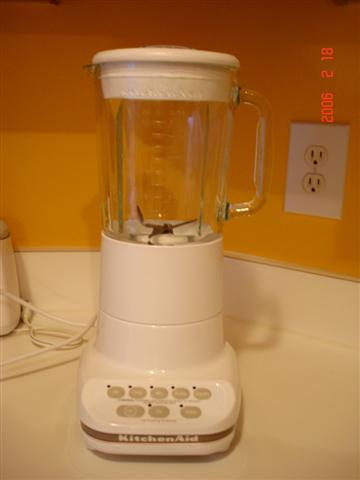
Besides not having many recipes to post I was also very disappointed with my new blender (remember, the pretty one I posted about here…) and had to return it to the store. I really wanted to like that blender because it looked so nice, and since I have a stand mixer from the same brand that is awesome, I never thought it would not be as good.
Oh well… we cannot only trust in the appearances, right?! I guess I will be getting a simpler one now, just like the one I had before, cheap but very efficient!
By the way, did anyone have the same blender as I did? Did you have any problems with it not pureeing things?! (Mine would not puree fruits, and even cooked beans…)
See you soon with more recipes!

Ana

Power Biscotti
2 1/2 cups all-purpose flour
1 cup sugar
3/4 cup quick-cooking oats
1/2 cup sliced almonds
1/2 cup chopped dried apricots
1/4 cup wheat bran
2 tablespoons flaxseed
2 teaspoons baking powder
1 tablespoon vegetable oil
2 teaspoons almond extract
1 teaspoon vanilla extract
3 large eggs
Cooking spray

Preheat oven to 350°.
Lightly spoon flour into dry measuring cups, and level with a knife. Combine the flour and the next 7 ingredients (flour through baking powder) in a large bowl. Combine oil, extracts, and eggs; add to flour mixture, stirring until well-blended (dough will be dry and crumbly). Turn dough out onto a lightly floured surface, and knead lightly 7 or 8 times. Divide the dough in half. Shape each portion into an 8-inch-long roll. Place the rolls 6 inches apart on a baking sheet coated with cooking spray; flatten each roll to 1-inch thickness.

Bake at 350° for 30 minutes. Remove rolls from baking sheet; cool 10 minutes on a wire rack. Cut each roll diagonally into 15 (1/2-inch) slices. Place the slices, cut sides down, on baking sheet. Reduce oven temperature to 325°; bake 10 minutes. Turn cookies over; bake an additional 10 minutes (the cookies will be slightly soft in center but will harden as they cool). Remove from baking sheet; cool completely on wire rack.
Yield: 2 ½ dozen
Cooking Light, November 2000

Sunday's Lunch, yummy ravioli!

Wednesday, March 01, 2006

Taste Testing some cake recipes…

As I mentioned on the last post, I have been testing some cake recipes, but not your usual cake recipes, they are actually more a kind of “allergy-free cakes”! hehe!
Matheus’ birthday is on the 25, and we are going to celebrate at a fun place he chose by inviting his classmates and having yummy cake to round up the fun! However, some of his friends have severe food allergies, and since the only thing I am going to make is the cake, I felt really bad about having a cake that a few kids could not enjoy.
So, I started a quest for an Egg-free Milk-free Nut-free Birthday Cake to make for the party, and that way I hope everyone can participate in the whole fun, including the cake part too!
I tested 3 recipes so far, two for yellow cake and one for chocolate cake. The chocolate cake I had actually made before (one time we wanted cake and didn’t have eggs in the house), but in name of research I did test it again!
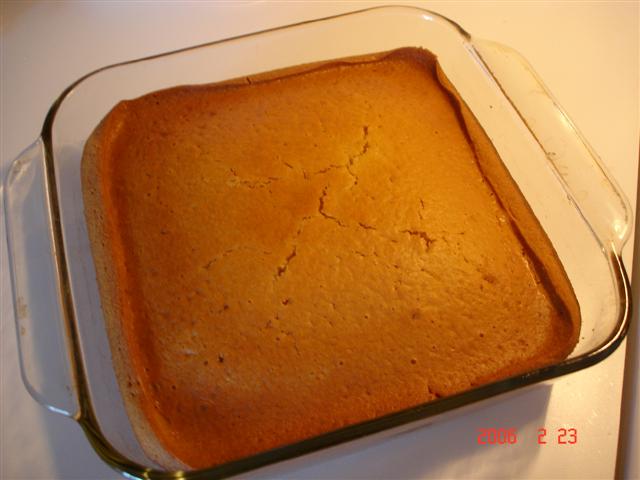
From the two yellow cakes, although the recipes were similar, one came out a little better than the other, and I am posting the recipe with a picture below. The only drawback from this recipe is that it makes a small (8x8 inches) cake, and I would have to at least double the recipe to feed all the 25 kids. However the cake tasted good and kept very moist for over three days.
The chocolate cake on the other side yielded a much better cake, a very moist and tall cake, which was baked in a 9x13 cake pan. (I got the recipe a while ago from the website www.cybercook.com.br) It tasted and looked good, very tender, and everyone was impressed the cake did not actually have any eggs or milk in it. We will probably be having chocolate cake for the birthday this year. If I can convince Matheus, that is; because he originally wanted a white cake with strawberries in the middle… oh well, chocolate cake is still good, right?! And being able to share it with everyone definitely makes it taste even better!
I will post further recipes in case I do more testings. Meanwhile, whish me luck… now I am on my way to taste another frosting recipe (first one did not came out very nice… oops!)

Ana

Milk-Free Egg-Free Chocolate Cake
3 cups flour
2 cups sugar
1 cup cocoa
1 tablespoon baking powder
2 cups warm water
1 cup oil
In a bow mix all dry ingredients together. In another bowl mix wet ingredients, add to mixture and mix until well combined and free of lumps. Pour batter into greased and floured rectangular baking pan and bake at 350 for about 35-40 minutes.


Milk-free, Egg-free Yellow Cake

1 3/4 cups flour
2 tsp arrowroot (optional)
1/4 cup brown sugar
3/4 cup white sugar
1 tsp baking powder
1 tsp baking soda
1 1/2 tsp vanilla
1 tsp lemon juice or vinegar
5 Tbsp canola oil
1 cup cold water
Preheat oven to 350. Grease an 8x8 pan.

Mix dry ingredients in a medium bowl. Add liquid ingredients and beat for 2 minutes. Pour into 8x8 pan and bake at 350 for 30-35 minutes or until a knife inserted comes out clean.

Monday, February 27, 2006

Bean soup

We were in a soup mood last week, so today I am posting one more comforting concoction. I like beans a lot, especially chickpeas and white beans, so when I saw this recipe I immediately copied it and placed in on top of the never-ending-to-try-pile. And I am glad I did! It is a very simple but flavorful soup. I like white beans because they are creamy and almost melt in your mouth, and chickpeas I believe is one of my all time favorites. It has such a nice flavor and is versatile, as it can be prepared in many different ways, you can varying its texture by cooking it more or less, use it soaked raw when preparing falafels, cooked into soups, pureed into hummus (yum!), you can even roast it and turn them into crunchy salty snacks.
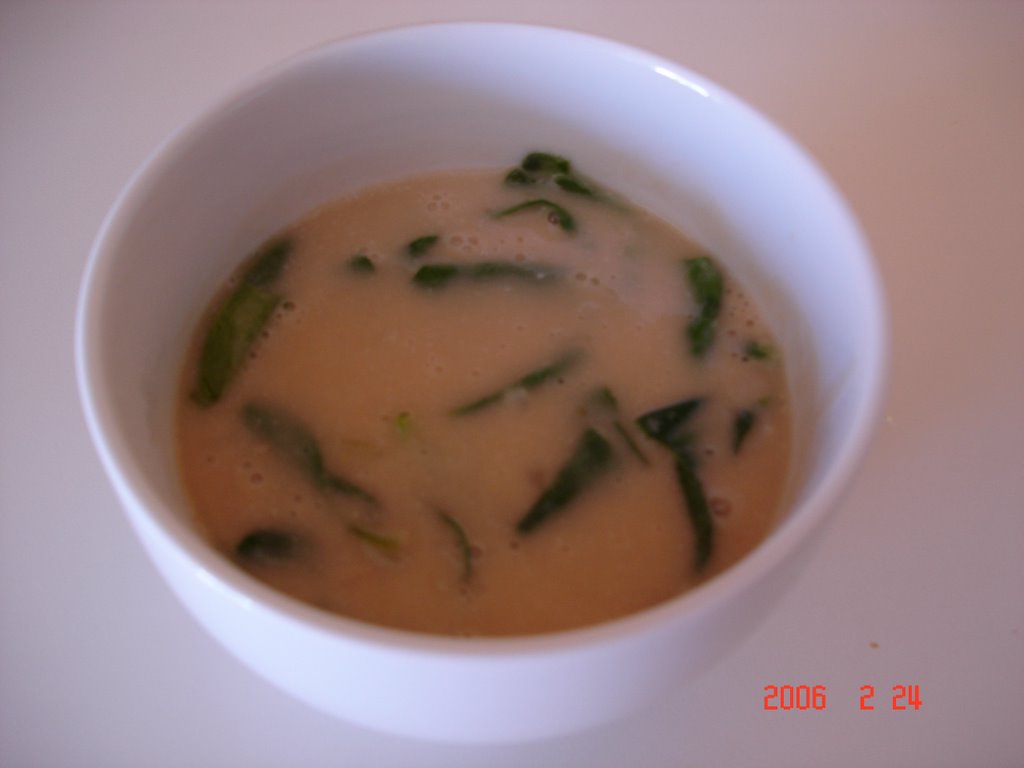
In this dish a combination of both beans is used and then pureed into a nice velvety soup! I wasn’t sure about the addition of spinach but it ended up complementing the soup nicely. I really enjoyed it and so did Matheus. But don’t be fooled by the 8-servings the recipe states, as I believe they are supposed to be really small portions. I made half recipe, we ate it all and ended up wanting some more… oh well, next time I will definitely make the whole batch!
Right now I am in a quest to find a tasty recipe for a “Milk-free Egg-Free Nut-free Cake”. Yes, I know, it seems like a lot of no-no, but as far as my testing are going I think I may actually be getting close to what I need. So, you can expect to see some cake recipes around here soon!
Ana


Creamy Bean Soup With Fresh Herbs And Spinach

3 tablespoons olive oil
3 cups chopped onions (about 2 medium)
3 garlic cloves -- minced
1 tablespoon chopped fresh rosemary
5 cups low-salt chicken broth
2 to 16-ounce cans white beans -- drained
2 to 16-ounce cans chickpeas (garbanzo beans) -- drained
1 package baby spinach leaves -- (6 ounce)
1 tablespoon finely chopped fresh sage
Grated Parmesan cheese
Extra-virgin olive oil (optional)

Heat 3 tablespoons olive oil in large pot over medium-high heat. Add onions and garlic and sauté until onions are golden, about 15 minutes. Add rosemary and stir 1 minute. Add all broth and beans. Bring soup to boil; reduce to medium-low and simmer until flavors blend, about 10 minutes.
Working in batches, transfer soup to blender and puree until smooth; return to pot. Mix in spinach and sage; stir until spinach wilts, about 1 minute. Season soup to taste with salt and pepper. Ladle soup into bowls. Sprinkle each with Parmesan cheese and drizzle with extra-virgin olive oil, if desired.
Makes 8 first-course servings
Bon Appétit, January 2006

Friday, February 24, 2006

Cauliflower soup!

I bought a cauliflower head for using on a different recipe, but with the weather being so yucky and rainy yesterday we were in the mood for some wintry food and ended up having soup instead. And what a delicious lunch we had!
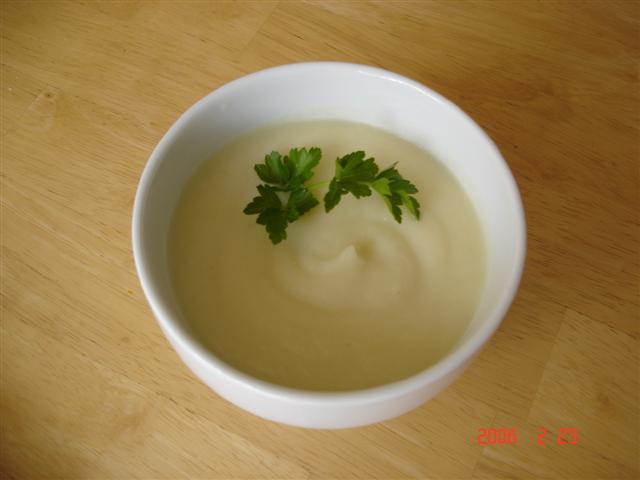
Silky Cauliflower Soup was just the perfect meal for a winter day. Creamy, warm, nice and comforting! I like cauliflower a lot, and recently discovered the wonderful texture it gets when pureed, either in soup or in a “mock” mashed potato, this vegetable is a lot more versatile than most of us think. I loved trying it as a puree, it is amazing how a cauliflower can turn into something so creamy and delicate!
We loved the soup, add a little butter and grated cheese on top and Matheus and I were in heaven!
I made the soup just like on the recipe, but since I like very creamy soups, I did not use all the chicken broth when pureeing mine in the blender. The taste was so good, but I think that some roasted garlic pureed into this would do wonders in terms of flavoring the soup… just a though to keep in mind for the next time, because this one is definitely a repeater here.
Matheus is on a “kebab-thing” right now, we had some kebabs the other day and he just loved the idea, putting anything possible on a skewer now, from chicken to beef, to fruits and veggies, you can only imagine the fun! So we had our soup with chicken skewers and some oven baked spinach croquettes that I made, which were actually very tasty, but the recipe is in Portuguese, so I will translate and post it later. Meanwhile, try the cauliflower soup; it is good!

Ana


Silky Cauliflower Soup
1 head cauliflower
2 tablespoons extra-virgin olive oil
1 small onion, chopped
2 cloves garlic, minced
1 quart low-sodium chicken stock
1/2 cup finely grated Parmesan
Salt and freshly ground black pepper

Remove the leaves and thick core from the cauliflower, coarsely chop, and reserve. Heat the olive oil in a large saucepan or soup pot over medium heat and add the onion and garlic. Cook until softened, but not browned, about 5 minutes. Add the cauliflower and stock and bring to a boil. Reduce the heat to a simmer, cover, and cook until the cauliflower is very soft and falling apart, about 15 minutes. Remove from heat and, using a hand held immersion blender, puree the soup, or puree in small batches in a blender, and return it to the pot. Add the Parmesan and stir until smooth. Season, to taste, with salt and black pepper.
(Recipe adapted from www.foodtv.com)

Wednesday, February 22, 2006

Pictures…

It is funny how the simplest food sometimes makes us droll…Last week I was reading some of my favorite blogs when I saw a picture at Valentina’s Blog (trembom.blogspot.com) of Stuffed Eggplant. Oh my, I love eggplant and just looking at that picture made me crave that dish too.

So, over the weekend we had to have some eggplant! I actually did not use a recipe, and when I came here to write my post I went to check back at Valentina’s, just to see how she made hers, and it was quite the same way I did!

I like to boil the eggplant shell before stuffing, just so that you get tender eggplant on both the filling and the shells. That also cuts up in the baking time, and if I have the filling and eggplant warm, a quick run through the broiler is enough to get a nice crunchy and cheesy top!

Valentina’s recipe is actually in Portuguese, so I am posting here a recipe in English that I have made before and liked a lot!

The eggplant in the picture above was stuffed with sautéed onions, garlic, diced tomatoes, the eggplant pulp, ground beef, and seasonings. But if you prefer a vegetarian dish you can omit the meat, or even substitute it with those soy crumbles, it is going to be yummy anyway you do! It is a very simple recipe that you can easily adapt to suit your taste.

The Greek-Style Stuffed Eggplant does not contain meat and the flavors are more pronounced due to the ingredients (especialy the fetta cheese). It is very tasty and we all liked it a lot when I made it at home. (When I made mine, the only thing I did different was to boil the eggplant on the stove, instead of the microwave method)

I hope one of the variations may appeal to your tastes! I love eggplant made this way, and you know what… just writing about it is making me crave it again!

Today we have lots to do and places to go, so we will probably end up eating out, but I have some plans for lunch tomorrow, let’s wait and see what comes next!

But before you go, check out my new blender, isn’t it pretty?! (My old one stopped functioning last week, after seven years of everyday use; I was sad in a way, but also quite happy to get a new toy!)

Ana


Greek-Style Stuffed Eggplant
2 eggplants, cut in half lengthwise (about 3 pounds)
1/4 cup water
Cooking spray
1 cup chopped onion
1 cup chopped plum tomato
1/4 cup white wine
3 garlic cloves, minced
1 cup (4 ounces) crumbled feta cheese
1/2 cup chopped fresh parsley, divided
3/4 teaspoon salt, divided
1/4 teaspoon freshly ground black pepper
2 (1-ounce) slices French bread
2 tablespoons grated fresh Parmesan cheese

Carefully remove pulp from each eggplant, reserving shells. Coarsely chop pulp to measure 6 cups. Place eggplant shells, cut sides down, in a 10-inch square baking dish. Add water to dish. Cover and microwave at high 5 minutes or until shells are tender. Keep warm.
Preheat broiler.
Heat a large nonstick skillet coated with cooking spray over medium-high heat. Add eggplant pulp; saute 7 minutes. Add onion; sauté 2 minutes. Stir in tomato, wine, and garlic; cook 3 minutes or until liquid almost evaporates, stirring occasionally. Remove from heat; add feta, 1/4 cup parsley, 1/2 teaspoon salt, and pepper, stirring to combine. Spoon 3/4 cup eggplant mixture into each eggplant shell.
Place the bread slices in food processor; pulse 10 times or until coarse crumbs measure 1 cup. Combine breadcrumbs, 1/4 cup parsley, 1/4 teaspoon salt, and Parmesan, stirring well. Sprinkle 1/4 cup breadcrumb mixture over each stuffed shell. Arrange shells on a baking sheet coated with cooking spray; broil 2 minutes or until lightly browned.
Yield: 4 servings (serving size: 1 stuffed eggplant half)
Cooking Light, June 2003

Tuesday, February 21, 2006

Yummy Fish!!

Although I haven’t been making new recipes lately, I should still come here and post more often. I really enjoy reading the other food blogs, learning new recipes and techniques and seeing their pictures, it is so much fun!
I took a few pictures last week but never got the time to sit down and post it. But I am back now!

Today I made a pretty nice meal for our lunch. I baked some Fish en Papillote, not a real recipe, and it turned out delicious!!
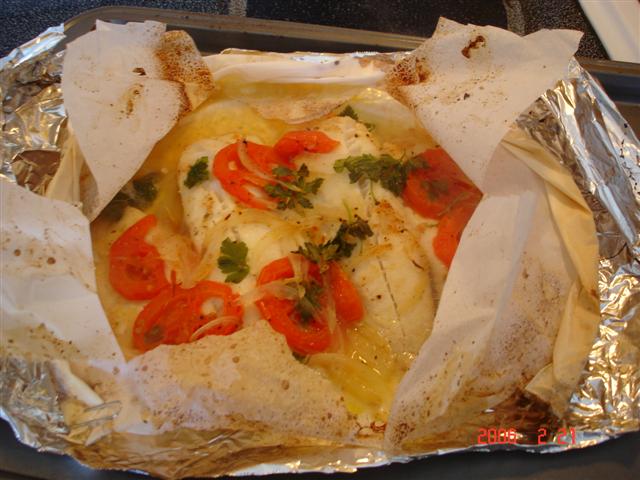
I seasoned two tilapia fillets with salt, pepper and olive oil. Put on top of a big piece of parchment paper, added some sliced tomatoes, onions, a few parsley sprigs (I love basil on this, but did not have any fresh today), seasoned with a little more salt, a sprinkle of paprika and garlic powder. Added about ¼ cup chicken broth to the packet (I like to use white wine here, but did not want to open a big bottle for this little amount), closed the parchment, and popped into the oven (425) for 20 minutes.

It could not have been any simpler and the flavors were just so good! I served with Balsamic Roasted Asparagus, which was extremely delicious and also super easy to make! The asparagus and the fish cooked at the same time (the asparagus went in the oven after the fish had been cooking for 10 minutes), and we had a tasty lunch, all rounded up with brown rice and some leftover beans (rice & beans, Brazilian style!).

Not only easy and tasty, but also very healthy! I should get into the habit of cooking fish more often!

Come back later, as I will post some pictures and recipes from what I cooked last week!

Ana


Balsamic Roasted Asparagus
1 pound asparagus

1 tablespoon olive oil

1 tablespoon balsamic vinegar

1/2 teaspoon kosher salt

1/2 teaspoon bottled minced garlic

1/4 teaspoon freshly ground black pepper

Preheat oven to 425°.
Snap off tough ends of asparagus. Place in a jelly-roll pan. Drizzle with olive oil and vinegar; sprinkle with salt, garlic, and pepper, tossing to coat. Bake at 425° for 10 minutes, turning once.

Yield: 4 servings
Cooking Light, January 2006

Tuesday, February 14, 2006

A quick post to share another heart!

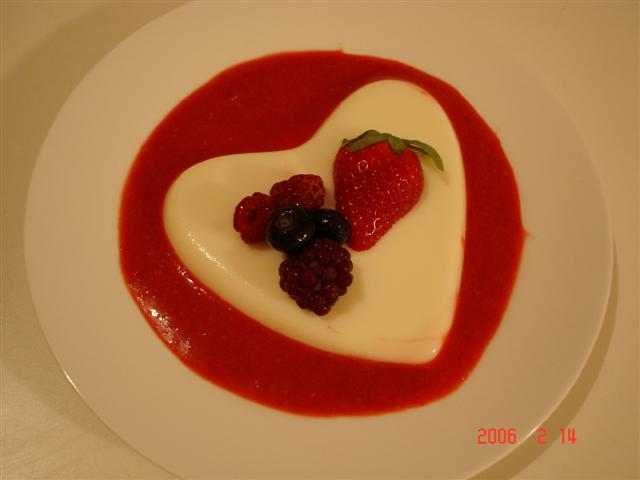
I simply love anything creamy, especially desserts! Among my favorites are custards, ice cream, and puddings, and last year I discovered one that really goes into these categories, panna cotta! As soon as I had my first one of this creamy and delicious custard I immediately fell in love with it and am always looking for new sauces and recipes to try!
They are rich when made with cream, and tangy when using buttermilk. But today’s recipe was by far one of the best ones I had, made with a combination of heavy cream and yogurt (I use plain whole milk) Yogurt Panna Cotta is now on top of my list!
Slightly sweet and deliciously creamy, this was by far one of the best desserts I have had! The perfect ending to a romantic Valentine’s Day meal!
I served ours with strawberry couli and assorted berries, but the possibilities for sauces here are endless…
Yummy! We just ate it and I could not wait to come here and share!

Ana

Yogurt Panna Cotta
¼ cup water
2 teaspoons unflavored gelatin
1 ¼ cups cream
¼ cup sugar
1 ½ cups yogurt
1/2 teaspoon vanilla (or almond) extract

Bloom gelatin in water. Warm cream and sugar until sugar is dissolved. Remove from heat; add gelatin and stir to dissolve. Whisk in yogurt and extract. Pour mixture into 6 ramequins (4 oz) and chill.
Note: I copied this recipe a while ago but did not write down from where, so I am sorry for not crediting the proper source.

"Hearty" Bread that I served for our cheese fondue! (It was so pretty I did not even wanted to cut into it...!)


Isn't my Husband nice?! Look what I got for Valentine's Day! Oh... I am so happy!!

Catching up on the Memes….

So, here I am back to answer the Vegetables Meme that Karen from “Kafka na Praia” tagged me! I love vegetables, so this is going to be fun!

1. Do you like vegetables?
I love it!

2. Do you have a favorite vegetable?
I them all, but I like squash a lot! (especially butternut)

3. Is there any vegetable that you think (or know) most people don’t like, but that you find great?
Chayote squash. I also love eggplant, but not everybody is crazy about it as I am.

Why?
Most people find chayote to be somewhat bland in its flavor, and not many people know it here in the US.

4. Is there any vegetable that you think (or know) most people find great, but that you don't love that much? Which experience you have with it?
More and more I have been finding recipes that includes Fennel, the bulb. I really do not like its flavor, in any variety; I guess the “anise” kind of flavor is not for me at all. Also, I don’t like celery, and most people love it.

5. Which kinds of vegetable are unusual to you?
Rhubarb is something I have not eaten many times or even cooked with it.

6. Name a couple of vegetables that you cook or eat.
Oh my… I eat lots of carrots, broccoli, cauliflower, corn, tomatoes, squash (winter and summer ones), bell peppers, eggplant, pumpkin, asparagus, potatoes, and more… I like them all!

7. Which vegetables do you want to know better and bring into you kitchen more frequently?
I would like to experiment more with the variety of roots available!

8. Some thoughts about vegetables.
I certainly could not live without vegetables! They bring so many flavors to our meals, plus they are packed with vitamins, healthy and good for you!

9. Name a great cookbook on vegetables.
A vegetarian book that I find great (and probably the next one I going to buy) is Vegetarian Cooking for Everyone, by Debora Madison. This book is full of good recipes!

And now, I tag Joe from Culinary in the Desert, you are it!

Monday, February 13, 2006

Tagged again!

So, I have been tagged for 2 memes this past month and, shame on me, had not yet replied. So, here am I to answer the first one, and later I will come back with the next.
The first one I was tagged for the Sevens Meme by Erika from Tummy Treasure!
So, here it goes:

The Sevens Meme:

Seven Culinary Things to do Before I Die
1. Take cooking classes
2. Eat Gelatto in Italy
3. Try a few fruits I have never eaten (love fruits!!)
4. Learn to make good Whole Wheat Bread
5. Go on a cooking tour around Europe
6. Open my food business (a Cafe!)
7. Eat lots of good chocolate!

Seven Things I Can't do in The Kitchen
1. Clean it enough
2. Cook without spilling...
3. Cook without trying the seasoning
4. Get a full batch of cookies without burning some...
5. Use the amount of sugar called in recipes (I always find things too sweet)
6. Frying food... argh!
7. Cooking with fennel... yucky

Seven Things That Attract Me to Food Blogging
1. It is fun!
2. I made new friends and reconnected with old ones!
3. Keeps me interested in trying new recipes
4. New notions about designing a home page
5. I can show my family in Brazil my cooking!
6. Sharing my passion with family and friends
7. There are tons of cool food blogs that I like to visit!

Seven Thing I Say Most Often While Cooking
1. Oops!
2. Ouch, it is hot!
3. Wait just a second Matheus...
4. Hummm, this is good!
5. Fran, come try this... So, what do you think?!
6. Yummy!
7. Oh no...

Seven Cookbooks I Love
1. The Complete Cooking Light Cookbook
2. Cooking Light Annuals
3. Dona Benta (Brazilian Cookbook)
4. Mosewood Lowfat Favorites
5. Fresh Every Day
6. The Foster's Market Cookbook
7. 1000 Lowfat Recipes

Seven Food Shows I Can Watch Over and Over Again
1. Good Eats
2. Barefoot Contessa
3. Food 911
4. Mexico with Ricky Bayless
5. Jamie Oliver's shows
6. Nigela Lawson (unfortunately I can't see them at my house....)
7. Some specials about chocolate, etc...
Happy Valentine’s Day!!!

What could be more appropriate to celebrate Valentine’s Day than chocolate, right? It does scream romance to me, and certainly makes us feel very happy!
Today I made one of my favorite chocolate cake recipes; Chocolate Fudge Snack Cake is a delicious and chocolaty cake that is simple and rich at the same time, satisfying any chocolate craving without being too heavy or extremely sweet.
Another plus is that this recipe makes a small cake, so we can always indulge without having to deal with the same dessert for several days.
The cake is nice, soft, and sort of fudgy in the middle, which is always a good thing, as it keeps the cake moist on the day after it is baked too!
Very easy to make and incredibly delicious!! I love to bake cakes, and I don’t know why, but I don’t have the best luck with chocolate cake (have tried many recipes already), so when the craving hits I usually stick to this recipe, and always end up very happy with my treat!
Happy Valentine’s Day!!

Ana

Chocolate Fudge Snack Cake
2 teaspoons all-purpose flour
1 cup all-purpose flour
1/2 cup cocoa
1/2 teaspoon baking soda
1/4 teaspoon salt
5 tablespoons butter, softened
1 teaspoon vanilla extract
11/4 cups granulated sugar (I use 1 cup)
2 large eggs
2/3 cup fat-free buttermilk

Preheat oven to 350°.
Coat an 8-inch square baking pan with cooking spray; dust with 2 teaspoons flour. Lightly spoon 1 cup flour into a dry measuring cup; level with a knife. Combine flour, cocoa, baking soda, and salt, stirring with a whisk.
Place butter in a large bowl; beat with a mixer at medium speed until smooth. Add vanilla; beat well. Add granulated sugar, 1/4 cup at a time, beating well after each addition. Beat at medium-high speed 3 minutes. Add eggs, one at a time, beating well after each addition.
Beating at low speed, add flour mixture and buttermilk alternately to sugar mixture, beginning and ending with flour mixture; beat just until smooth.
Pour batter into prepared pan. Bake at 350° for 32 minutes or until a wooden pick inserted in center comes out clean. Cool in pan 10 minutes on a wire rack; remove from pan. Cool completely on wire rack.
Yield: 9 servings

Cooking Light, March 2003

Monday, February 06, 2006

Quinoa

I could not wait to come here and post today’s recipe after we had lunch today. Creamy Quinoa Primavera was simply delicious! Seriously, it was one of the best dishes I had lately! So yummy, creamy and full of flavors!
Since I discovered quinoa last year I have been collecting (and trying) a few recipe here and there, and each time I eat quinoa I like it even more! It is a very nutritious grain, full of protein and some fiber as well. It has a yummy nutty flavor, which I really like.
Today’s dish was by far the best quinoa recipe I have had, a great combination of flavors between the quinoa and the veggies; it was creamy and cheesy (“risotto-like”), really, really good! Plus, Matheus loved it too and we polished off the half recipe I made!
I got this recipe from the Cooking Light Bulletin Boards; “Valchemist” posted it. Thanks Val!
If you like quinoa then give this recipe a try! I loved it and will definitely be making it again, and again…

Ana

Creamy Quinoa Primavera
1 1/2 c quinoa -- uncooked
3 c chicken broth
2 ozs reduced-fat cream cheese
1 tbsp chopped fresh basil -- or 1 tsp dried
2 tsps butter
2 garlic cloves -- finely chopped
5 c thinly-sliced or bite sized pieces of
assorted veggies -- such as asparagus, broccoli, carrots, zucchini
2 tbsps grated romano cheese

Rinse Quinoa thoroughly and drain. Heat quinoa and broth to boiling in 2-quart saucepan; reduce heat. Cover and simmer 10 to 15 minutes or until the broth is absorbed. Stir in cream cheese and basil. Melt butter in 10-inch nonstick skillet over medium high heat. Cook garlic about 30 seconds, stirring frequently. Stir in vegetables. Cook about 2 minutes, sitirring frequently, until vegetables are crisp-tender. Toss vegetables and quinoa mixture. Sprinkle with cheese.
Yield: 6 servings
Source: "Betty Crocker's Healthy Home Cooking"

Sunday, February 05, 2006

Cupcake

I began planning Matheus’ birthday party (turning 4 on March 25!!) this past week, and since we started talking about cakes and other yummy goodies Matheus has been asking me to make cupcakes. Maybe it is because they are small and cute; but there is something about cupcakes that makes children (of all ages!) like them a lot! Matheus is not different and loves cupcakes, especially the ones frosted and with colored sprinkles on top.
The other day he did not want to eat much due to his cold, and the only thing he wanted was cupcake, so cupcake it was! (Yes, he did have a cupcake and some milk for diner… not healthy I know, but I was glad at least he ate something!)
I decided to try a new recipe, and it ended up being a great one. The recipe came from one of the first cookbooks I bought, which is (believe it or not) a low fat cookbook.
Ok, I know, cupcakes are not actually meant to be low fat, but these ones were, and they were delicious! Nice and soft cupcakes, not too sweet (I cut back a little on the sugar), and firm enough to be frosted. We loved them at home and they will definitely be my standard cupcake recipe from now on!
As for the frosting on our cupcakes, I actually used drained vanilla yogurt. I always do this and for me it is way better than any frosting (not a fan of frostings and icings here). The yogurt was firm and creamy, it iced the cupcake nicely and even hold up nicely the “kissables” (Hershey’s version of m&m) we used to decorate.
I really liked this recipe, Matheus was happy with his cupcake, and even ended up eating some healthy yogurt with it! Not bad, huh?!!

Ana


Cupcakes
2 tablespoons unsalted butter, softened
1 cup sugar (I used ¾ cup)
¼ cup vegetable oil
1 ¾ cups all-purposed flour
½ teaspoon salt
1 egg
1 egg white
1 teaspoon vanilla extract
½ teaspoon baking powder
½ teaspoon baking soda
½ cup plain yogurt

Preheat oven to 350F. Grease 12 muffin cups, or line with paper cups.
Beat butter and sugar. Add oil, flour, salt, egg, egg white, and vanilla, and mix well
Stir baking powder, baking soda, and yogurt into the batter.
Pour batter into muffin cup, filling half-way. Bake 20 minutes, or until tops are golden.
Yield: 12 muffins
Recipe Adapted from “1000 Low fat Recipes” by Terry Blonder Golson

Some cooking this week…

Although I had planned a little more cooking this week, it still turned out to be ok. Matheus got a cold (which unfortunately turned into a beginning of pneumonia), so he hasn’t been feeling too well lately, which means he needs more attention from mommy and is not all that interested in eating… Oh well, I just hope next week will be smoother (so much for doctor’s appointments) and that he will get better, up and running again soon.
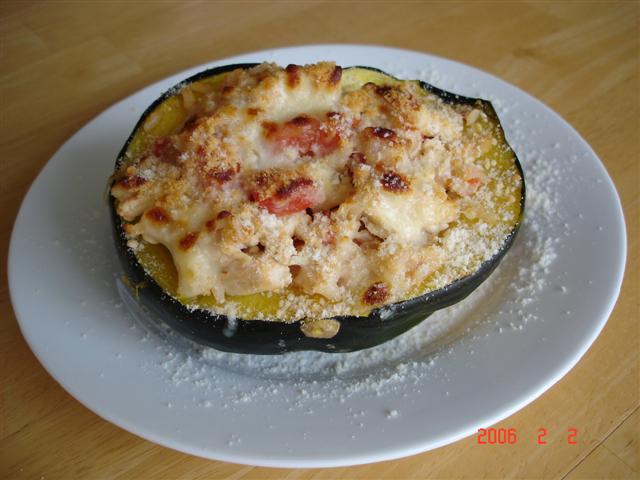
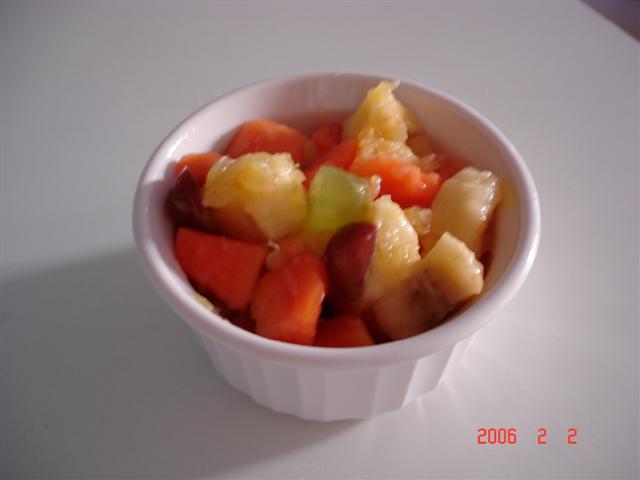
Here are some pictures I took during the week from my cooking, which I actually meant to post a couple days ago. I made a stuffed acorn squash that turned out very tasty! I have seen many recipes for this but all the ones I looked when I wanted to make I did not have one or two ingredients, so I ended up sort of making my own creation. I sautéed some onions and garlic in olive oil, added a chopped tomato, cooked and shredded chicken, cooked brown rice and seasonings, made a sort of a risotto thing and stuffed it into the acorn squash (which has been previously halved, cleaned, and cooked in the microwave for about 10 minutes). For an extra taste I added shredded mozzarella and gratted Parmesan to the top and put it in the broiler for a couple of minutes. Not difficult to make, but very tasty nonetheless. Fruit salad for dessert ended up a light and tasty lunch!
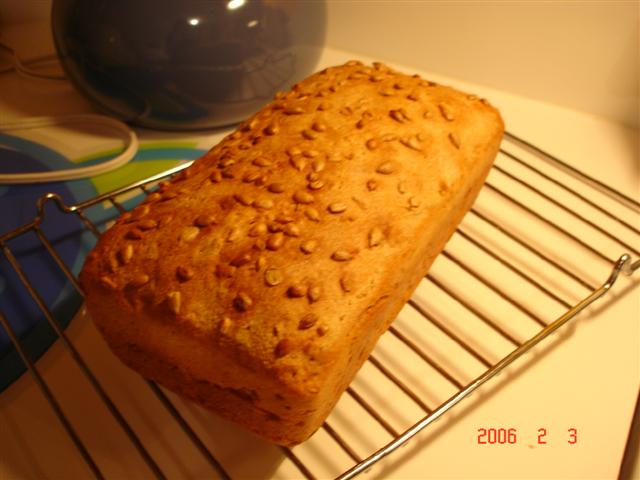
I also tried a recipe for whole grain bread with pumpkin seeds. It turned out nice, with a very good texture (not too dense for a whole wheat bread), however the flavors here could be improved. None of us actually liked the bread at our home...
I love those breads that have lots of small seeds inside (flax, sunflower kernels, and those tiny little yellowish balls that I have no idea what they are), and would love to be able to make nice whole grain bread at home. So I decided to start experimenting with whole wheat/grain breads but am still looking to finding best recipe. Would you have any suggestions?!?!?! Recipes are definitely welcome!
Well, this is it for now, but I will come back later to post a recipe for cupcake that I also made this week and came out surprisingly good!
See you all soon!

Ana

I love fruit salad! It is sooo good!


Whole wheat sunflower oat bread... looks good, but needs improvements!

Thursday, February 02, 2006

Granola!

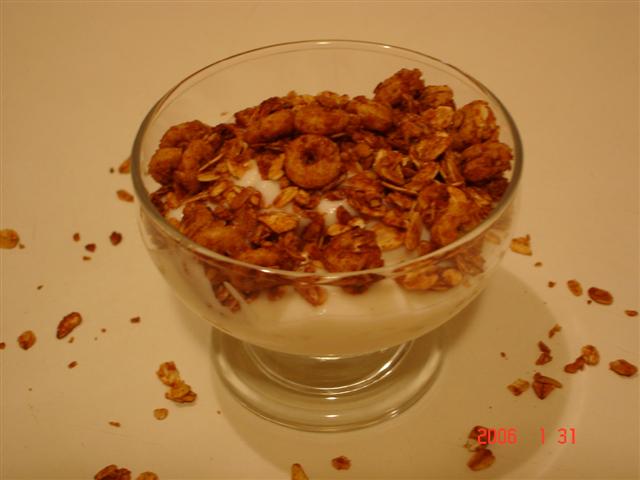
I looove granola, especially with yogurt and fruits for breakfast, yum!! As I have said here before, I love oatmeal in any form, so Granola is just the perfect crunchy snack for me!
However, most commercial granolas not only have lots of stuff in it but also are overly sweet for my taste. So, I usually make my own granola at home. It is a very simple thing to make; the only catch is to pay attention to the oven because the oats can scorch very easily.
I sort of developed my own recipe for granola based on my likings and a few recipes I have seen, but since I saw this recipe last year I really wanted to try it. I like all sorts of apple-flavored things; besides, Joe from the “Culinary in the Desert” gave good reviews on this one too!
Apple-Cinnamon Granola is a lot like the granola I make, so I was quite positive I was going to like this one. And I sure did!
The ingredients are easy and with all the good stuff it could not come out wrong. But be prepared, because it is very addicting; I made half batch Tuesday night, and believe it or not it is all gone, and shame on me… I was the only one eating it! (The husband is not a big fan of cereals in general) Oh well, at least it is supposed to be healthy, right?
Oats are delicious and so good for you! Yum! I am definitely going to make this one again!
Enjoy!

Ana

Apple-cinnamon Granola
3 cups regular oats

1 cup whole-grain toasted oat cereal (such as Cheerios)
1/3 cup oat bran
1/3 cup finely chopped walnuts
2 teaspoons ground cinnamon
1/4 teaspoon ground cardamom
2 tablespoons butter
1/3 cup applesauce
1/4 cup honey
2 tablespoons brown sugar
Cooking spray
1 cup chopped dried apple

Preheat oven to 250°.
Combine first 6 ingredients in a large bowl, stirring well to combine.
Melt 2 tablespoons butter in a medium saucepan over medium heat. Add 1/3 cup applesauce, honey, and brown sugar to pan, and bring to a boil. Cook for 1 minute, stirring frequently. Pour applesauce mixture over oat mixture, stirring to coat. Spread mixture in an even layer on a jelly-roll pan coated with cooking spray. Bake at 250° for 1 1/2 hours, stirring every 30 minutes. Allow to cool completely. Stir in chopped apple.
Note: Store granola in an airtight container up to one week.

Yield: 6 cups
Cooking Light November 2005