Friday, June 30, 2006

Go Brasil!!

I've been meaning to post for a while here, since I came to Brazil, but due to a few techinical problems the computer needed some repairs and only this week we were able to use the internet again. Isn't it funny how attached we get to the computer world? It seemed we were isolated from the world without the internet for a few days! hehe!
Now I am back and hopefuly with a few recipes to post in the near future. I haven't been cooking much these past few days, mostly we are enjoying the family and the yummy Brazilian foods we don't have (or is harder/expensive to find) in the US.
I am not going to post a recipe today, as I just came to say hello and coment a bit about the Brazilian soccer team that is doing great at the Soccer World Cup. And oh boy, people over here are going crazy with the games, there are flags and the yellow and green colors everywhere, it is a little overwhelming, but the happines around is really cool!
On the last game I made some yellow and green jello for dessert, yummy!
I will be coming back home next week, and will definitely resume my cooking/posting activities around here!! I love to cook, and posting on this blog as well!
See you all soon!
Ana

Wednesday, June 14, 2006

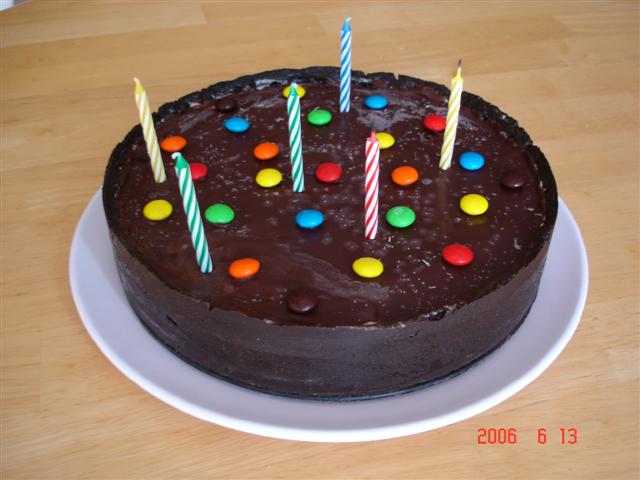
Happy Birthday to the Husband!

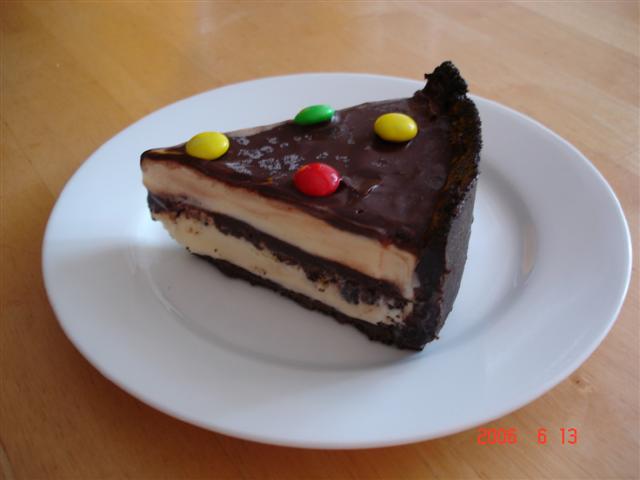
Yesterday was the husband’s birthday, and he asked for an ice cream cake this year. I went on the web and found this recipe at Epicurious; the original recipe used peppermint candies and extract to flavor the ice cream, but I opted for leaving the ice cream on its original vanilla flavor, as we definitely like it more around here.
One of the husband’s favorite ice creams is vanilla-Oreos, so when I spotted this recipe I knew right away it was going to be a success. And it sure was; we all liked it a lot here! Although, with lots of ice cream and chocolate, what is not to like?!
It is not a difficult cake to make, actually the crust and glaze is all there is to make. The rest is basically assembling and waiting for it to freeze as you go. Quite simple, but you need to make it in advance.
The cake provides a good contrast between the softness of the ice cream and the firmness of the crust, plus the shinny and gooeyness of the glaze. One word: Yummy!
Now, recipes apart, we are going to Brazil today, so it will probably be a few days before I post again, but do come back, because I will sure be posting while we are there!
See you all soon!
Ana


Ice Cream Cake
Crust
1/2 cup (1 stick) unsalted butter
8 ounces bittersweet (not unsweetened) or semisweet chocolate, chopped
1 1/2 9-ounce packages chocolate wafer cookies (about 61 cookies)

Glaze
1/2 cup whipping cream
1/4 cup light corn syrup
6 ounces bittersweet (not unsweetened) or semisweet chocolate, chopped

Filling
7 cups vanilla ice cream, slightly softened

For crust:
Melt butter with chocolate in heavy small saucepan over low heat. Finely grind cookies in processor. Add warm chocolate mixture; blend just until crumbs are moistened. Reserve 1 cup crumb mixture in small bowl. Press remaining crumb mixture onto sides, then bottom of 9-inch-diameter springform pan with 2 3/4-inch-high sides. Freeze.

For glaze:
Bring cream and corn syrup to boil in heavy large saucepan. Remove from heat. Add chocolate; whisk until melted and smooth. Let stand until cool but still pourable, about 1 hour.

Assembling:
Spoon half of ice cream into crust; spread evenly (place remaining ice cream mixture in bowl in freezer). Sprinkle reserved 1 cup cookie crumbs over ice cream in pan; press gently. Pour 1 cup chocolate glaze over ice cream in pan. Freeze 1 hour. Top with remaining ice cream; spread evenly. Freeze until firm, about 4 hours. Stir remaining glaze over low heat just until pourable but not warm (I nuked in the microwave for 20 seconds). Pour glaze over ice cream; spread evenly. Freeze overnight.
Run sharp knife between crust and pan sides to loosen cake. Release pan sides. Transfer cake to platter. Garnish as desired and serve.
(adapted from the following recipe from epicurious.com: Chocolate-perppermint Ice Cream Cake)

Monday, June 12, 2006

Granola Bars

Matheus loves granola bars; he likes to eat them for breakfast, and sometimes as a snack as well. Granola bars are yummy and even sound like a healthy treat, however if you don’t pay attention to the ingredient list of store bought ones you could be ingesting a lot of not so good for you stuff together with a little of the healthy oatmeal and dried fruits (and I mean things I read and can’t even pronounce…).
As a nice mom who happens to love cooking and experimenting, I decided to try a few granola recipes for Matheus’ breakfasts, this way at least I know what he is eating and make sure he is getting some proper nutrition before sending him off to pre-school!
I tried a couple recipes already and this one was the absolutely winner. So much so that I didn’t even try another one, since Matheus declared he loved these and has been happily requesting them for breakfast!

Granola Bars III came from the website allrecipes. They are super easy to make, simple and yet delicious!
I have made them with both chocolate chips and dried fruits (dried cherries and raisins), and they were equally good (omited the walnuts both times I made). Matheus liked the chocolate chips ones better though!
The bars are chewy, kind of moist but with a nice texture to it. They also freeze remarkably well; just let them sit on the counter for a few hours (or overnight) to thaw, or a quick 20 seconds on the microwave will quickly do the trick for you.

I am sorry for the picture, I know they didn’t come out very good-looking bars, but they sure tasted great!
Ana

Granola Bars III (allrecipes.com)
2 cups quick cooking oats
1 cup all-purpose flour
3/4 cup packed brown sugar
3/4 cup raisins
1/2 cup wheat germ
1/2 teaspoon salt
1/2 teaspoon ground cinnamon
1/2 cup chopped English walnuts
1/2 cup vegetable oil
1/2 cup honey
1 egg
2 teaspoons vanilla extract

Preheat oven to 350 degrees F (175 degrees C). Line a 9x13 inch baking pan with aluminum foil or parchment paper, and spray with vegetable oil spray.
In a large bowl, stir together oats, flour, brown sugar, raisins, wheat germ, salt, cinnamon, and walnuts. In a smaller bowl, thoroughly blend oil, honey, egg, and vanilla; pour into the flour mixture, and mix by hand until the liquid is evenly distributed. Press evenly into the prepared baking pan.
Bake 25 to 30 minutes in the preheated oven, or until the edges are golden. Cool completely in pan before turning out onto a cutting board and cutting into bars.

Chocolate-Tofu Mousse

Don’t let the title of this recipe refrain you from trying this mousse. I know sometimes tofu can be intimidating, and I have had some issued with it myself, but in this recipe there is no error, no problems, no after tastes, what you get is a creamy and chocolaty concoction, so good that no one will never ever think about tofu when eating this.
My husband won’t even get near tofu… no matter how much I want to try and experiment with it, I will have to eat the food all by myself. However, I have made this recipe twice already and he has not the slightest idea it has tofu in it. No one here knows… and we all agree it is one of the best chocolate desserts. I loooove creamy desserts, and this one is just perfect!
Super easy to make, full of good stuff, not to mention the rich chocolate flavor!
This recipe turned into a very dense and dark chocolate mousse, and I have made another similar recipe before which contained 2 egg whites beaten to stiff peak. We liked this recipe a lot as is, but if you want your mousse to have that light and airy texture, then you might consider adding the egg whites, which to be quite frank with you, I will do next time I make this.
Try this mousse. Seriously, it is good!
Oh, and before I forget, it is Valentine's Day in Brazil today so... "Feliz Dia dos Namorados" to all the Brazilian lovers out there!!
Ana

Dark Chocolate Mousse
1 (12.3-ounce) package silken tofu
3 ounces semisweet chocolate, chopped
1/4 cup unsweetened cocoa powder
1/2 cup sugar
1/4 cup water

In a blender puree the tofu until it is smooth.
Melt the chocolate, cocoa powder and water in a double boiler, or in the microwave
. Remove from heat. Mix in 1/2 cup of sugar until smooth.
Add the chocolate mixture to the tofu and puree until smooth and well blended. Spoon the mousse into serving dishes, cover and refrigerate for at least 1 hour.
Yield: 5 servings
(adapted from a recipe by Ellie Krieger)

Sunday, June 11, 2006

Flaxseed Crackers

I love the nutty flavor of flaxseeds, add it to my yogurt every morning and always put some in my muffins and baked goods. Besides being yummy, it has good fatty acids, such as omega 3, and help keep me “regular”, if you know what I mean.
Since it is so healthy and good for us, I have been experimenting with recipes, bought a book about it and the ones I have tried have been winners.
This recipe I got from the Bob’s Red Mill Website. While browsing for bread recipes I found this one for crackers and promptly printed and added to the “to-try” list. The other night I wanted some savory crackers and there was none in the house, so I decided to try these ones.
They came out very nice, crispy, crunchy, with a yummy nutty flavor to it. The whole seeds add to the texture and complement the flavor that the meal lends to the whole thing.
I used half whole wheat and half white flour, but next time I will try using all whole wheat. I am so used to its taste, and eating mostly whole-wheat products, that I didn’t care much for the white flour taste on my crackers.
They are easy to make and to eat too… I made mine smaller than the size the recipe recommends (basically the size of those TLC crackers, which are my favorites), so I got a lot of crackers, which was not bad, as they tasted just as good after being stored for three days in a tight-sealed container.
I mixed all my ingredients by hand, in a big bowl and added a little more salt than the recipe asked for (doubled the amount), and I glad I did, because I still thought they need more salt…. Also, to half of the batch I brushed with melted butter and sprinkled kosher salt, which made them even better, and I will definitely do the brushing/sprinkling to all of them next time a make them!
Hearty and healthy, nice wholesome crackers that are worth trying!
Enjoy!
Ana

Flaxseed Crackers (Bob’s Red Mill website)
¼ cup flaxseed
¼ cup flaxseed meal
1 ½ cup all-purpose flour
½ teaspoon baking powder
½ teaspoon sea salt
4 teaspoons butter, softened
½ cup milk

Preheat oven to 325°. Set aside an ungreased baking sheet.
In a bowl of a stand-up mixer, add flax seed, flax seed meal, flour, baking powder, salt and butter. With the paddle attachment, mix on low speed until the mixture
resembles a coarse meal.
Stir in milk and mix until mixture forms a soft dough. (You can also mix the dough by hand.)
Wrap dough in plastic wrap and chill 10 minutes. Divide the dough into quarters. Turn out onto a lightly floured board. Roll out very thin to a rectangle approximately 1/16” thick. Cut into 2-1/2” squares. Transfer to an ungreased baking sheet. Repeat with remainder of dough.
Bake 20 minutes, until crisp and golden.
Variations:
1 tb powdered onion soup mix
1 cup grated cheddar cheese
1 tb oregano with 1 cup grated mozzarella cheese
Yield: approximately 24 crackers

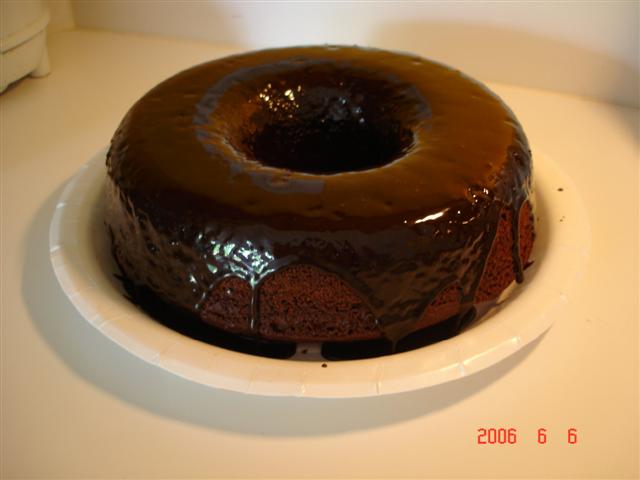
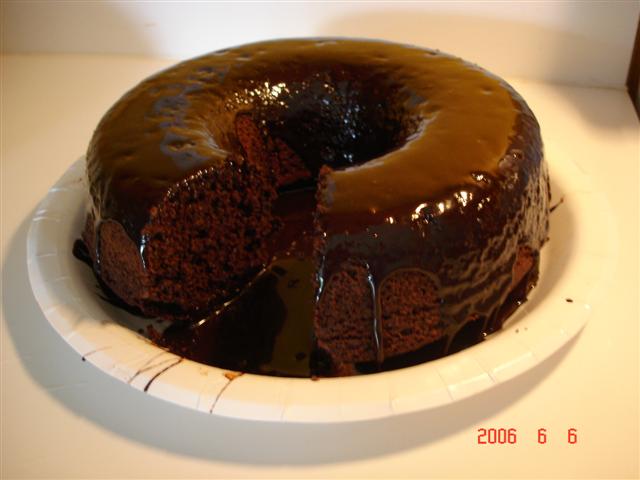
You Can’t Beet this Cake

No, it is not a typo, you read it right, I wrote “beet” in the title of the post. Yep, there is beet in the cake!
Can you believe it?!?! So couldn’t we! If no one tells, you would probably not know there was beet in this nice and chocolaty cake!

As I was making the cake:
Matheus: mommy, what are you making?
Me: cake!
Matheus: chocolate cake?
Me: yes, it is a Chocolate Beet Cake!
Matheus: (looking at me, smiling like I was crazy) Ahhh, silly mommy, you can’t put beets in cakes!
Me: Yes you can! Don’t we make carrot cakes?
Matheus: Yes!
Me: So, I am making a beet cake today!
Matheus: is it really a chocolate cake?
Me: Yes!
Matheus: Yummy, I love chocolate cake!

And he sure liked this one. Especially the glaze, he actually asked if he could eat a second piece, but just the glaze part! The husband also liked it a lot (and the glaze too!), and I actually ended up mentioning the beet to him, just to get a real review of the recipe. He said he would never guess about the beets in it, he could not taste it (although I could), and happily finished his piece of chocolate cake!
The method for this cake is actually the way we make Brazilian-style carrot cakes, however, we do not use the cocoa in the batter and the cake turns out a nice shade of orange, and it is commonly topped with a chocolate glaze. I will post a picture and recipe for the carrot cake here soon.
Now I have to get to the news… I am going to Brazil! Yes, again!! And no, this is not common. We normally go for Christmas time and my family came to visit us in July. However this year they are not coming and we are probably not going in December, so we decided to go now.
Matheus has been asking to go to Brazil again since we got back in January, so the husband finally gave off the multiple requests and decided to send the two of us for a little vacation (hubby has to work… no Brazil for him this time, sniff!). We are leaving this week and will be back in July.
I made lots of recipes this past two weeks, and have been meaning to come here and post, but between the end of school year and the trip I ended up not having much time and inspiration to write. But I guess I will have time in Brazil, so I will keep posting from there and adding the new recipes as we go.
Until then, I hope you enjoy our chocolate cake too!
Ana


Chocolate Beet Cake
1 large beet (or 2 small), raw, peeled and chopped into pieces
4 eggs
1 ½ cups sugar
½ cup canola oil
1 cup all-purpose flour
1/2 cup whole-wheat flour
1 tablespoon baking powder
4 tablespoons cocoa

Pre-heat oven to 350F.
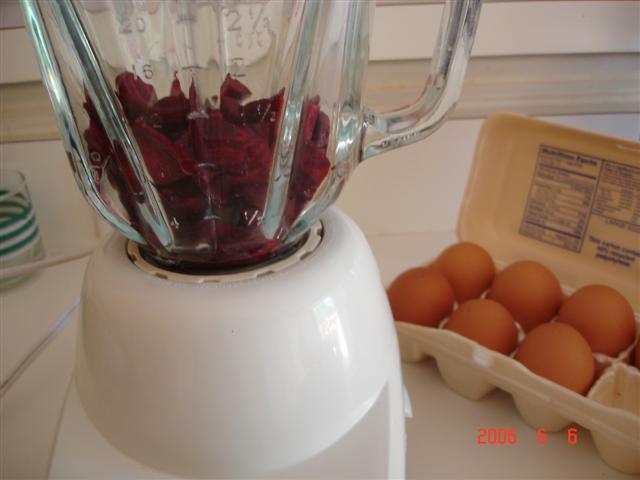
Put beet, eggs, sugar, oil and cocoa in a blender and mix until smooth and liquidy, and there is no large pieces of beets remaining.
Pour batter in a large bowl, add flours and baking powder, and mix well with a wooden spoon until everything is incorporated. Pour batter into a greased bundt pan and bake at 350F for 35 to 40 minutes, or until a toothpick inserted comes out clean.

Chocolate Glaze:
In a saucepan put 1 cup sugar, ¾ cups cocoa, 1 tablespoon butter, and ½ cup milk. Cook over medium heat until thickened. Remove from heat and immediately pour over cake.

Monday, May 29, 2006

Appetizers

I tried two appetizer type recipes last week and both were winners around our house!
The first was a dip I have been wanting to try for a while. It comes from Giada de Laurentis cookbook, Everyday Italians, and received rave reviews from those who tried it.
Now I know why! This dip has the perfect balance of creaminess and flavor. The white beans have a delicate flavor and smooth texture, both characteristics that paired with the lemon juice and parsley turned into a delicious and tasty concoction. I loved this one and will definitely repeat!
My favorite dip is hummus, and this recipe now comes in a close second on my list!
I served the dip with baked pita chips that I made, a delicious contrast of crispy and crunchy chips with the creamy dip.
The dip is also good served with crunchy veggies on the side, I like carrots, cherry tomatoes and red bell peppers too!
The second recipe I tried was a Mini Quiche. I attended a baby shower in which we were all supposed to bring in a dish, and since I was assigned to a savory one, I opted for this one.
I actually came up with a recipe myself, after reading through several other ones. The crust was great, and actually my favorite part here! It was extremely easy to work with and came out very tasty and crispy. I enjoyed this crust a lot and will definitely use it again when making this kind of tartlets. I even think they would be good in sweet little tarts, I guess omitting the salt and adding some sugar to the dough would work well here (but make sure to use unsalted butter!).
For the filling I basically used what I had in the fridge, and it worked out quite well.
I made it into mini quiches, so that it would be easy to eat, but I guess it should work just as well if baked into a quiche pan. Just be sure to adjust the baking time.
Everybody liked the mini quiche at the baby shower, and I was very happy to hear they were a lot better than store bought ones!
Two new recipes to try, and if you like creamy foods as I do, be sure to try the dip, it is really good!
Ana

White Bean Dip
1 (15-ounce) can cannellini beans, drained and rinsed
2 cloves garlic
2 tablespoons fresh lemon juice
1/3 cup olive oil, plus 4 tablespoons
1/4 cup (loosely packed) fresh Italian parsley leaves
Salt
Freshly ground black pepper

Place the beans, garlic, lemon juice, 1/3 cup olive oil, and parsley in the work bowl of a food processor. Pulse until the mixture is coarsely chopped. Season with salt and pepper, to taste. Transfer the bean puree to a small bowl.
For the pita chips I simply cut the pita bread into pieces, season them with salt, pepper and olive oil, and bake at 350 for about 5 minutes. Talk about easy and good!


Mini Quiches

Crust:
1 cup all-purpose flour
¼ teaspoon salt
½ cup cold butter, cut into small pieces (1 stick)
3 ounces chilled cream cheese, cut into small pieces

Mix everything together in a bowl. Using a pastry blender, or two knives (as I did!), cut the butter and cream cheese into the flour until it resembles coarse meal. With your hands form the dough into a ball, shape into a log and wrap with plastic wrap. Chill for about 1 hour. (You can use a food processor here; I guess it would be a lot easier if I had one!)
Cut the log into 24 pieces and press then into 24-cup mini muffin pan. While you make the filling put these on the freezer to firm up.

Filling:
3/4 cup grated white cheddar cheese

¼ cup ham, chopped finely

2 eggs

1/3 cup heavy cream (or half-half)

Chopped herbs (I used fresh oregano)

Salt and pepper to taste

Combine grated cheese and ham in a small bowl. In another bowl mix eggs, heavy cream, salt, pepper and herbs. Sprinkle the ham/cheese mixture into the muffin tins, then spoon in the egg mixture into the shells.Bake it at 350 F for about 30 minutes.

Wednesday, May 24, 2006

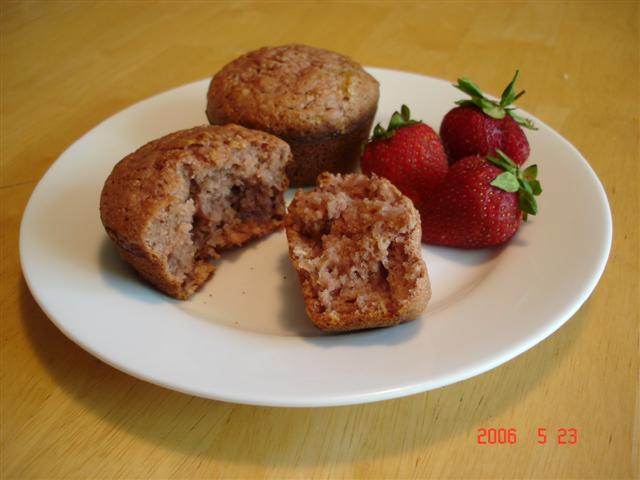
Strawberry Muffins!
As you already know, I love baking muffins, so in order to use up some of the strawberries we picked last weekend I decided to make one of the boys favorite baked treats: Strawberry Muffins!
Although definitely not my favorite, the boys really like these muffins and always wait for me to make them during the strawberry season. A couple years ago I adapted a recipe from a cookbook I had (after making it as the original and not liking it much) and came up with this one.
These muffins are very moist and have a nice pink hue to them. They are very easy to make and also simple in its complexity. To improve the flavor you can add grated orange rind, as the strawberry-orange combo is a pretty nice one. However, I was out of oranges yesterday and ended up leaving it out, but the muffins came out ok!
The original recipe called for all-purpose flour; I normally use whole-wheat flour in my baked goods, but opted for a combination of the two here, as these muffins are quite delicate. I also added about ½ cup oats to the batter, as it always seems too liquid to me, and it worked well, it was just enough to get the batter together without adding heaviness to it (with a bonus of some added nutrients too!)
I find this a little on the sweet side, but the boys (Matheus and the Husband) enjoy it just like it is! I decreased the sugar amount from the original recipe, and you can add or take out based on your own taste.
Hope you enjoy this one, and it seems we will have some more strawberry goodies, as there are still some strawberries around (and we are already planning to go pick some more!).
Ana


Strawberry Muffins 

1 2/3 cup fresh strawberries, halved 
2 eggs
1/3 cup grape seed oil
1 teaspoon vanilla extract
1 1/2 cups flour (I use 1 cup whole wheat, ½ cup all-purpose)

1/2 cup sugar
1 teaspoon baking powder

1/2 tsp baking soda
1/2 tsp cinnamon
1/4 teaspoon salt


Preheat oven to 350
Line muffin tin with baking cups or grease with coconut oil, reserve.
In a large bowl mash strawberries with a fork, add sugar, oil, egg and vanilla and mix well.
Add flour, baking powder, baking soda, cinnamon, and salt and mix well just until all incorporated.
Pour batter into muffin cups and bake at pre-heated oven for about 18 minutes.
Makes 11 to 12 muffins depending on the size of your muffin tins.

Monday, May 22, 2006

Strawberries Anyone?!?!?!

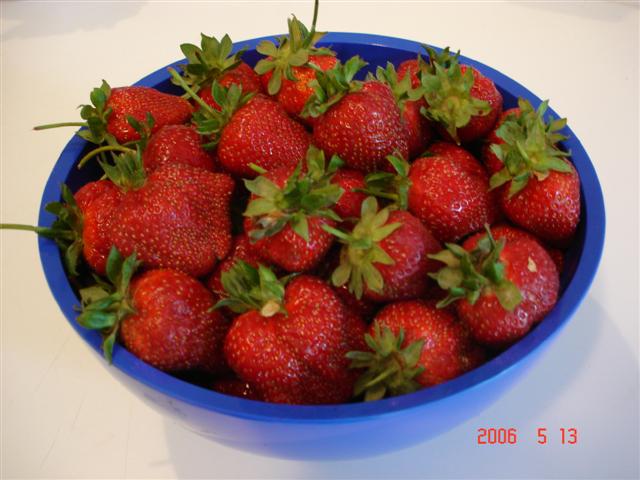
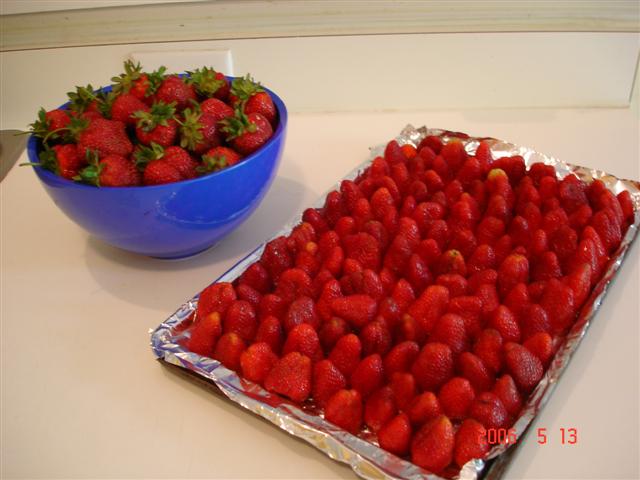
Just a quick post to show some of the strawberries we picked at a nearby strawberry farm! Aren't they gorgeous?! Sweet and Juicy too!! Yum!
We froze most of them, for future use and smoothie making, but some of them are in the fridge, and I know they won't last long...
Watch for some strawberry recipes coming up soon!
Ana

Savory Ricotta Pie

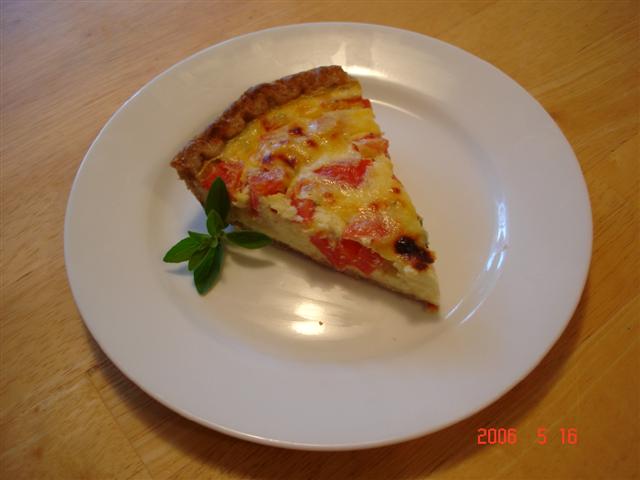
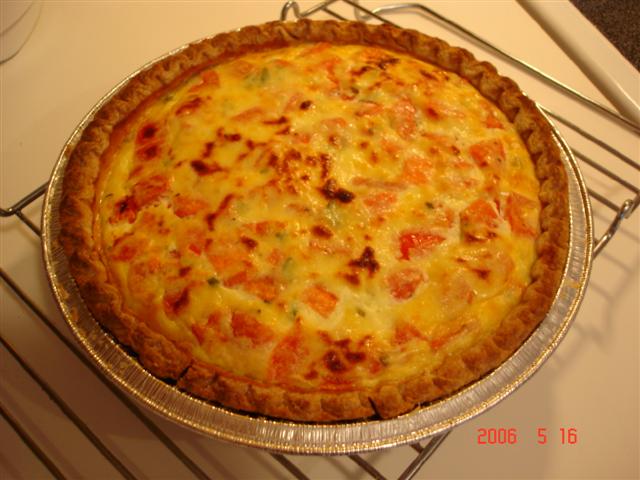
I had some ricotta to use up last week before we headed out for the beach and came up with this recipe. Savory Ricotta Pie was a spur of the moment creation and ended up being a very good dish!
I used a store bought whole wheat pie crust that I had in the freezer, and mixed together the filling in a matter of minutes, making this a very quick and satisfying dinner all in one!
We all liked this a lot, which means it will probably be repeated here. Which is a good thing, because this recipe is so basic that the possibilities for variations are endless. You can add basically anything you like, different cheeses, a variety of veggies, really, you can make up your own pie using the base I used for the ricotta filling. Just make sure you don’t use any wet ingredients, so the pie won’t be soggy.
I used diced fresh tomatoes that I seasoned with salt, pepper, olive oil and oregano, put them on a sieve and let them drain while I pre-baked the crust and made the filling.
The pie filling was very tasty; the ricotta was moist and did set up nicely. The tomatoes and oregano just complemented the whole thing bringing a lot of flavor to the dish. Basil would be great here too!
One combination I love is ricotta and spinach, so I will most likely be trying that one next.
Oh, and the ricotta I used here was the one I made with the recipe I posted here before (I know, I know… I am working on a recipe index, it will make our lives easier to look for previous recipes, but please be patient!!).
Hope you enjoy this one as much as we did!
Ana


Savory Ricotta Pie

1 9-inch piecrust (store bought or your favorite recipe)

2 cups ricotta

2 eggs

¼ cup grated white cheddar cheese

2 teaspoons olive oil

Salt and pepper to taste

2 small roma tomatoes, diced

Sprigs of fresh oregano (or a teaspoon of dried)

Pre heat oven to 350 F.
Season the tomatoes with salt and pepper to taste, put them on a sieve and let it drain while you mix the filling.
Bake piecrust for about 10 minutes, remove from oven and let cool. (If desired you can brush the inside with egg white, just to create a protective coating to the crust, so it doesn’t get soggy)
Mix together the ricotta, eggs, grated cheese, olive oil, fresh oregano, and salt and pepper to taste (I usually season the ricotta first, so I can adjust the amount of salt and pepper according to my tastes without having to taste the raw egg).
Pour about ¾ of the filling into the cooled piecrust, add the tomatoes and top with remaining filling.
Bake at 350 for about 30 - 40 minutes, or until set and golden on top. Let cool before serving.

Wednesday, May 17, 2006

Brownies

No posts this past couple of days, but it was for a good cause. We went to the beach for the weekend and that was a lot of fun! The weather was nice, it was sunny and Matheus had a good time between playing in the sand and swimming in the pool at the hotel. Definitely one of the best trips we had around here!
As I mentioned in a previous post, the play date we were having last week (the one I made the cookies for) was rescheduled, so we decided to make a different treat for the new date. This one was even easier to make and just as good as the cookies. After all, who doesn’t like brownies, huh?!

Well, we do! And although I prefer my brownies on the simple side (with a scoop of ice cream is nice too!), this one didn’t disappoint.
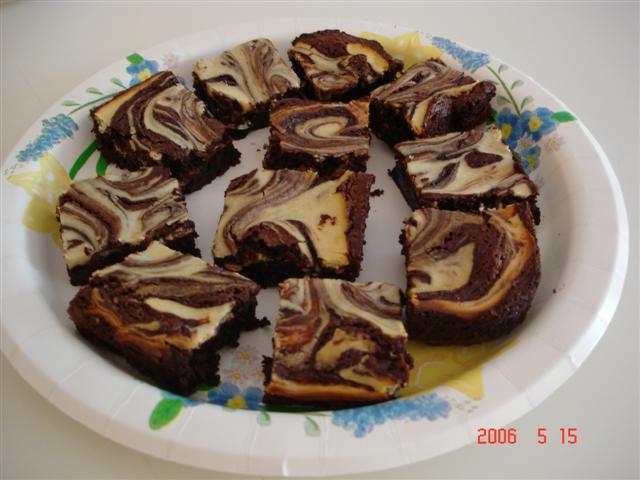
With a little addition to the top, Cheesecake Brownies bring some improvement to the brownie world. These were yummy, and being the cheesecake fan he is, the Husband loved this one!

Brownies were fudgy in the middle, just as I like, and the cheesecake topping really gave them an extra twist, something to definitely consider trying if you have not had it yet!

I actually developed my own topping recipe based on others I had seen, and to be practical (and use up the box that was sitting in the pantry for a while) I used a brownie mix, but you can use your favorite recipe, it will work just the same. The picture is not that pretty, since I had to cut it while it was still a little warm, but if you wait until completely cool you should be able to get nice clean cut squares out of them.

Hope you all like it, and come back for some savory recipes this week, I have been making too much sweets lately, haven’t I?!!

Ana

Cheesecake Brownies
1package brownie mix, or your favorite recipe
4 ounces cream cheese
½ egg (yes, I thought 1 egg would be too much…)
1 teaspoon vanilla extract
2 teaspoons flour
¼ cup sugar (more or less to taste)

Prepare the brownie mix accordingly to the package instructions. Pour the batter on a 8x8 square baking pan, reserving about ¼ cup of it, set aside. In a small bowl combine all the other ingredients until well mixed and smooth. Pour the cheesecake mixture over the brownie batter, dollop with the remaining ¼ cup of reserved brownie mix. Gently run a knife into the batter to make swirls. Bake at 350 F for about 30 minutes. Do not to over bake, so start to check it at 25 minutes to see if it is not ready yet. Let cool before slicing.
Notes: if your brownie recipe yields a 9x13 baking pan, then you should double the cheesecake batter, and reserve about ½ cup of the brownie batter to dollop on top and make the swirls.

Tuesday, May 16, 2006

Another Turkey loaf …

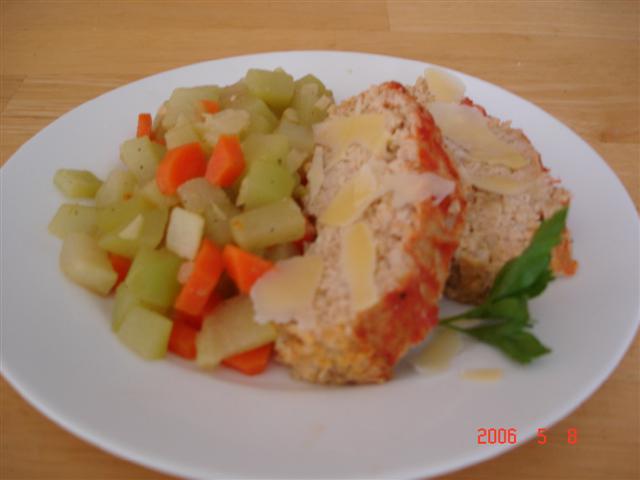
I have posted a recipe for meatloaf here before, but I tried a different recipe last week (which I saw on a new TV show) and it was so good that I had to come and post it here. I actually liked it so much more than the previous recipe, that this one is now declared my favorite.
Meatloaf is not a gourmet dish by any means, but I like the way it tastes and even more the ease of preparation, and home cooking is basically this: healthy food made with love, that taste good and is easy to prepare, right?!
There is no work involved in making meatloaf other than mixing and putting it into the oven, pretty easy but tastes so good! And is versatile too, as you can shape it in any form, bake it in individual portions (using muffin or mini loaf tins), and add anything you like to it from a variety of veggies to cheeses, some people even add whole cooked eggs inside them, making it look prettier when cut through.
I usually make mine plain, sometimes adding grated carrots or zucchini; they make it moister and taste it even better.
This recipe is no different from the others, however it produced a extremely moist loaf, and better than that, it was made entirely with ground turkey breast (which usually tend to be dry).
The different ingredient here is oatmeal, it really added to the moistness of the meatloaf, and believe me, you cannot taste it at all. The one thing I added extra to the recipe was a 1/4 cup of grated parmesan cheese, as I think it adds a lot of flavor to this type of dish.
This now became a favorite and will definitely be repeated many times here! Give it a try!
Ana

Turkey Meatloaf
1/3 cup oats
¼ cup milk
½ onion, peeled and grated
1 pound ground turkey
¼ cup chopped red bell pepper
1 egg, beaten
1 tablespoon Worcestershire sauce (which I ommited, did not have at home)
2 tablespoons ketchup (I used tomato sauce, as I didn't want sugar added to the loaf)
¼ teaspoon salt (or more to taste)
Ground black pepper
1/4 cup grated cheese
4 ounces tomato sauce

Preheat the oven to 350 degrees F.
In a small bowl, stir together the oats and milk. In a large bowl combine the turkey, oat mixture, onion, bell pepper, eggs, Worcestershire sauce, ketchup, grated cheese, salt and a few grinds of pepper. Mix just until well combined.
Transfer the mixture to a loaf pan. Pour the tomato sauce over the meatloaf and sprinkle with sliced onions (if desired). Bake for about 50 minutes or until an instant-read thermometer registers 160 degrees.F.
Remove from the oven and let rest for 10 to15 minutes before slicing.
(Recipe adapted from Healthy Apetite by Ellie Krieger)

And more cookies…

We were going to have a play date last week and since we were in a chocolate chip cookie mood we decided to make some more to share with the friends. This time though I choose a slightly different recipe, with peanut butter in the dough, as I had some in the fridge that needed to be used up.
Chocolate and Peanut Butter Cookies is basically your usual recipe for chocolate chip cookies with a couple tablespoons of peanut butter added to it. I actually upped the peanut butter, adding an extra tablespoon (as I said, needed to use up the peanut butter and I wasn’t going to leave one tablespoon in the fridge anyway…), I also added and extra tablespoon of butter to it, as some people that made the cookies commented on it being a little on the dry side.
Well, ours were not dry or crumbly at all; they were actually perfect, crispy bottom, crunchy edges and chewy middle, very delicious! There were not much peanut butter flavor to it, a very subtle taste, but it definitely added to the texture of the cookies, and since I used natural peanut butter there were those tiny little pieces of ground peanuts through out the cookies, which made them taste even better!
Matheus and the Husband really liked it, and I was very pleased with the results on this one (I am not a huge fan of chocolate chip cookies…), which has already been added to our list of favorites!
If you like chocolate chip cookies do give it a try, cause these are really good!
Oh, and by the way….the play date was rescheduled and we ended up eating all the cookies ourselves during the weekend, yum!
Ana

Chocolate and Peanut Butter Cookies
1 cup all-purpose flour
1/2 teaspoon baking powder
1/2 cup granulated sugar
1/2 cup packed brown sugar
1/4 cup butter, softened
2 tablespoons creamy peanut butter
1 1/2 teaspoons vanilla extract
1 large egg white
3/4 cup regular oats
1/2 cup raisins
1/2 cup semisweet chocolate chips
Cooking spray

Preheat oven to 350°.
Lightly spoon all-purpose flour into a dry measuring cup, and level with a knife. Combine flour and 1/2 teaspoon baking powder in a small bowl, stirring well with a whisk. Place the granulated sugar, brown sugar, butter, peanut butter, vanilla extract, and egg white in a large bowl; beat with a mixer at medium speed until well blended (about 2 minutes). Add flour mixture, 3/4 cup oats, 1/2 cup raisins, and 1/2 cup chocolate chips, stirring until ingredients are well combined. Cover and freeze cookie dough for 10 minutes.
Divide cookie dough into 30 equal portions, shaping each one into a ball. Place the dough balls 2 inches apart on baking sheets coated with cooking spray, and flatten dough balls with the bottom of a glass. Bake the dough balls at 350° for 15 minutes. Remove the cookies from pans, and cool completely on wire racks.
Yield: 30 cookies
Cooking Light, April 2004

Cookies

One week without postings… I miss porting in the blog, but last week I was just not in the mood for neither cooking nor eating much. I had such a bad episode of sinus and ear infections, that food literally lost it taste for a few days. I was so congested that I could not smell or taste well the food I made. And this does not help when you like to cook and is already feeling tired with all the viruses going on inside your body.
Oh well, a week of antibiotics later and I am feeling much better! Which is good, because we are going to spend the weekend at the beach and I definitely want to be feeling good then.
Not much cooking, but Matheus and I managed to make some cookies last week. It’s been a while since we did a weekly treat for the class, so he wanted to make cookies and take to school to share with his friends.
It seems that everybody’s favorite there is chocolate chip cookies, so that is what he chose.
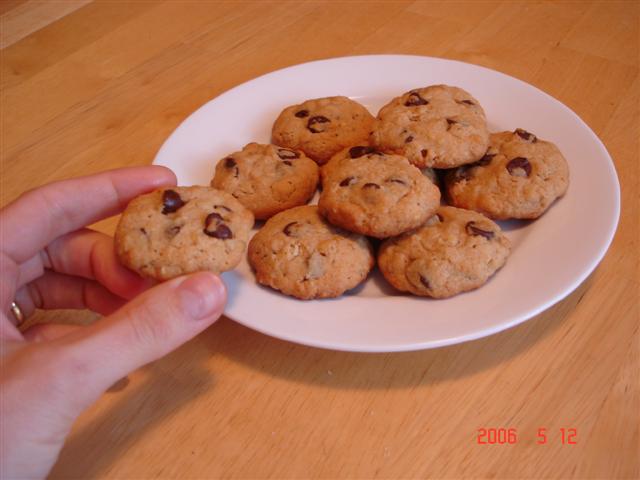
Bev’s Chocolate Chip Cookies is my favorite recipe for this kind of cookies. I love oatmeal and chocolate, put the two together and it cannot end in something bad! This cookies are healthier the other versions, but just as good, we all love it at home, and it was also a big success at school! Matheus came home all happy telling me all his friends liked the cookies too!!
Enjoy!
Ana

Bev's Chocolate Chip Cookies
3/4 c rolled oats
1 c whole wheat flour
1/2 tsp baking soda
1/2 tsp salt
1/4 c butter -- softened
1/4 c canola oil
1/3 c sugar
1/3 c packed brown sugar
1 egg
1 tsp vanilla
1 c chocolate chips

Grind oats in a blender or food processor. Transfer to a bowl and stir in flour, soda, and salt. Beat butter in a large bowl until fluffy. Add sugars, oil, egg, and vanilla and beat until smooth. Add dry ingredients and beat until just combined. Stir in chips. Drop by heaping teaspoonfuls onto pan. Bake at 350 for 15 minutes or until cookies are firm around the edges and golden on top. makes 30 small cookies.
(Recipe from Eating Well Magazine)

Sunday, May 07, 2006

Flan!

The Husband sort of had a craving for Flan this weekend, so I made it yesterday for our dessert today. It was super easy to make, yet it produced a very tasty and creamy dessert! No major appliances needed for this one, just a couple ingredients, that you probably already have on hand, and you got yourself a delectable end for any meal!
I would say that the hardest part of this is making the caramel, and being fast (and careful) enough to divide it up into the ramekins before it starts to set. After that it is just mixing and pouring, popping into the oven and waiting for it to chill (which sometimes is also hard, huh?!).

Very yummy, creamy but also very light, we liked it and I already got requests to repeat this one!

Ana

Flan
½ sugar
3 eggs
2 cups milk
2 teaspoons vanilla
½ cup sugar (or more, to taste)

In a sauce pan heat the ½ cup sugar until it caramelizes. Divide it into 6 individual ramekins (or custard cups).
Mix the rest of ingredients in a bowl with a whisk. Divide mixture into prepared ramekins.
Put ramekins into a big baking dish, add water to the baking dish and bake the custards in a water bath at 325 for about 45 minutes. Let it cool, chill in the refrigerator. To serve, run a knife around the edge of the cup and invert onto a plate. Yum!

Friday, May 05, 2006

The ricotta, and my favorite squash

As promised, here am I with a dish using ricotta cheese, and this one was very yummy! I looked through a few recipes for Butternut Squash Lasagna and sort of came up with my own.
When I made the lasagna, I did not measure much, so I tried to figure quantities for the ingredients. Below I am sort of giving the directions as how I made mine, but you can use more or less of the ingredients, to suit your own taste. You can also make it with white (Alfredo) sauce instead of the marinara sauce, which I actually am going to try next, as I believe it may be even better than this one.
I made ours in individual bowls as I wanted to do individual portions, but a Pyrex dish will work just as well. And since the bowls were small I didn't do many layers, but in the pyrex you can do as many layers as you want. (some people like their lasagna to be "taller"!)
It was a very good and yummy dish, everybody liked it a lot at home, so I will probably be making this one again in the fall this year!
Hope you like it too!
Ana

Note: I forgot to mention in the recipe, I also added a few chopped sage leaves to the butternut squash puree when I seasoned it. I like the combination of squash and sage!

Butternut Squash and Ricotta Lasagna
1/2 cup shredded mozzarella cheese
1/4 cup chopped fresh parsley
Salt and pepper to taste
2 cups ricotta cheese
2
cups butternut squash puree
about 3
cups Marinara sauce (or another pasta sauce you like)
Pre-cooked
lasagna noodles
G
rated fresh Parmesan cheese and mozzarella cheese for topping

Season the butternut squash puree with salt and pepper, set aside. Mix the ricotta with the mozzarella cheese, set aside (you can season this mixture too if you like).
Coat the bottom and sides of a (8-inch-square) baking dish with cooking spray. Spread some sauce in the bottom. Arrange noodles to cover the bottom over sauce; spread ½ of the ricotta cheese over noodles. Arrange 1cup squash over cheese mixture; spread 1cup sauce over squash.
Arrange more noodles over sauce; spread remaining cheese mixture over the noodles, and then 1cup of the sauce over it.
Make another layer of noodles over sauce; spread remaining sauce evenly over noodles. Sprinkle with Parmesan and mozzarella cheeses, cover baking dish with aluminum foil. Bake at 35o° for 20 minutes. Uncover and bake an additional 20 minutes.

Thursday, May 04, 2006

Homemade Ricotta

I tried this recipe for Homemade Ricotta a while ago and just fell in love with it. Homemade cheese is totally different from the store bought ones, especially ricotta. The one I found at grocery stores around here are very thin and a lot sweeter than the cheese made at home. Some Italian markets do carry nice and fresh cheeses, including good ricotta, but the store bought ones don’t even get an inch close in flavor and quality as the homemade version.
This is super easy to make, there is no way you can go wrong. I have been making it basically every week since I first tried it and after a couple times I didn’t even needed the thermometer to know it was at 190 F anymore.
I have made ricotta a couple different ways already, using milk and lemon juice, using whey (from fresh cheese I make) and rennet, even using a combination of milk and whey, but none of them was as good as this one, made with milk and buttermilk.
The ricotta’s soft curds are rich and creamy, with a nice milky taste to it, not acidic or sweet as some I have had. This was the perfect cheese to me!
And it can be used it in many different recipes, both savory and sweet. I have flavored mine with kosher salt, pepper and olive oil and used as a dipping for crispy veggies and crackers, creamy and delicious, so good!

It can also be used in sweet recipes, from a simple sweetened ricotta and fruits parfait to a delicious cheesecake, or even a lighter version of tiramisu (I have a delicious recipe for tiramisu that uses ricotta for part of the mascarpone). Oh, and I don’t add the salt to my ricotta, so I can use it in any recipe I want.
Very versatile, and better of all, delicious and good for you! Calcium rich too!! Hehehe!!
Tomorrow I will post a recipe for a Butternut Squash Lasagna that I made with the ricotta and was really good!
Ana

Homemade Ricotta

1 gallon 2% reduced-fat milk
5 cups low-fat buttermilk
1/2 teaspoon fine sea salt

Line a large colander or sieve with 5 layers of dampened cheesecloth, allowing the cheesecloth to extend over outside edges of colander; place colander in a large bowl.
Combine milk and buttermilk in a large, heavy stockpot. Attach a candy thermometer to edge of pan so that thermometer extends at least 2 inches into milk mixture. Cook over medium-high heat until candy thermometer registers 170° (about 20 minutes), gently stirring occasionally. As soon as milk mixture reaches 170°, stop stirring (whey and curds will begin separating at this point). Continue to cook, without stirring, until the thermometer registers 190°. (Be sure not to stir, or curds that have formed will break apart.) Immediately remove pan from heat. (Bottom of pan may be slightly scorched.)
Using a slotted spoon, gently spoon curds into cheesecloth-lined colander; discard whey, or reserve it for another use. Drain over bowl for 5 minutes. Gather edges of cheesecloth together; tie securely. Hang cheesecloth bundle from kitchen faucet; drain 15 minutes or until whey stops dripping. Scrape ricotta into a bowl. Sprinkle with salt; toss gently with a fork to combine. Cool to room temperature. Store in refrigerator up to 4 days.

Yield: About 3 cups
Cooking Light, April 2005

Wednesday, May 03, 2006

Pasta on Wednesday?

As you know the usual “pasta day” around here is Sunday. Since I am not a big fan of the noodles I don’t usually make it on weekdays, but pasta is my boys favorite food, so over the weekend we always have some sort of macaroni around.
However, I saw a pasta dish on a TV show the other day that looked amazingly good, with lots of vegetables and some interesting cheeses, smoked mozzarella being one of those.
The husband was working from home today, so the dish seemed appropriate, as I could get a one-dish meal with all of our favorite flavors in it. And it was a hit!
We liked the Baked Penne with Roasted Vegetables a lot! The dish is chock full of yummy roasted veggies (my favorite!!), marinara sauce and three kinds of cheese. I loved the flavors of the vegetables, the combination of roasted squashes, red pepper, onions and mushrooms was just perfect, I could have had just that for my lunch! Hehe!
The marinara sauce added body, and even the peas were delicious, but the smoked mozzarella definitely lends the most flavor to the dish. We could taste it in every bite, not in an overpowering way, but in a very delicious and tasty way, it sort of flavored the tomato sauce. We all agreed it was a very nice dish with the smoked mozzarella flavor, which is something we don’t eat very often.
I made half-recipe and served it with sautéed chicken breasts (carnivores here…otherwise it would have been a nice vegetarian meal). Also, I used white cheddar in place of the fontina (did not find it), and forgot to dot the top with butter. For the first 15 minutes I baked it with foil on top, then removed it for the final 10 minutes of baking (just in case, I didn’t want the top to get dry)
Now I have to find some other dish with smoked mozzarella, to use up what I have left. Any suggestions?!
Enjoy!
Ana

Baked Penne With Roasted Vegetables
(Recipe courtesy Giada De Laurentiis)

2 red peppers, cored and cut into 1-inch wide strips
2 zucchini, quartered lengthwise and cut into 1-inch cubes
2 summer squash, quartered lengthwise and cut into 1-inch cubes
4 cremini mushrooms, halved
1 yellow onion, peeled and sliced into 1-inch strips
1/4 cup extra-virgin olive oil
1 teaspoon salt, divided
1 teaspoon freshly ground black pepper, divided
1 tablespoon dried Italian herb mix or herbs de Provence
1 pound penne pasta
3 cups marinara sauce (store bought or homemade)
1 cup grated fontina cheese
1/2 cup grated smoked mozzarella
1 1/2 cups frozen peas, thawed
1/4 cup grated Parmesan, plus 1/3 cup for topping
2 tablespoons butter, cut into small pieces

Preheat the oven to 450 degrees F.
On a baking sheet, toss the peppers, zucchini, squash, mushrooms, and onions with olive oil, 1/2 teaspoon salt, 1/2 teaspoon pepper, and dried herbs. Roast until tender, about 15 minutes.
Meanwhile, bring a large pot of salted water to a boil over high heat. Add the pasta and cook for about 6 minutes. Since you will be cooking the pasta a second time in the oven, you want to make sure the inside is still hard. Drain in a colander.
In a large bowl, toss the drained pasta with the roasted vegetables, marinara sauce, cheeses, peas, 1/2 teaspoon salt, and 1/2 teaspoon pepper. Using a wooden spoon, gently mix, until all the pasta is coated with the sauce and the ingredients are combined.
Pour the pasta into a greased 9 by 13-inch pan. Top with the remaining 1/3 cup Parmesan and butter pieces. Bake until top is golden and cheese melts, about 25 minutes
Yield: 6 servings

Monday, May 01, 2006

Cinnamon Rolls

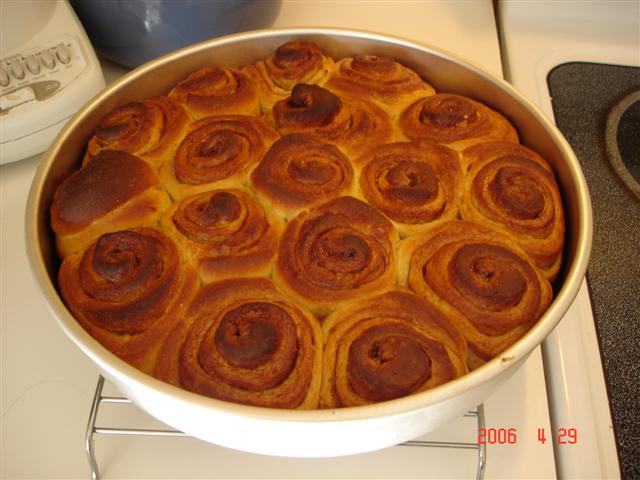
Even though he had never tried it before, Matheus asked me to make Cinnamon Rolls. He saw it a couple weeks ago in a stand at a hockey game and simply got curious to know how they tasted. He asked if I could make some for him and so we did over the weekend. (Oh yes he helped, and we had lots of fun!! Not to mention a “flour-covered kitchen”! Hehe!!)
I chose a recipe that was easy to make and also very convenient, as we made it Friday night and let it rise in the fridge overnight. Saturday we woke up and just popped them into the oven, after 22 minutes the house smelled wonderful and we had a very yummy and comforting breakfast! Matheus simply loved the rolls!
It was definitely a nice way to start my birthday!
Ana

Overnight Cinnamon Rolls (adapted from allrecipes.com)
1 cup milk
1/3 cup butter
1 (.25 ounce) package active dry yeast
1/2 cup white sugar
1 cup whole wheat flour
3 cups all-purpose flour
1 teaspoon salt
3 eggs

Filling
3/4 cup brown sugar
1 tablespoon ground cinnamon
1 tablespoon melted butter

Heat the milk in a small saucepan until it bubbles, remove from heat, add the butter and stir until melted; let cool until warm.
In a large mixing bowl, dissolve the yeast in the milk mixture. Add the sugar, the whole-wheat flour, 2 cups of the all-purpose flour, salt and eggs; stir well to combine. Add the remaining all-purpose flour, 1/2 cup at a time, stirring well after each addition. When the dough has pulled together, turn it out onto a lightly floured surface and knead until smooth and supple, about 8 minutes.
Lightly oil a large mixing, place the dough in the bowl and turn to coat with oil. Cover with a damp cloth and let rise in a warm place until doubled in volume, about 1 hour.
Deflate the dough and turn it out onto a lightly floured surface and roll into a 10x 14 inch rectangle. Lightly brush the dough with melted butter. In a small bowl combine the cinnamon and 3/4 cup brown sugar and sprinkle over the rectangle. Roll up the dough into a log and seal the seam.
Cut the dough into 12 equal pieces; place the pieces in a greased 9x13 inch baking pan, or 12 inch deep dish pizza pan. Cover with plastic wrap and place in the refrigerator to rise overnight.
The next morning, preheat oven to 375 degrees F (190 degrees C). Take the rolls out of the refrigerator and let stand at room temperature for 30 minutes.

Bake the rolls for 25 minutes or until golden, serve warm.

Happy Birthday…

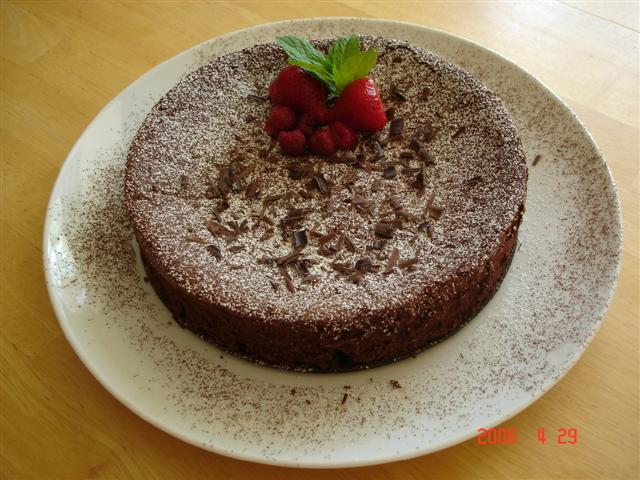
to me!!! Not that I am happy to be getting older, but it was my birthday last weekend, and with a 4-year old at home there was no way I could go through the day without a birthday cake! And being the chocoholic I am, I opted for a yummy chocolate one, which ended up pleasing everybody else at home.
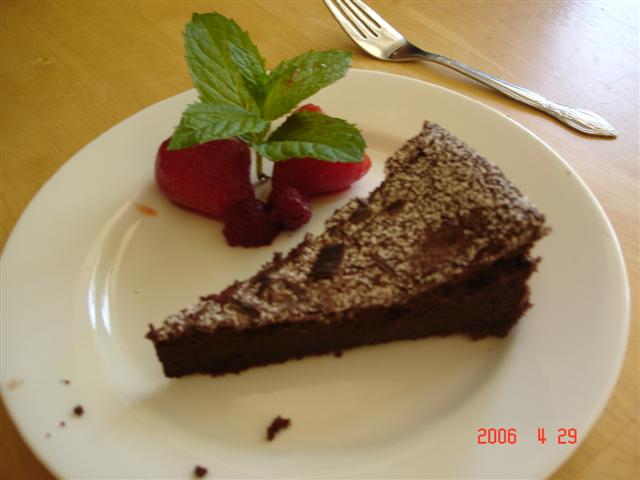
I had this recipe on my to try pile for years, and I am glad I finally decided to try it. Dark Chocolate Soufflé Cake is delicious and yet quite simple to make. The cake rises well during baking, but falls on itself after cooling, just like a soufflé. However, it did not tasted like one. It had a rich chocolate taste and a very light texture at the same time.
We all enjoyed it at home, and since it was a pretty nice cake we did not need anything else with it, apart from a few berries and some powdered sugar for decoration! Yummy cake, worth trying at any time!
As usual I made a few changes… I used only semisweet chocolate (4 oz total – it was what I had at home), and only ½ the sugar asked in the recipe. Also, I did not add the Kahlua, because unfortunately I did not have any (subbed 2 tbsp milk – gotta buy some liqueur here!). The sweetness was just perfect to us, but if you prefer your desserts on the sweeter side then maybe you should keep the sugar as it was.
All in all, I had a good cake and a very happy birthday!
Ana

Dark Chocolate Souffle Cake
1/2 cup granulated sugar
1/2 cup packed dark brown sugar
3/4 cup water
1 tablespoon instant espresso or 2 tablespoons instant coffee granules
2/3 cup Dutch process or unsweetened cocoa
1/4 teaspoon salt
2 ounces semisweet chocolate, chopped
2 ounces unsweetened chocolate, chopped
2 tablespoons Kahlúa (coffee-flavored liqueur)
3 large egg yolks
1/3 cup sifted cake flour (such as Swan's Down)
6 large egg whites (at room temperature)
1/4 teaspoon cream of tartar
1/3 cup granulated sugar
1 tablespoon powdered sugar
1/4 cup raspberries (optional)
Chocolate curls (optional)

Preheat oven to 300°.
Coat bottom of a 9-inch springform pan with cooking spray. Set aside.
Combine 1/2 cup granulated sugar, 1/2 cup brown sugar, water, and espresso in a large saucepan; stir well and bring to a boil. Remove from heat; add cocoa, salt, and chocolates, stirring with a whisk until chocolate melts. Stir in Kahlúa and egg yolks. Stir in flour; cool to room temperature. Set aside.
Beat egg whites and cream of tartar at high speed of a mixer until foamy. Add 1/3 cup granulated sugar, 1 tablespoon at a time, beating until stiff peaks form. Gently fold one-fourth of egg white mixture into chocolate mixture; repeat procedure with remaining egg white mixture, one-fourth at a time. Spoon into prepared pan. Bake at 300° for 1 hour or until a wooden pick inserted in center comes out almost clean. Cool completely on wire rack. Remove sides from pan; sift powdered sugar over cake. Garnish with raspberries and chocolate curls, if desired.
Note: A substitution of 1/4 cup all-purpose flour may be used in place of 1/3 cup cake flour.

Cooking Light, November 1997.