Showing posts with label Cake. Show all posts

Tuesday, October 19, 2010

My best Apple Cake yet!

Fall is definitely here and that to me translates to not only colder weather (which I do not like) but mostly to lots of pumpkin (which I love), butternut squashes, acorn squashes, all winter squashes, cinnamon, and of course apples. Even though we have apples available year round it is during fall - their peak season - that they are the sweetest and have the most delicious flavors.
For the past couple weeks we have been inundated with apples in our CSA box, so we have been eating them out of hand, taking to school as a snack, and also making delicious homemade applesauce - a favorite of mine and Matheus' too.
With an urge to bake and lots of apples staring at me from the fruit bowl on the counter top I entered the kitchen ready and full of the best intentions to create something delicious, nutritious and also easy to make.
I am happy to inform that my mission was accomplished and it turned out into a Vegan Apple Cake that is definitely the best apple cake I have ever made.
The first cake I baked was left on the counter while I went out for a few hours, and upon my return half of it was gone, the husband really liked it. We polished the rest of it the next morning for breakfast, so I didn't even had a chance to take a picture.
Since we loved it so much, and yes, I still had apples on the counter, I made another one. This time I rushed and did take a picture though! phew! (and as you can see in the pic, there were even more apples around!)
There is nothing fancy about this cake but the flavors are spot on, I also think it looks great, and better than anything: it makes your house smell wonderful as it bakes!
And as I said before, it is super easy to make. It is the "mix-dry-with-wet" type cake, no mixer, no special equipments needed, plus you can have it in the oven in no time.
When it comes to cake, the simple ones are my favorites (I am not an icing, filling, "stuff in the middle of my cake" gal), and this apple cake even though as simple as it turned out is also flavorful, fruity, and fragrant. Perfect to have with tea, or maybe a cup of warm milk.
One note: I used my homemade applesauce but you can certainly use any apple sauce or pureed apple you have - I actually used the store bought plain applesauce on the second cake I baked as we were out of the homemade deliciousness (it never lasts long!)
If you like apple cakes definitely try this one, and then let me know what you think. Around here it was a massive success. The last piece of the second cake I baked was hidden by Matheus one night so he could have it for breakfast on the next day (he was afraid dad would eat it!). And right then, after breakfast I got another request to make some more, from both boys.
You can't make a mom who loves to cook happier than when you say you love her food and ask for more!
Ana

See what I mean by "mix-dry-with-wet" kind of cake?! All you need for this are two bowls. I used a pan with removable sides for this and lined the bottom with parchment paper, but any 8 or 9 inch round cake pan should work, just make sure you oil it a bit.


Vegan Apple Cake

Preheat oven to 350F. Lightly oil a round cake pan (either 8 or 9 inches)

In a small bowl mix together:
6 tbsp. water
2 tbsp. ground flax seeds
1/2 cup brown sugar
1/2 cup applesauce
1/2 cup canola oil (or another neutral oil you might like)
1/4 cup almond milk (or soy milk, or milk of your choice - if using cow's milk this won't be vegan anymore)
1 tsp. vanilla

In a big bowl mix together:
1 cup all purpose flour
1 cup whole wheat flour
1 tbsp cinnamon (looks like a lot, but trust me, it makes the cake taste and smell incredible!)
2 tsp baking powder
3 small apples, cored and chopped (peeled if you prefer)

Add the wet ingredients to the dry ingredients, mix until combined. Pour batter into pan (it will be thick) and flatten with a spatula or back of a spoon. Bake for about 30 minutes, or until your house is smelling amazing and a toothpick inserted in the center comes out clean!

Tuesday, February 02, 2010

Easy chocolate cake!

Another day without school... still lots of ice/snow outside on the roads, and to get things a little worse it was raining, the whole day, sigh.
At least we were able to get out of the house and went to the YMCA, mom gets an workout and kid can play with friends, and we both come back home happy!
But what one do when there is another afternoon of nothing ahead and it is so cold out that it makes you want to have tea and hot cocoa for breakfast, lunch and dinner? Make chocolate cake, of course!
And that's what we did! You can't beat a slice of warm chocolate cake, it warms you up from the inside out - chocolate does put a smile on my face! (and wrecks my morning workout, but that's another story... we gotta live a little, right?!)
After a few days staying home I got the urge to bake, and after a batch of muffins (I made Morning Glory Muffins this time!) and a frittata for lunch I was left with no eggs... "no problemo", I can find a chocolate cake recipe without eggs, right? Sure, and to be true I even have one like that in my archives already (this one), but still I wanted to see if there was something different out there and got me some google action! (What can't you find on google, tell me?!!)
A minute on the search engine led me to some very similar recipes to the one I had previously made, and after adapting my recipe and and combining it with a slightly different one I came up with a new egg-free chocolate cake recipe, and guess what? It was way better than the one I made before!!
People, if you don't have eggs, or milk, or if you can eat any of those ingredients, do not fret, you can still have some awesome chocolate cake! Some call this a whacky cake, but you can call it whatever you want and I don't care, just don't shy away from making this cake, it is really yummy!
Plus you will only dirty up one bowl, that's all - and the baking pan. Super easy and so fluffy and chocolaty, we really enjoyed it!
The combination of vinegar and baking soda is the key to this cake, it is what gives the leavening action and make this type of cake rise, pretty cool, huh?
The cake was delicious warm just by itself, and that's how we ate it right after it came out of the oven. Then, a little later, we decided that a chocolate sauce would only improve the goodness. I quickly whipped some of our favorite chocolate syrup and we went to town, it was heavenly!
This recipe yields a small, 8-inch round cake, which was just perfect for the three of us. It is a fluffy, very tender cake, chocolaty and delicious, just perfect for another snow day!
Enjoy!
Ana

Easy no-egg chocolate cake

1 cup whole wheat flour
1/2 cup all-purpose flour
2 or 3 tablespoons cocoa
1 teaspoon baking soda
1 tablespoon white vinegar (I used champagne vinegar, it was what I had)
3/4 cups sugar (feel free to add more if you want it sweeter)
1/4 teaspoon salt
1/3 cup oil
1 teaspoon vanilla
1 cup water (cold)

Preheat oven to 350F and spray an 8-inch round cake pan with oil.
In a bowl mix up dry ingredients, make a well in the center, add wet ingredients and stir all together until smooth. Pour batter into prepared pan and bake for about 20 to 25 minutes.

My notes: start checking at around 20 minutes. Turn on the oven light and see how it looks, if risen then open and check with a toothpick, mine was done at 22 minutes.

Saturday, September 19, 2009

The "blogversary" cake!

After the 4 year celebration post I knew I had to come back here and share the recipe for the cake pictured there as soon as I could. Then Brisa asked me about it... how could I say no?!!
I am most happy to do so as this was a cake that we liked a lot. It is a Flourless Honey Almond Cake, and it came from the Eating Well magazine.
I made this a while back and found it to be special in a way so I wanted to post about it when something came up. Nothing better than the "blogversary"!
When you are not used to baking with almond flour a recipe like this can turn out to be an edible experience by itself. This is a light and airy cake, very flavorful and with a delicious texture. It is so different than your usual concept of how "cake" should feel like that I thoroughly enjoyed the experience of both making and eating it.
The secret here, as noted in the magazine, is not to overbeat the egg whites. You don't need your beaten whites to be stiff or hold a peak here, just beat them enough to get them foamy. The whites is what ensures good part of the structure of the cake, as there is no flour here to help the eggs in support.
It is easy to make and a perfect cake to eat in the afternoon with some tea, which we did. And then had leftovers for breakfast the next day... yum!
Ana

Ps: notice that there should have been a lot more toasted almonds on the top of the cake but Matheus and I got carried away and munched on too many of them while I made the cake... oops! By the way, I didn't have sliced almonds and used the slivered ones, and they worked out well (roasted almonds sooooo good, aren't they?!?!?!)


Flourless Honey-Almond Cake
(Adapted from Eating Well)

1 3/4 cups almond flour
4 large eggs, at room temperature, separated
1/2 cup honey
1 teaspoon vanilla extract
1/2 teaspoon baking soda
1/2 teaspoon salt

Topping:
2 tablespoons honey
1/4 cup sliced almonds, toasted

Preheat oven and lightly grease (or use cooking spray) an 9-inch springform pan (the one with removable sides), line the bottom with parchment paper and lightly grease the top of the paper as well.
Using an electric mixer beat 4 egg yolks, 1/2 cup honey, vanilla, baking soda and salt until well mixed. Add the almond meal and beat on low until all combined.
In another bowl beat the 4 egg whites on medium speed until they are foamy and doubled in volume (for about 2 minutes).
Using a spatula, gently fold the whites on the almond batter just until combined. Pour batter on prepared pan and bake until cake is golden and toothpick inserted on center comes out clean, about 25-28 minutes.
Let cool in pan about 10 minutes, run a knife around the edges, remove side ring and cool completely.
Serve drizzled with honey and sprikled with the toasted almonds.

Notes:
1) If you don't have the almond meal but have whole almonds you can do the following: measure 1 1/2 cups almonds, spread them on a baking sheet and roast at 350F for about 7 to 9 nine minutes, stirring once halfway. Let them cool completely, then process in the food processor or blender until finely ground - this should yield about the 1 3/4 cups almond meal asked for the recipe.

2) The sliced almonds for the top are toasted on a dry skillet over medium heat. Stir them constantly and toast until golden, about 2 to 4 minutes at most.

Friday, May 01, 2009

Applesauce Snack Cake

This cake was a total winner here at our house, it is by far the best apple cake. Or at least the best one I have made and/or eaten!
Matheus and even the husband loved the cake too. So much so that they asked me to make another one just as the last two pieces were being devoured - by them!
I made it twice already and as I was separating the pictures to post the recipe today, Matheus took a peek at the computer and said

Matheus: "Is that the apple cake mom?"

Me: "Yes, I am going to post the recipe on the blog"

Matheus: "Yummm, that cake is good... so, when are you making it again?"

Seem like we will be having applesauce cake pretty soon around here again!
The key to this apple cake is using the right kind of dried apples. You should use the ones that are soft and moist, not the crunchy, chip-like ones.
Here is how the ones I used look like:


The apples not only add lots of flavor to the cake but, together with the applesauce, contribute for a very moist cake. And such moisture content brings me to the adaptations I made to the recipe.
The original recipe, from American's Test Kitchen, was made with a full stick of melted butter and all white flour. A first glance through the recipe told me that all that butter, besides being a whole lot for a small 8-inch cake, was not at all necessary for a desirable outcome. I didn't use quite nearly that amount of fat and got an amazingly moist and delicious cake. In fact, I believe I could decrease the fat even a tad more, but didn't want to change too much too soon.
Also, due to the high moisture ingredients present here I did what I always do to most of my cakes and baked goods: used half all-purpose and half whole wheat flours. Again, perfect texture and still very moist, with a boost on nutritional contents!
The version I am posting here is the recipe with my adaptations to it. If you want to see the original one take a look at the American's Test Kitchen website - you need to register, but it's free.

Now truly, if you like apple cake as much as I do then you definitely should try this recipe. It is a very simple cake, easy to make and really, really good. It's totally worth searching for the dried apples. This cake is awesome, and for once everyone around here agrees with me!
Enjoy!
Ana

A pic of the slice, see how moist it is?? I told you, go get some dried apples and make this cake. You are not going to regret it, I promise!


Applesauce Snack Cake
(Adapted from America's Test Kitchens)

3/4 cup dried apples (2 ounces) cut into pieces
1 cup apple cider or apple juice (I used apple juice)
3/4 cups all-purpose flour
3/4 cups whole wheat flour
1 teaspoon baking soda
2/3 cup sugar
1/2 teaspoon cinnamon
1/4 teaspoon nutmeg (I omitted)
1/8 teaspoon cloves (I omitted)
1 cup unsweetened applesauce
1/3 cup canola oil
1 egg
1/2 teaspoon salt
1 teaspoon vanilla extract

Prepare an 8-inch square baking dish by spraying it with cooking spray, then line it with a long rectangular strip of parchment paper and spray the parchment paper too. Set aside.

Put apples and apple juice in a small saucepan and cook, simmering, for about 15 minutes, or until almost all the liquid has evaporated. Let cool.

Preheat oven to 325F.

In a medium bowl, combine sugar, cinnamon, nutmeg, and cloves. Measure 2 tablespoons sugar-spice mixture into small bowl and set aside to use for the topping.

In a food processor or blender, process the dried apple mixture until smooth. Pour mixture into a large bowl and to it add the sugar + spices mixture, egg, salt, vanilla, oil, and applesauce, mix well to combine. Add the flours and baking soda, mixing just until all is incorporated and moistened.

Put batter into prepared pan, smooth the top with a spatula and then sprinkle it evenly with the 2 tablespoons of reserved sugar+spices. Bake for about 35 to 40 minutes, or until a toothpick inserted in the center comes out clean. Let cool and serve!

Thursday, September 25, 2008


3 Years of KitchenSpace!!

Yes, it's been 3 years since I started this blog and it is amazing how much fun I've been having here. I tried new recipes, created delicious dishes, and best of all made a lot of great friends!
Thanks to all that keep visiting my blog through the 3 years I have been around, I love each and all of you!!

The "blogversary" was actually on the 15th, but I barely had time to sit down and post these past few weeks, so I decided to celebrate today, as today Matheus is also turning 6 1/2 years old.
Yep, he likes celebrating "half-birthdays", so this is something special we do every year, and today we started the day with a yummy breakfast treat: cupcakes with yogurt "frosting", and some m&m's to keep the happines around!
The recipe for the cupcakes is one of my favorites, it is one of my favorite cake recipes, a super easy and simple Yogurt Cake that always come out tender and moist and make me happy any time I make it!
For the "frosting" part I use either greek yogurt or plain yogurt drained overnight. I then add a touch of vanilla to it and sweeten with either honey or sugar. Simple, but delicious and healthy nonetheless!
Matheus loves this "frosting", and I love it even more as he is getting something good for him and at the same time he is as happy as one could be. The only catch here is that since it is yogurt based, the "frosting" does not hold very well for too log, so it is best to spread it on top of the cupcake right before serving.
And as far as "half-birthdays" celebrations go, you can't get much better than this, cupcakes are always a nice treat, and this one is a healthy one to boost!!
Enjoy!
Ana

And here goes the Yogurt Cake recipe with my notes and some variation ideas I have tried and enjoyed. I have talked about it before (click here!), but am going to post again as it is such a versatile cake that it is worth repeating!

Yogurt Cake

1 cup plain yogurt (one 8oz container - use the yogurt container to measure up the rest of the ingredients)
½ cup oil
1 cup sugar
2 cups all-purpose flour
4 eggs
1 teaspoon pure vanilla extract
1 tablespoon baking powder

In a blender put yogurt, oil, sugar, eggs and vanilla, whiz until everything is very well incorporated. Put the wet misture into a large bowl and to it add the flour and baking powder. Mix it all together with a whisk until the batter is uniform (do not overmix). Pour batter in a greased and floured bundt pan. Bake at 350F for about 35 to 40 minutes, or until golden on top and toothpick inserted comes out clean. (Since every oven is different, keep an eye on the cake after the first 30 minutes)

For Cupcakes, pour batter into muffin tins (greased or lined with cupcake liners) and bake at 350 for about 18 to 20 minutes, keep an eye on them after the 18 min. mark!

My notes and Variations:

You can use less sugar if you prefer, I sometimes use only 1/2 cup and that seems to be enough for us. Also, I have made it with half all-purpose and 1/2 whole wheat flour (the white or the pastry variety though) and it worked out beautifully!

You can add some flavorings you like to this cake too and make it:

- an orange cake: add orange zest to the batter!,

- a lemon cake: add lemon zest and/or lemon exctract to the batter.

- a marble cake: divide batter in two and add a couple tablespoons of cocoa powder to half of the batter. Pour the white batter into the prepared pan and then dollop the chocolate batter on top, use a butter knife to make "swirls" and gently mix the two colored batters for the marble effect.

- a blueberry cake: gently fold some fresh frozen blueberries to the batter (coat the berries first with a tbsp. flour just so they won't sink to the bottom).

- a chocolate chip cake: gently fold some mini (or regular) chocolate chips into the batter (or sprinkle them on top - if folding do the flour trick and coat the chips with some flour so they don't sink into the batter).

- an "anthill" cake: add chocolate sprinkles to the batter! This is one of our favorite cakes, my son loves it! When you cut the cake the chocolate sprinkles look like little ants, that's why the anthill name to this variation.

- add colorful sprinkles to the batter for a "carnival" effect

- Jam cupcakes: fill muffin tins half-way with batter, add a small dollop of your favorite Jam then cover with some more batter. Bake as directed for cupcakes and when they are done you will have some cupcakes with a surprise inside!

-Also, any of the flavorings and add ins works for cupcakes/muffins as well!

As you see, this cake is ultra versatile! You can flavor it or complement with some add ins and never make the same cake twice. It is a super easy cake to make and the end results is a very tender and moist cake that everyone is sure to enjoy!

Ana

Sunday, November 11, 2007

Chocolate Soufflé

Although it is a nice day outside it is quite cold for us, so we opted to stay inside today. We called grandma and grandpa in Brazil, saw them on the computer through the camera and ended up having fun in our own way.
Part of our fun today was making and eating these Chocolate Soufflé Cakes. They were warm and delicious, perfect for the cold weather. And they were so light and airy that I love the way I felt satisfied with a sweet treat without feeling I had an entire cake for dessert. Plus it makes just enough for the three of us and we don't have tons of leftovers, which I like since I do love to cook and experiment with different recipes quite regularly.
We all loved and totally agreed that this is certainly going to be repeated during the winter.
Really yummy!
I have had this recipe marked to try since it appeared in the magazine, in April... now, why did I wait so long to make it?????
Enjoy!
Ana

Note: I used less sugar in this recipe (thought it would be too sweet as written) and both the husband and Matheus agreed it was perfectly sweet. Since I am a 70% dark chocolate girl I still found this a little on the sweet side, but I know that if I made it less sweet they would not enjoy it as much.
Anyway, just wanted to suggest that as you make this recipe give the soufflé base a taste and from there see how much more sugar you would like added to the egg whites, just so that you can control the sweetness to your taste.


Individual Chocolate Soufflé Cakes
(Adapted from Cooking Light, April 2007)

Cooking spray
9 tablespoons granulated sugar, divided
5 teaspoons all-purpose flour
3 tablespoons Dutch process cocoa
4 tablespoons fat-free milk
1/2 teaspoon vanilla extract
2 large egg white
2 teaspoons powdered sugar

Preheat oven to 350°.
Coat 4 (6-ounce) ramekins with cooking spray; sprinkle each with 3/4 teaspoon granulated sugar.
Combine 4 tablespoons granulated sugar, flour, cocoa, and milk in a small saucepan over medium heat. Cook 2 to 3 minutes, stirring until thickened and smooth. Spoon chocolate mixture into a medium bowl; cool 4 minutes. Stir in vanilla.
Place egg whites in a medium bowl; beat with a mixer at high speed until soft peaks form. Add remaining 4 tablespoons granulated sugar, 1 teaspoon at a time, beating until stiff peaks form (do not overbeat). Gently stir 1/4 of egg white mixture into chocolate mixture; gently fold in remaining egg white mixture. Spoon mixture into prepared dishes. Sharply tap dishes 2 or 3 times to level. Place dishes on a baking sheet; bake at 350° for 15 minutes or until puffy and set. Sprinkle each soufflé with 1/2 teaspoon powdered sugar. Serve immediately.

Yield: 4 servings.
(Recipe can be made to serve 2. Use 1 tablespoon flour and just half all other ingredients!!)

Thursday, October 04, 2007

Carrot Cake, Brazilian Style!!

I was watching a cooking show this past Monday and the lady was making a carrot cake. Matheus was playing around when he saw and we started to talk:

Matheus: -Humm, carrot cake, it's been a while since you have made a carrot cake mommy.
Me: - Yes, you are right... we could make some, I like carrot cake.
Matheus: - Humm, good idea. Ohh, but I like the other one...
Me: - The other one, which one?
Matheus: - That one that you make with the chocolate on top!

But of course, that was the carrot cake I was suggesting we make!
We do like the American type cake, with the grated carrots, raisins and all (which I have made before and already posted here), but for me carrot cake will always be this one, yellowish, moist, with tender crumbs, with the glossy chocolate sauce on top. Just like my grandma made to us, just like my mom made to us, and just the way I now make for us.
This recipe was handed down to me by my grandmother Anna, which I loved with all my heart.
I would spend my vacation months at her house and she would bake simple but delicious cakes on the weekends afternoon when my aunts and uncles came to visit.
We would also bake together "bolachinhas de nata", which would probably translate to "cream cookies" (I guess...), and an Italian concoction called "crostole", which consisted from a simple dough that was rolled, cut into diamonds and then fried, finished with a sprkinle of sugar and... yummmm! These were delicious, and it has been years since I last had it, but hey, this is another post.

Today is Carrot Cake day!!
This is one of the simplest and easiest cakes you can possibly make, yet I guarantee you it is one of the tastiest cakes ever. I just absolutely love this cake, each bite brings me back to Brazil, to my mom's house, to my vacations with my grandmother....
You can't get better than this, and to prove how easy it is to make all I can say is: Matheus basically made this one!
All I did was to wash, peel, and chop the carrots. He measured and put everything else in the blender, poured (with some help) the batter into a bowl and stirred in the flour and baking powder. Cake was ready to go in the oven, and this part I helped too, of course.
I am not able to express how much I love this cake. Making it with my son is the most rewarding thing I could ever wish for, and let me tell you, a slice of warm carrot cake with the chocolate sauce still running around the plate is a very comforting food, perfect to lift me up after a week when I was not feeling my best.
We juts made this one today, and I had to come here and share. Matheus said it was the best carrot cake.... it was!
Ana


Brazilian Style Carrot Cake (Grandma Anna's recipe!)

4 carrots - raw, peeled and chopped into chunks
2 cups sugar (I use 1 1/4 cups)
4 eggs
1/2 cup oil (I use canola oil)
2 cups flour
1 tablespoon baking powder

Grease and flour a bundt pan (or a 13x9, rectangular pan). Preheat oven to 350 F (180 C).
Put carrots, sugar, oil, and eggs in a blender and whiz until all pureed and smooth.
Pour batter into a bowl, add flour and baking powder and stir well with a wooden spoon until all incorporated (but don't over mix!).
Pour batter into prepared pan, bake at 350F for about 35 minutes, or until a toothpick inserted in the middle comes out clean.
Wait a few minutes for cake to cool (while you make the chocolate sauce) and invert cake into a plate. Pour hot chocolate sauce over the cake while it is still warm.
Serve cake warm or cool to room temperature (if you can wait all that long, that is!).

Chocolate glaze
2 tablespoons cocoa
4 tablespoons sugar
2 tablespoons butter
5 tablespoons milk

Put all ingredients into a saucepan, heat over medium-high heat and let boil for about 4 to 5 minutes, until it has thickened up. Pour hot chocolate sauce immediately over the warm cake.

Notes: I usually double the chocolate glaze recipe, especially when I make the cake on a rectangular pan (the surface area is larger and you really need more chocolate sauce to cover the top)

Here is the batter, ready to go into the pan. The picture didn't capture it well, but it had such a beautiful orange hue, it screamed Halloween to us!! hehehe!!

Monday, June 04, 2007

A Baby Shower!!

And no, before you ask, it was not for me! It was just a little Baby Shower breakfast that I had today for my friend Kennon to celebrate her 4th little one!
I just wanted to share here with you the cake I made, as Me and all my friends agreed came out really cute!
It was really fun to make and I am seriously thinking about venturing myself into the cake decorating area, as I am truly enjoying this cake-making thing! (take a peek at the other one I made for my son's birthday a couple months ago - click here)
For this one I used a very simple recipe for a pound cake and filled with the same butter cream used to ice the outsides before applying the fondant.
I am posting the recipe as I think it is a super versatile one! I love this cake just by itself, but you can make it your own way by changing the extract or by adding fruits or even chocolate chips to the batter.
Simple but really yummy!!
Kennon, once again, congratulations on the new baby! I loved our gathering today and am super glad you liked it all too!!
Ana

Sour Cream Pound Cake
(Adapted from Cooking Light Magazine, April 1997)

3 cups sugar
3/4 cup butter, softened
4 eggs (or 7 egg whites)
1 1/2 cups sour cream
1 teaspoon baking soda
4 cups + 2 tablespoons all-purpose flour, sifted
1/4 teaspoon salt
2 teaspoons vanilla extract

Preheat oven to 325°.
Beat sugar and butter in a mixer until well-blended. Add vanilla and eggs, one at a time, beating well after each addition.
Combine sour cream and baking soda, set aside. Combine flour and salt. Add flour mixture to creamed mixture alternately with sour cream mixture, beginning and ending with flour mixture.
Pour batter into a 10-inch greased and floured tube pan. Bake at 325° for about 1 hour and 30 minutes or until a wooden pick inserted in center comes out clean. Cool in pan for 10 minutes before inverting. Let cool and serve.

And here a picture of a slice! The baby seems to like it too!!!

Wednesday, May 09, 2007

Strawberry Bread

We went strawberry picking this past weekend again and between the three of us and Matheus' excitement filling his own little basket we ended up with lots of the sweetest red little gems!
Our favorite way of eating them is of course simply by washing and devouring, one by one, two by two... oh my, they are so sweet, so fresh, so delicious, I even fell like I don't want to crush them in the blender or other appliance at all.
However, after a couple of days the strawberries do start to loose their shine a bit and there is when I get into the kitchen to make some goodies - The husband though goes into the pantry, grabs a can of sweetened condensed milk and pour it over his chopped fruit, making them even more decadent and sweet!
Talking about the husband, his favorite strawberry concoction, besides the condensed milk thing, is Strawberry Muffins, which I have posted here before and have made twice this past two weeks.
Yesterday though I decided to make another baked goody just to change things a little, and went with a Strawberry Bread that I had already tried before but not posted here.
So, here I am to share this one with you. Very simple, yet delicious; it came out so good that it didn't last 48 hours in our house this time. It was snack, breakfast, and even caused a little fight between "the boys" to see who was having the last bite, yes, I mean the last bite, which was full of strawberries and both of them wanted to eat, can you believe that?!!!
I adapted this recipe from one posted at the Cooking Light Bulletin Boards a couple years ago. I make it every strawberry season ever since, have given it to friends, and everyone seems to enjoy it a lot.
This time I didn't have any white sugar around so I made it with brown sugar and it came out even better, a little darker than I was expecting but so good that I might try doing it this way from now on! Oh, and I sprinkled mine with sliced almonds, which not only gave it a nice look but also a great crunch on top.
Enjoy!! But hey, no need to fight, the recipe can be easily doubled and freezes beautifully too! I am making another one tomorrow for us! hehehe!!
Ana

Strawberry Bread
(Adapted from CLBB, posted by Lillith)

1 cup whole wheat flour
1/2 cup all-purpose flour
1/2 teaspoon baking soda
1/4 teaspoon salt
1 teaspoon cinnamon
2/3 cups sugar (can use brown sugar too)
2 eggs
1/2 cup plus 1 tablespoon oil
1 cup fresh strawberries, chopped
1/2 cups nuts or almonds (optional) - I used chopped almonds this time but actually prefer walnuts for this one

In a bowl mis together, baking soda, salt, cinnamon and sugar. Add eggs and oil and mix well to combine. Fold in strawberries and nuts (is using) - the batter will be thick. Pour batter into a greased 9-inches loaf pan. Bake at 350F for about 50 minutes to 1 hour. Cool in the pan, then invert onto a rack and let it cool completely.
(resist the temptation and wait for it to cool a little bit before cutting... I know, it is hard, especially with the wonderful aroma of freshly baked good in the kitchen, but it will pay off, and the cake won't desintegrate!!)

Monday, March 26, 2007

It was a Soccer Party!!

I still can't believe my "baby" already turned 5, but the party sure was fun! Matheus' birthday was yesterday and we had a party for him at the place he practices soccer. It was great, the kids had a blast running around and kicking balls. One of the coaches was there and kept them busy and laughing for the entire time.
Matheus loved it, he was so happy, and of course so was I! The cake was his idea, a soccer field, and let me tell you, the kids loooooved it!
It was my first attempt with fondant, and I believe a very successful one. I got some tips with a friend that is used to making cakes like this and didn't have much problems. The fondant was actually easy to work with and I had so much fun making the cake, coloring and rolling the fondant. It took me a while to get everything done, but it was so worth it!
I loved and even told my husband that one day I will work with this type of thing. I had the best time doing it, and can you imagine getting paid and having this much fun??? I can just dream about it!
The cake itself was a recipe for chocolate cake that I first made when I was in Brazil, and I have actually mentioned this recipe here. It has the basics ingredients in it, simple method of preparation, but the result is outstanding. I loved this cake from the moment I tasted the batter the first time I made. Simple but yet delectable, rich chocolate taste with just the right amount of sweetness to it. Everyone enjoyed it and I even got some requests for the recipe from some of the mom's, how cool it that??!
So, here is the recipe for all of you who would like a taste of my little soccer cake! I am also including the ganache that came with the recipe originally, you can use it to fill and cover the cake if desired. This cake covered and filled with the ganache was one of the best chocolate cakes I have ever had, yumm!!
Enjoy!!
Ana

The one piece leftover from the cake (the kids really liked the cake, everyone wanted to touch it and even the little guys on the top were taken home as souvenirs!!)


Cocoa Cake with Chocolate Ganache
(Adapted from the book "Cozinha de Estar" by Rita Lobo)

2 cups all-purpose flour
1 cup cocoa
2 tablespoons baking powder
1/2 teaspoon salt
200 grams butter, room temperature
2 cups sugar
4 eggs
1 cup milk

Ganache:
400 grams semisweet chocolate
2 cups heavy whipping cream

For the cake
Preheat oven 350F. Grease and flour a round cake pan (it can also be baked in bundt or rectangular 13x9 pans).
Sift the flour, cocoa, salt, and baking powder, set aside.
With the mixer beat butter and sugar until light and fluffy. Add eggs, one at a time, and keep beating to incorporate.
On low speed, add flour mixture alternating with the milk. Do this in three additions, starting and ending with the flour. Mix everything just until well incorporated.
Pour batter into prepared pan and bake at 350F for about 40 to 45 minutes, or until a toothpick inserted in center comes out clean. Let cake cool completely before filling and covering with the ganache.

For the ganache:
Put cream on a sauce pan and heat until it reaches a boil. Remove from heat, add chocolate and let it rest for about 10 minutes. Gently mix the chocolate and cream mixture until all the chocolate is melted and the ganache is uniform. Pour mixture in a bowl, cover with plastic wrap and let it cool in the frige for about 30 minutes, or until it has a good consistency to be applied to the cake.


Since I had fondant leftover I decided to make a second small cake. It turned out kind of cute, didn't it??!

Tuesday, December 05, 2006

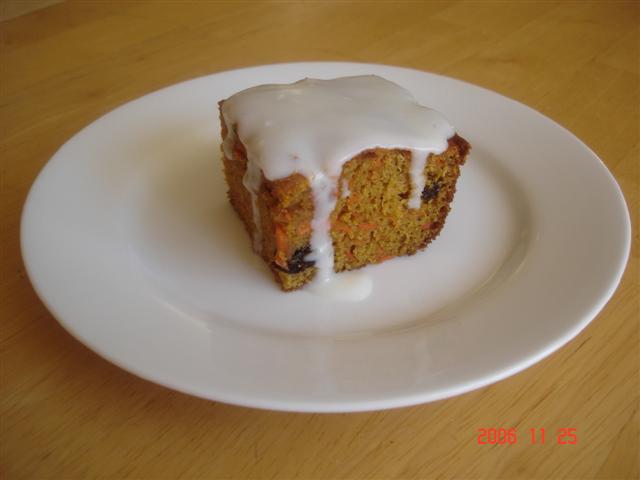
Carrot Cake

Since I was in a row with the cake recipes, I will maintain the sequence and post another recipes I tried from Valentina's blog. Last post was the cookie recipe, and today is her Carrot Cake!
As the name states, it is really a moist cake, and very flavorful too! I liked the orange zest added to the batter; it gave the cake a subtle but yet delicious essence that complemented the carrots very well.
Another simple and easy recipe I made that was a success. With each day of cooking it is more and more obvious that simple foods and simple flavors are for sure the best ones!
Next I want to post here about the “Brazilian way” of making a carrot cake. It is even simpler but just as good! But this is another post yet to come. (Stay tuned, ‘cause I will have more cakes posted here!)
For today’s recipe, I have to admit that I didn’t make the frosting stated in the recipe. Although it sounded very good with the ricotta cheese being part of it, I opted for skiping this part as we were having the cake for breakfast, and particularly I do prefer my cake in the simplest form possible. However, I am pretty sure the frosting is delicious and will certainly make the cake taste even better.
Also, the cake asks for golden raisins, but I used dark ones, as it was the only kind I had at home.
For the picture I whipped a little bit of buttermilk glaze, just as the one I used for the pumpkin cake. And it was also good with this one!
So, for this cake you decide: there is the ricotta topping that came with the recipe, the delicious buttermilk glaze, and the more traditional cream cheese frosting. Well, it is clear that there is no need to have a “frostlees” cake with so many options to choose from, right?!
Great recipe, saved with the winners ones, because it will be repeated in a near future for sure!
Enjoy!!

Ana

By the way, you can take a look at Valentina’s picture and recipe here.

Moist Carrot Cake
(Adapted from a recipe from Delia Smith)

175grams brown sugar
2 eggs
120 ml oil
200 grams whole wheat flour
1 teaspoon baking powder
1 ½ teaspoon baking soda
1 teaspoon ground cinnamon
1 teaspoon ground nutmeg (I omitted this one)
1 teaspoon grated ginger (I omitted this too)
Zest of an orange
200 grams grated carrots
175 grams golden raisins

Frosting
250 grams ricotta cheese
20 grams sugar
2 teaspoons vanilla extract
1 tablespoon cinnamon, to sprinkle over the cake after it has been frosted

Syrup
Juice of ½ orange
1 teaspoon lemon juice
40 grams brown sugar

Preheat oven to 350 F (180C).
Cream the sugar, eggs, and oil for 2 minutes, until creamy. Add the flour, baking soda, baking powder, nutmeg, cinnamon, and ginger, beating just until incorporated. With a spoon, fold in the carrots, orange zest and raisins. Put mixture in a greased rectangular pan and bake for 30 minutes, or until a toothpick inserted comes out clean.
To make the frosting, mix all ingredients until fluffy. Keep refrigerated until ready to use.
To make the syrup, mix all ingredients until sugar dissolves completely. Pour the syrup over the top of the cake while still warm (you can poke some holes on top so the syrup can penetrate the cake). Let cake cool, frost and sprinkle with cinnamon.

Monday, November 27, 2006

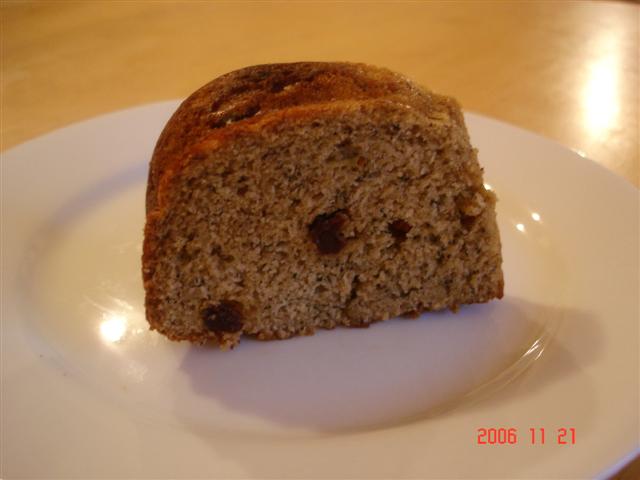
Banana Cake

It seems every time I want to make some healthy cake for breakfast we all agree to make it a banana cake! If it is not cake, then it is muffin, and which one is the favorite around here? Oh yes, banana muffins!!
I had three very ripe bananas sitting on the counter last week and decided to make a cake on an afternoon. What a great idea it was. We had cake for snack and on the next couple days for breakfast, and the cake was not just very moist but deliciously tasty too!
I sort of created the recipe based on what I had on hand and on previous cake recipes I made. And since it came out so good I wrote down the recipe later on so that I could post it here and share with you all!
The picture is definitely not the prettiest one, but I have to say that the cake was one of the best I have made!
Simple, easy and so good! Perfect when you have excess of bananas, or just when that little cake craving hits on the afternoon but you just want some comforting flavors without ruining the healthy eating habits you are so hardly trying to conquer.
The boys here raved about this one, I hope you like it too! Oh, and I used raisins (per Matheus request), but chocolate chips would be just as good here!!
Ana

Simple Banana Cake

About ½ cup raisins soaked in some warm water or apple juice (just to make them plump!)
1 ½ cups whole wheat flour
½ cup all-purpose flour
½ teaspoon salt
1 teaspoon baking powder
1 teaspoon baking soda
1 teaspoon ground cinnamon
½ cup brown sugar
4 tablespoons butter (1/4 cup), at room temperature
1 teaspoon vanilla
2 eggs
3 very ripe bananas
½ cup buttermilk

Preheat oven 350F.
With a mixer, beat butter and sugar until creamy. Add vanilla, eggs, bananas, and buttermilk and beat until well mixed. Add flour, salt, baking powder, baking soda and cinnamon. Mix until everything is incorporated. Add raisins and mix with a wooden spoon.
Pour batter into a greased bundt pan and bake for about 30 to 35 minutes, or until it is golden and a toothpick inserted comes out clean.

Sunday, November 26, 2006

Cake recipes to come…

First of all, a little late Happy Thanksgiving to everyone! And Thanks for those who stopped by to wish us a happy holyday as well, you all are the reason I love this blogsphere!
It’s been a while since my last post, however I haven’t abandoned the kitchen, especially with the Thanksgiving and all the cooking and yummy food it involves.
This year we went to one of our best friends house, and we did have a great time there! I wish I had taken pictures of everybody and the delicious feast we had, but surely enough I did the favor of forgetting my camera… oh well, it happens to all of us!
We contributed with three dishes, a simple mixed leaf salad topped with apple slices and dried cranberries, cranberry compote, and a sweet potato casserole! All were very good and got me many compliments. The one my friend likes the most is the cranberry compote, and although I cannot show you pictures, I can certainly share the recipe here, just let me know!
Well, enough of that Thanksgiving talk, as I believe most people here in the US had its share of it, right?!
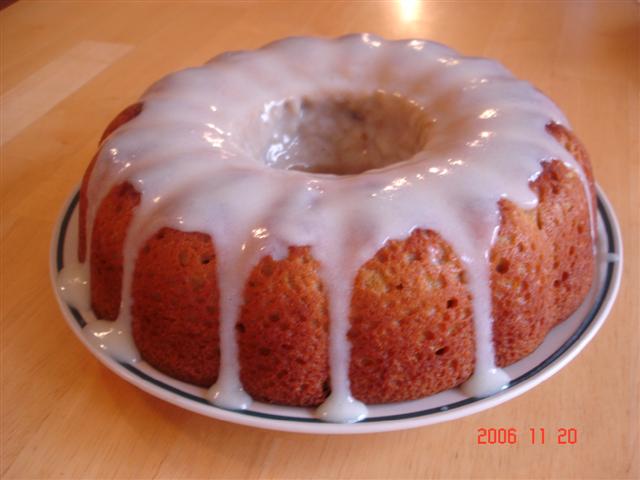
So, moving forward to the nice cake picture above. Well, I think it looks nice, but I have to tell you that it tasted even better than it looked!
Really, it was a very nice cake. Extremely moist and not as dense as I was expecting it to be, especially with the “pound cake” presented in the recipe title.
As I said, the cake part was delicious, full of yummy fall flavors and as moist as it could be, good, really good! And lets not forget the glaze, which as a great exception, I loved too!
I am not a fan of glazes, frostings, powdered sugar stuff on top of my cake, and you know, this cake might not even need a glaze at all, but this one was so good that I was glad I included it too, plus it did made the cake look prettier!
The glaze was simply made with buttermilk, sugar, cornstarch, and a tad of butter, which definitely made it taste smooth. It was sweet for my taste, but that is how glazes are supposed to be, right?
I really liked the tang provided by the buttermilk and it complemented the cake flavors really well, even more so because the cake was not overly sweet, so it was a very happy combination in between the two. And as a fellow baker who tried this recipe mentioned in the CLBB, this glaze was almost drinkable by itself! Yes, I found it to be that good, and will certainly use it in other recipes as well!
All in all, we had a nice week and a happy Thanksgiving!
And for the title of the post, it is just as it says; be prepared to see a few more cake recipes posted around here in the days to come. Our microwave broke and while we don’t replace it the husband doesn’t have a quick way to reheat his beloved muffins, so I have been baking muffins and cakes almost daily for breakfast, and we are eating it as snack too. They are healthy cakes, of course, and I have a couple recipes and pictures that accumulated to share here with you!
So, please come back, and in the meantime try this pumpkin cake, it was a delicious surprise to all of us, and to some friends that I took the cake to share with on a breakfast gathering. Everyone really enjoyed this one!
Ana

Pumpkin Pound Cake with Buttermilk Glaze (Adapted from Cooking Light, Dec. 2006)
15 ounces pureed pumpkin
¾ cup white sugar
¾ cup brown sugar
½ cup butter, softened
4 eggs
1 teaspoon vanilla extract
3 cups all-purpose flour (13 ½ ounces)
1 ½ teaspoons pumpkin pie spice (I used 1 teaspoon cinnamon and ¼ teaspoon cloves)
1 teaspoon baking soda
½ teaspoon salt
¾ cup buttermilk

Glaze:
1/3 cup buttermilk
¼ cup sugar
2 tablespoons butter
2 teaspoons cornstarch
1/8 teaspoon baking soda

Preheat oven to 350F (180C). Grease and flour a 10-inch tube pan.
While you get your ingredients ready, put pumpkin puree in a fine sieve and lay it on top of a bowl to drain excess liquid.
With a mixer cream butter and sugars. Add eggs, one at a time, beating until well blended. Add the drained pumpkin and vanilla and mix well. Add baking powder, baking soda, salt and spices, incorporate those ingredients and then alternately add the flour and the buttermilk, mix well until well blended.
Pour batter into prepared pan and bake for about 50 minutes. Cool in pan for about 10 minutes, remove and let cool over a rack.
For the glaze, combine all ingredients in a saucepan and cook it over medium heat until thickened, stirring constantly. Remove from heat and drizzle over cake.

Editing to add: for the pumpkin pie spice, according to foodsubs you can make your own by combining "4 parts cinnamon + 2 parts ginger + 1 part allspice + 1 part nutmeg, all ground OR equal parts cinnamon, ginger, nutmeg, mace, and cloves, all ground."

Monday, November 06, 2006

My Grandma’s Banana Cake

Today’s recipe is one that a lot of Brazilians like; especially those grew up around my family and got to know my grandma’s yummy foods. This was one of her cakes that everyone loved, and after being together for a while, I learned that my husband liked this cake very much too!
So, when I have a few extra bananas hanging around, if I don’t make muffins, into Banana Torte they turn!

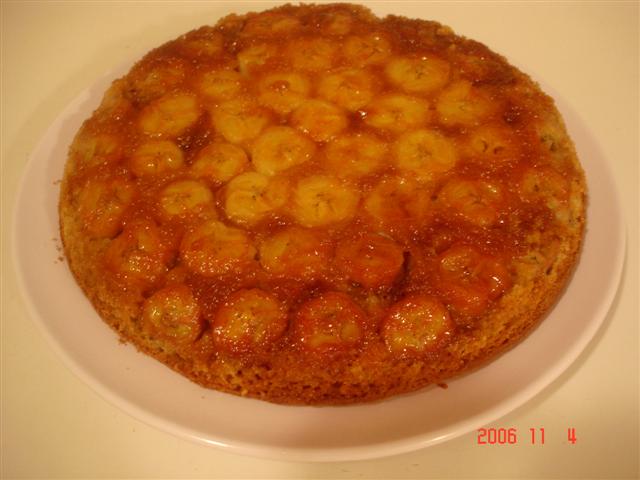
It is basically caramel and bananas layered in the bottom of the pan with a cake batter poured on top. When you cut the cake the bananas are deliciously cooked and ooey gooey due to the caramel, lending the yummiest and sweetest taste to the cake base, really, really good!

A super simple and easy recipes, that uses basic ingredients we all have at our homes, but that to me couldn’t exemplify better the flavors and aromas that I used to sense in my grandma’s house.

This cake does bring great memories to me, and a lot of smiles on the faces of my loved ones!

Oh, and the name of the recipe was my idea here… my grandmother used to call it simply Banana Torte (Torta de Bananas), but doesn’t the caramelized bananas look like jewels on top?!

Ana


Grandma’s Anna “Jeweled” Banana Torte

Bananas to cover the bottom of the pan
Sugar to caramelize the pan
3 egg whites
3 egg yolks
1 cup warm milk
1 ½ cups sugar
2 ½ cups flour
1 tablespoon baking powder

Melt enough sugar to cover the bottom of a cake pan (rectangular or round). Slice bananas and put on top of caramel, covering the entire bottom of the pan.
Beat egg whites into stiff peaks and reserve. In a blender mix egg yolks, sugar, and milk. Pour batter on a bowl and with a wooden spoon mix in the flour and baking powder. Using a spatula, gently fold in the egg whites.
Pour batter into prepared pan and bake at 350F for about 40 minutes. We like it served warm!

Saturday, November 04, 2006

Apple-Date Bars

I made this recipe yesterday and it was so good that I had to come here and share with my blog friends! The recipe comes from Cooking Light magazine, and it is another one that will certainly be repeated, as I already got requests to make it again.
These apple-date bars were a nice treat for a cold afternoon, something sweet and warm that will definitely make you feel good. What can be better than warm apples with the sweet taste of cinnamon to it? Add some nuts and a few flavorings more and what you get is a tasty and moist bar, with juicy and yummy apple pieces inside, divine! I love baked apples; apple cake and muffins are my favorite, so this was for sure one of the best treats for me.
And for those of you that like dates, then you will probably like it even more! The combination is good, however, I have tried and just can’t get myself to like dates. I have tried dates by itself, wrapped in proscciutto, in baked goods, and nope, they are definitely not for me. So many good reviews on this recipe made me want to try them again, but I assure you, this was it for me. I don’t know why, but their texture and taste are just difficult to swallow, plus I can barely eat ¼ of it, as I find them to be sickly sweet.
Yeah, I know, most people enjoy them, and so did my husband and my son (they really liked them in the cake!), unfortunately they are not for me; but I am proud that I gave them another try.
I halved the recipe when I made it yesterday, baking it on a square baking dish; but I have to say that I should have made the whole thing as the bars were literally devoured (mainly by me!) on the same day. Most reviewers of this recipe mentioned the bars being great on the next day, but I didn’t get a chance to try. There was indeed one piece left, and Matheus asked me to save it for him to have for breakfast today. I warmed it slightly for him today and he loved it even more! He was sad to eat the last piece, and already requested that I make it again soon, “This apple cake is very delicious Mommy”!
I have a ton of bananas ripening on the counter right now, and when I mentioned making something with bananas today he looked at me and said: “but that apple cake was so good, I wanted more apples, not bananas in my cake!” Cute, huh!?!!
Here is the original recipe from Cooking Light, but I made mine with half all-purpose and half whole-wheat flour, added a little more apples than asked for (my apples were big!), used walnuts instead of pecans (what I had on hand), and also reduced the sugar by half, and believe me, they were plenty sweet for us, even more with the super sweet date pieces around (which I will leave out next time…).
Hope you all like it too, they were very moist and delicious, we really enjoyed them here at home! And with less sugar and some whole-wheat flour, they sure are suitable for a yummy breakfast treat!
Ana

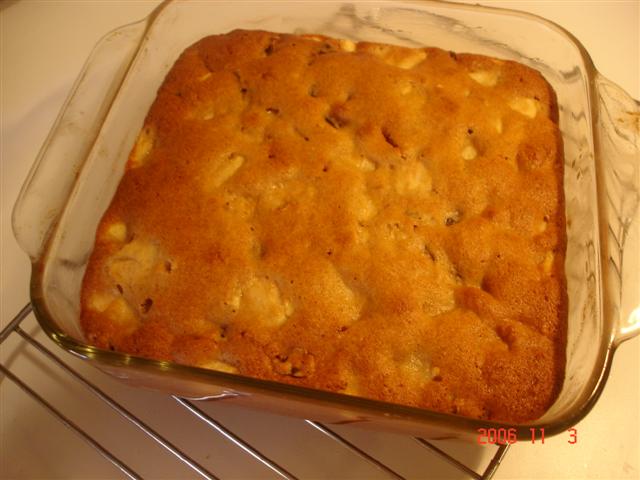
A picture of them right out of the oven!


Apple-Date Bars
(Adapted from Cooking Light, Oct. 2006)

2 cups all-purpose flour (about 9 ounces)
1 teaspoon baking soda
1 teaspoon baking powder
1/2 teaspoon ground cinnamon
1/4 teaspoon salt
2 cups sugar
7 tablespoons butter, softened
1 large egg
2 large egg whites
1/4 cup applesauce
1 teaspoon vanilla extract
1 cup chopped pitted dates
1 teaspoon all-purpose flour
1 1/2 cups chopped peeled Granny Smith apple (about 1 large)
1 1/2 cups chopped peeled Red Delicious apple (about 1 large)
1/2 teaspoon fresh lemon juice
2/3 cup chopped pecans
Cooking spray

Preheat oven to 325°.
Lightly spoon 2 cups flour into dry measuring cups; level with a knife. Combine 2 cups flour, baking soda, baking powder, cinnamon, and salt in a large bowl; stir with a whisk. Set aside.
Place sugar and butter in a large bowl, and beat with a mixer at high speed for 2 minutes or until light and fluffy. Add egg and egg whites, beating well after each addition. Stir in applesauce and vanilla. Gradually add flour mixture to sugar mixture; stir just until combined to form a stiff batter. Toss dates with 1 teaspoon flour. Toss apples with juice. Add dates, apples, and nuts to flour mixture, stirring just until combined. Pour batter into a 13 x 9-inch baking dish coated with cooking spray. Bake at 325° for 1 hour and 5 minutes or until a wooden pick inserted in center comes out clean. Cool completely on a wire rack.

Monday, October 30, 2006

Pumpkin Bread

I roasted another small pumpkin today and got about 6 cups of pumpkin puree from it. Yumm!
Matheus asked for pumpkin soup, which we happily had for lunch and used about 2 cups of puree. Another cup was used in the recipe below, and the rest are already in the freezer, although they won’t stay there too long, as we are definitely in a pumpkin mood and I already have plans for them!
The recipe I am posting today and so easy, but very yummy! I adapted a recipe for Pumpkin Bread and came out with this one. Simple ingredients, and it is basically the same recipe I use for banana bread, just using pumpkin in its place.
I still want to get it a little bit spicier, but it is just a matter of adjusting the amounts and maybe even adding something else in there the next time I make it. I will probably be making this recipe one more time soon, so if I get better results I will certainly report back!
You can add chocolate chips, dried fruits, and even nuts to this bread. Chocolate goes surprisingly well with the pumpkin flavors, and another great combination are dried cranberries and walnuts; I think they really add another dimension of flavors and textures to the finished product!
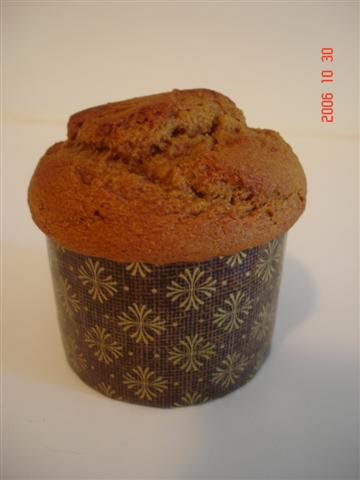
Today I actually baked my cake (yes, I do think it had a cake texture, and still don’t see this or the banana breads as being actual breads… they are really cake to me!) into some mini panettone molds that I recently got from the Internet. Aren’t they cute??
I bought them to make panettone for the holidays (for ourselves and to give out to the dearest friends!), and couldn’t wait longer to see how something baked in them would look like. And I have to say that I really liked the looks of the pumpkin bread in it, and the molds do have a certain “holidayish” feel, don’t they?!
Enjoy!
Ana

Pumpkin Bread

3/4-cup brown sugar
1-cup pumpkin puree
1/4 cup canola oil

1/4 cup plain yogurt
1/2 teaspoon vanilla
1 egg
3/4 cup all-purpose flour
¾ cup whole-wheat flour
1 teaspoon ground cinnamon

A pinch of ground cloves
1/2 teaspoons salt
1/2 teaspoon baking soda
Cooking spray

Preheat oven to 350°.
In a bowl combine sugar, pumpkin, oil, yogurt, vanilla, and egg. Add flours, cinnamon baking soda, and salt to the bowl, and mix just until moist.
Pour batter into 1 greased loaf pan (8x4inches). Bake at 350° for 1 hour, or until a toothpick inserted comes out clean. Remove from pan after about 10 minutes and let cool on a wire rack.

Tuesday, October 24, 2006

Espresso Cake

The recipe I am posting today if for a cake that really impressed me last week. It is a super simple and easy cake to make; however the flavor is intense and extremely pleasant.
Espresso Cake first called my attention because the recipe had another recipe that came with it where the leftover cake could be used to make truffles (more on this latter). Second I liked the idea of trying a new Chocolate Cake recipe!
And what a chocolate cake that was! Delicious, moist, and with a great flavor distributed all over it. I would say it is sort of a “grown up chocolate cake”, but have to add that Matheus just loved it too! He said it was one of the best chocolate cakes, which by the way is his favorite cake!
The husband liked it too, but being the “coffee hater” he is, he really pointed out that the coffee flavor was rather strong. I on the other hand really loved this cake, it was not too sweet, and ultra moist, which is a plus for me, and chocolate cakes in general. I have tried a few simple chocolate cake recipes and this one was by far the best one I made.
I will certainly make this cake again, even more because Matheus already asked for it and I also want to try the alternative recipe that came with it. And next time I make it I will probably use half coffee and half water, or maybe even substitute milk for the coffee, just to please my lovely hubby!
I got this recipe from a book called “Conscious Cuisine” by Cary Neff. The author is a spa chef and the book is full of delicious and nutritious recipes. I borrowed the book from the library and am now considering buying it for myself, as I liked and still want to try a few more recipes from it (and I already renewed it once, so I am running out of time with the library here!).
As I mentioned earlier, there is another recipe in the same book that uses this cake to make truffles! I loved the idea, but unfortunately didn’t have the time to make it sooner and when I went to take a look at the leftover cake, other than not having much left, it was also sort of smelling weird, with a pronounced prune smell and flavor. So I decided to toss it (oh no!) and will definitely make the truffles the next time I make the cake (which I am planning to do pretty soon). And I promise to post the recipe and reviews for that here, of course!
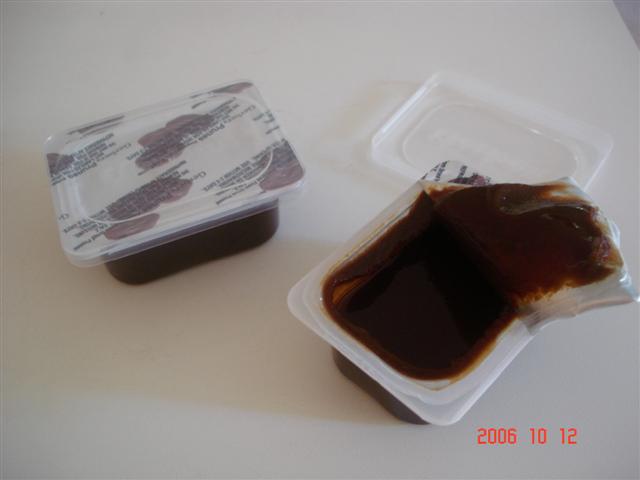
I used prune puree when I made my cake but you can also use applesauce, which I plan to try next (I opted for the prunes since it was a chocolate cake, and I do believe it contributed to the cake rich dark color too). You can easily make your own prune puree, but I saved time by using the baby food little jars, which for my surprise came in little plastic containers, with lids and all. I though they were really nice (usually when I was young there were only the glass jars…), and the prune puree was also very good!
Right now I will leave the cake recipe and some pictures here. It is a very nice cake, really really easy, super moist and incredibly tasty! Plus, another light recipe, each slice has only 80 calories, can you believe that? See why I loved the book? Yummy and healthy recipes, what else can you ask for?!
Ana

Espresso Cake
(Conscious Cuisine, by chef Cary Neff)

2/3 cup whole-wheat pastry flour
1/4 cup all-purpose flour
1 cup sugar
2/3 cup unsweetened cocoa powder
1 1/2 teaspoons baking powder
1/4 teaspoon baking soda
1/4 teaspoon salt
1/2 cup pureed prunes or unsweetened applesauce
3 large egg whites
1 teaspoon pure vanilla extract
1 cup coffee

Preheat the oven 350 degrees F. Spray a 9-inch cake pan with cooking spray and dust with additional cocoa powder, set aside.
In a medium bowl, combine the flours, sugar, cocoa, baking powder, baking soda, and salt; set aside. In another bowl, combine the prune puree, egg whites, vanilla, and coffee. Mix the wet ingredients into the dry ingredients and pour into the prepared cake pan.
Bake for 20 to 25 minutes or until a toothpick inserted in the middle of the cake comes out clean. Cool the cake in the pan on a wire rack for 10 minutes. Run a knife around the edge of the cake and invert onto a wire rack to cool completely.

A picture of a cake slice...


And the prune puree I used.


Monday, July 17, 2006

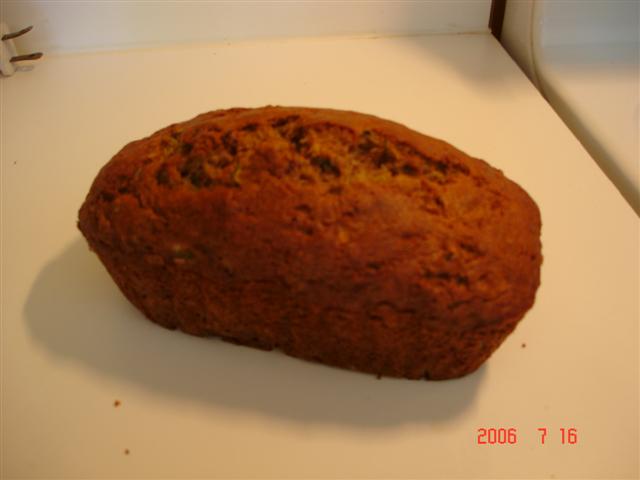
Zucchini Bread

Keeping with the theme of quick breads, this weekend I made another one of my favorites, Zucchini Bread! Don’t let the presence of zucchini in the dough prevent you from making this bread/cake. You will not be able to tell the zucchini is there, and it lends so much moisture to the loaf, it is impressive how delicious this is!
We all enjoy this a lot at our home, sometimes it is even preferred over the beloved banana bread! (yes, once I made one of each and the zucchini bread didn’t survive until the next day…).

Try it and I am pretty sure you will like it too!! I like to make it the way it is, the two things I changed from the recipe I got from a friend was to reduce the sugar a little and use half whole-eat, half all-purpose flour (instead of all white). And I have also made it with ¼ cup oil and ¼ cup of either yogurt or applesauce (instead of the 1/2 cup oil) and it works super well, not altering much the texture of the bread.

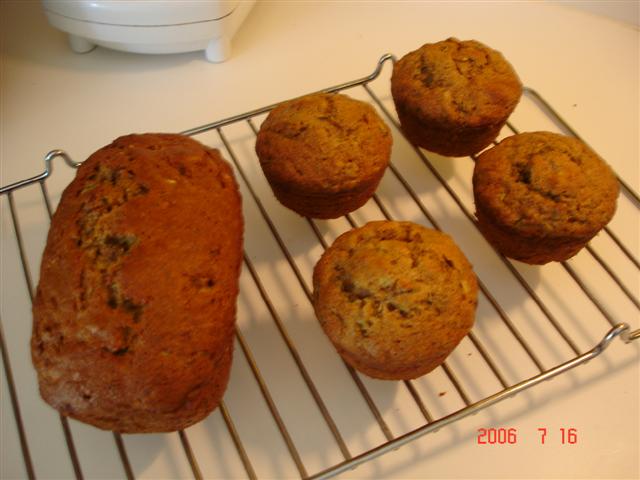
It can be made into either normal or mini loaf pans, or how we like it best here, in muffin tins. This time I made in both, and believe it or not, the muffins got eaten and the loaf is still there… there is something about muffins that we really love around here!

Super easy, very delicious bread, perfect to eat in the afternoon or for breakfast with a nice glass of milk and a piece of fruit.

Enjoy!

Ana


Zucchini Bread
¾ cups all purpose flour
¾ cups whole-wheat flour
1 large egg
½ cup sugar
½ cup oil
1 teaspoon vanilla
1 teaspoon cinnamon
½ teaspoon baking soda
¼ teaspoon baking powder
1 cup grated zucchini
¼ teaspoon salt
½ cup chopped walnuts (optional)

Mix together egg, sugar, oil and vanilla. Add rest of ingredients and mix until well incorporated.
Pour batter into a loaf pan (8x4”). Bake on a pre-heated oven at 350F for about 1 hour.

Notes: If made in mini loaf pans it will be done in about 40 minutes. For muffins, about 30 minutes

.

Monday, July 10, 2006

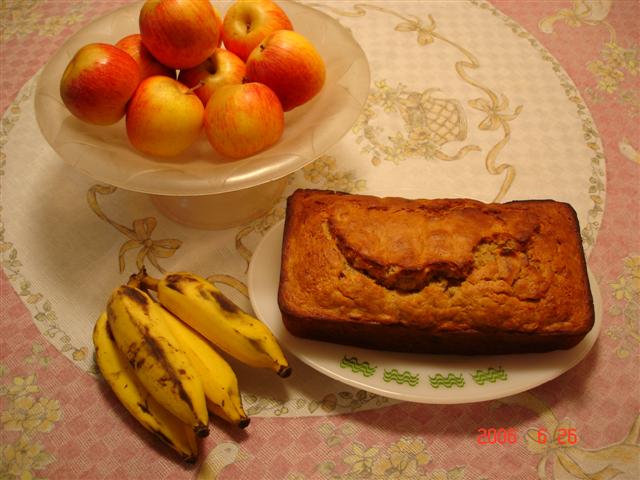
Banana Bread

This is one of my favorite recipes for Banana Bread. It is sweet, moist and delicious, freezes beautifully and can be baked into muffins too.
I sort of adapted a couple of recipes and came up with this one. I like to eat my bananas all yellow with no spots at all, but the best bananas for banana bread (and muffins as well) are those that are over ripe and looking nasty and brown in the counter, those are great here, as they help with moisture and give it the best “bananay” flavor to the bread/cake! (I always make banana bread and everyone here says it is banana cake! Hehe!)
This one in the picture I made at my mom’s house while in Brazil and it was a definitely success there too!
Enjoy!
Ana

Banana Bread
2/3 cup sugar
¼ cup canola oil
1 2/3 cups mashed banana
¼ cup milk
¼ cup yogurt
1 egg
1 cup all-purpose flour
1 cup whole wheat flour
1 teaspoon baking soda
½ teaspoon salt

Preheat oven 350F.
Beat sugar and oil in a bowl. Add the mashed bananas, milk, yogurt and egg and beat well.
Add flour, baking soda and salt, mix until all incorporated.
Pour batter into a greased loaf pan and bake for about 1 hour.
It can also be made into muffins, just pour batter into greased muffin cups and bake at same temperature for about 25 minutes, but keep an eye on them after 20 minutes of the baking time has elapsed.

Wednesday, June 14, 2006

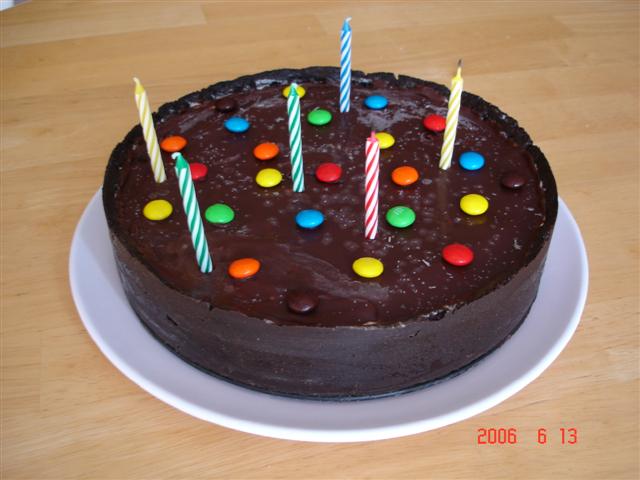
Happy Birthday to the Husband!

Yesterday was the husband’s birthday, and he asked for an ice cream cake this year. I went on the web and found this recipe at Epicurious; the original recipe used peppermint candies and extract to flavor the ice cream, but I opted for leaving the ice cream on its original vanilla flavor, as we definitely like it more around here.
One of the husband’s favorite ice creams is vanilla-Oreos, so when I spotted this recipe I knew right away it was going to be a success. And it sure was; we all liked it a lot here! Although, with lots of ice cream and chocolate, what is not to like?!
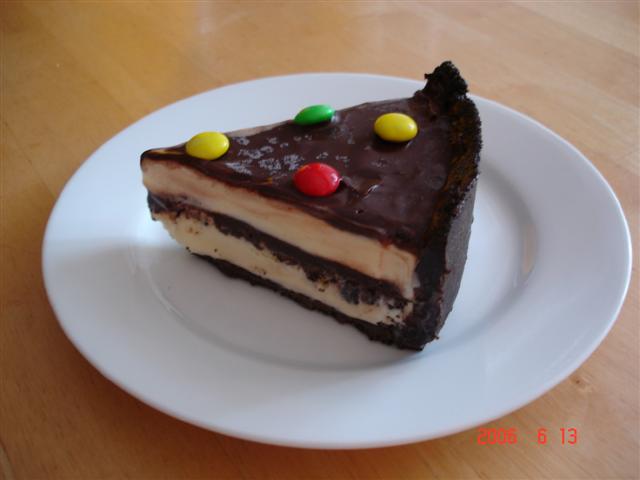
It is not a difficult cake to make, actually the crust and glaze is all there is to make. The rest is basically assembling and waiting for it to freeze as you go. Quite simple, but you need to make it in advance.
The cake provides a good contrast between the softness of the ice cream and the firmness of the crust, plus the shinny and gooeyness of the glaze. One word: Yummy!
Now, recipes apart, we are going to Brazil today, so it will probably be a few days before I post again, but do come back, because I will sure be posting while we are there!
See you all soon!
Ana


Ice Cream Cake
Crust
1/2 cup (1 stick) unsalted butter
8 ounces bittersweet (not unsweetened) or semisweet chocolate, chopped
1 1/2 9-ounce packages chocolate wafer cookies (about 61 cookies)

Glaze
1/2 cup whipping cream
1/4 cup light corn syrup
6 ounces bittersweet (not unsweetened) or semisweet chocolate, chopped

Filling
7 cups vanilla ice cream, slightly softened

For crust:
Melt butter with chocolate in heavy small saucepan over low heat. Finely grind cookies in processor. Add warm chocolate mixture; blend just until crumbs are moistened. Reserve 1 cup crumb mixture in small bowl. Press remaining crumb mixture onto sides, then bottom of 9-inch-diameter springform pan with 2 3/4-inch-high sides. Freeze.

For glaze:
Bring cream and corn syrup to boil in heavy large saucepan. Remove from heat. Add chocolate; whisk until melted and smooth. Let stand until cool but still pourable, about 1 hour.

Assembling:
Spoon half of ice cream into crust; spread evenly (place remaining ice cream mixture in bowl in freezer). Sprinkle reserved 1 cup cookie crumbs over ice cream in pan; press gently. Pour 1 cup chocolate glaze over ice cream in pan. Freeze 1 hour. Top with remaining ice cream; spread evenly. Freeze until firm, about 4 hours. Stir remaining glaze over low heat just until pourable but not warm (I nuked in the microwave for 20 seconds). Pour glaze over ice cream; spread evenly. Freeze overnight.
Run sharp knife between crust and pan sides to loosen cake. Release pan sides. Transfer cake to platter. Garnish as desired and serve.
(adapted from the following recipe from epicurious.com: Chocolate-perppermint Ice Cream Cake)