Showing posts with label Pie. Show all posts

Thursday, October 07, 2010

Easy veg weeknight meal!

Sometimes all we need for a good meal is something easy to prepare and that taste good right? With all the studying and attending classes for my masters degree plus life as a stay home mom, take to school, pick up, soccer practices, playdates, and more, there are days when I don't have that much time to get dinner on the table, so the less complicated the dish the more appealing it is to me.
This is a recipe that fits perfectly for such days, easy and quick to put together, tastes delicious and makes everyone happy! Serve with a side salad, maybe some rolls or something of the like, and you are good to go! (just make sure to have your phyllo dough defrosted)
Could not be better!
I got the recipe idea from one of my favorite magazines, Vegetarian Times. I like their recipes a lot, usually pretty flavorful and uncomplicated, and vegetarian to boot, score!
Another plus of this recipe? You can adapt to whatever veggies you may have in your fridge, just make sure it is not something too moist/watery, and you are good to go! :-)
Ana

Spinach, Feta, and Tomato Quiche
(Adapted from Vegetarian Times)

8 sheets of phyllo dough
Olive oil to brush the dough
10 oz frozen spinach, thawed and water squeezed out (make sure to really squeeze this baby, they have a lot more water than you imagine) - by the way, I seasoned my spinach with salt, pepper, and garlic powder before adding it to the quiche.
1/3 cup feta cheese - I used ricotta salata since I had that at home
Cherry tomatoes to fill the top - I used a combo cherry tomatoes from the backyard and chopped roma from the CSA box as that was what I had on hand
2 eggs
3/4 cup milk
dash of Salt and a few turns of freshly ground black pepper

Preheat oven 350F.
Brush a pie plate/pan with olive oil and layer one sheet of the phyllo dough in it, brush dough with olive oil and repeat the layering and brushing with all other phyllo dough sheets. When done tuck in the parts of dough that are hanging around the plate (or trim if you prefer, I love the crispy borders and don't like wasting it, so I tuck it in!).
Sprinkle the crust with the cheese, top with the spinach and layer the tomatoes on top of that.
In a bowl beat the eggs with the milk, season with salt and pepper, and pour over the veggies in the prepared crust.
Bake for about 40 to 45 minutes or until the top is golden brown and the egg is set.

Sunday, July 15, 2007


Doesn't it look pretty?!!!

It sure does, and it couldn't be another way, as the recipe came from a kitchen filled with awesome goodies: Eliana's "Sabores da Lica"! See, I told you it was from a great place!
Every recipe I made from Eliana's came out delicious, and this one was no exception. This kind of savory pie is very popular in Brazil, and this one couldn't be more typical, as it is filled with hearts of palm, which I absolutely love!
Until a few months ago I wasn't able to find decent hearts of palm here where I live, the canned ones I found at the grocery store were just not as good as the one we have in Brazil. But now, thanks to Trader Joe's store (which I also love!), I can find yummy hearts of palm, which are both organic and from Brazil!
So I bought a couple of cans for my pantry and a few days latter I spotted this beauty at Eliana's blog, I just had to make it! Even more since the dough had another ingredient I adore: yogurt! Which, although you can't taste much, made the dough so moist and delicious that we could not stop commenting on it.
The pie was perfect, it came out beautiful and tasted even better than how it looked! The filling was creamy and delicious, and the crust was more than good. It was tender on the bottom and the very topping of my crisscross pattern was not just golden brown and delicious, but light and flaky as well.
A definite keeper in my kitchen, it was approved by all of us, including my Mom and my Sister that are here visiting these days! (And that explains why I have been a little absent from the blog lately... but it is a good reason, right?!) They saw my post in the blog and asked if I could make it sometime while they were here. Of course I already made it and we are now planning on making it again with a chicken filling. Ohhhh, I just can't wait!!
Thanks Eliana for this delicious treat!! (For the recipe in Portuguese, take a look here.)
Ana


Savory Hearts of Palm Pie with Yogurt Crust

Pastry dough:
2 1/2 cups all-purpose flour
1 stick butter (150 g), room temperature
3/4 cups plain yogurt (180 g)
1 teaspoon salt
1 egg yolk

Filling:
3 tablespoons olive oil
1 onion, diced
2 garlic cloves, minced
1 can (220 g) hearts of palm, chopped (Trader Joe's has a great organic one, from Brazil!!)
1/3 cup chopped green olives (more or less to your taste)
1/2 cup frozen peas
180 grams cream cheese (I used 6 of those Laughing Cow triangles)
1/2 chopped parsley
2 teaspoons all-purpose flour
Salt and pepper to taste

To make the filling: heat olive oil in a large skillet, add onion, garlic and sautée for a few minutes until softened. Add the tomatoes and cook for another minute. Add the hearts of palm, peas, and olives. Taste, add salt and pepper as needed and et cook a couple minutes more. Add the cream cheese, the parsley and cook for another minute until all incorporated. Sprinkle the flour on the filling and stir until the filling is thick and creamy. Take off the heat, put filling in a big plate and let cool before using.

To make the dough: Put 2 cups of the flour, butter, yogurt, and salt in a bowl. Mix all together until it forms a smooth ball of dough. Add the remaining 1/2 cup of flour if necessary (I only needed 2 cups of flour both times I made the recipe...!), to make sure the dough is not too sticky.
Cover the bowl and let the dough rest for about 20 minutes.
Roll out half of dough into a circle between two sheets of plastic wrap. Cover the bottom and sides of a 9-inch (22 cm) pie pan with removable bottom. Add filling and spread it evenly.
Roll out remaining dough and cover the pie. Pinch the sides to it sticks together and doesn't open as it bake (you can also use egg whites as a glue to stick the two parts of dough together). Brush top with egg yolk and bake at 350 F for about 35 minutes, or until top is golden.

Note: for this pie I tried to make the pie as pretty as Eliana's, so I rolled out the second half of dough, cut into strips, and arranged them in a crisscross pattern. We really liked the result and I was proud with my pretty little pie!!
(This recipe was adapted from Eliana's post, which originally got the recipe from "Palmirinha Onofre").

Wednesday, December 13, 2006

Buttermilk Pie

This was the second of two experiments I did on a Buttermilk Pie recipe, proving clearly that our kitchens are more than susceptible to have a few disasters among the so happy successes we usually may have.
I decided to make a buttermilk pie but, although extremely simple and basically fool proof, the first recipe was an unhappy choice. Although it had the creaminess I was looking for, the taste was totally off. I don’t think I did anything wrong as the recipe for this kind of pie is pretty straight forward, but the combination of brown sugar and buttermilk was not the best one for me, and the color was a little too brownish for us, not very appetizing.
But since I am a persistent girl, I decided to give it a second try and make it my way. I invented, used the ingredients I felt would give the taste I was looking for and it was right on, I got a delicious and creamy pie that satisfied our dessert cravings taste wise and visually too!
I thought I had 1 ½ cups buttermilk, but when I went to make the recipe there was only one cup, so I used ½ cup of half-half I had in the fridge that needed to be used up. And also the second time I used white sugar and the flavor was indeed much better.
The pie had a flan taste and consistency, but was embedded in a crunchy piecrust. We all liked it, especially the husband, who is a big flan fan.
I used a nice organic whole-wheat crust that I bought at a local natural market, but you can use your crust of choice. And to be true, I think it would be even better if baked in a graham cracker crust, which is my favorite and first choice for most pies I bake.
However you chose to make it, I am sure most people would like this one. It was simple in flavor, but creamy and very tasty nonetheless.
Enjoy!
Ana

Buttermilk Pie
½ cup white granulated sugar
3 tbsp flour
1/4 tsp salt
3 large eggs
1 tsp vanilla extract
1 1/2 cups buttermilk (or 1 cup buttermilk and ½ cup half-half)
One piecrust or graham cracker crust

Preheat oven to 350F.
Combine all ingredients on a blender and mix until smooth. Pour over piecrust and bake for about 35 minutes. Cool completely before serving. You can serve chilled or at room temperature.

Tuesday, September 26, 2006

Pumpkin Pie

As soon as Matheus saw the mounds of fall pumpkins in front of the market last week, he started to beg me to buy one for him (and he wanted the huge one!) in order to make pumpkin pie.
We were definitely going to buy some pumpkins, but I wanted to wait a little more, you know, it is not even October yet… Plus I wanted to get the pumpkins at the farmers market, as there are a variety of them and they look very nice there too.
Trying to explain all that to a 4-year old didn’t actually worked well, and Matheus started to ask me every day when we were going to buy our pumpkin to make some pie. So, in order to keep my sanity, I finally gave in and we both headed to the kitchen to make the so desired dessert.
Now, I have got to say: it was so worth it! Pumpkin pie is soooo easy to make, and so delicious, that there was no reason to wait until we “feel like fall”. Matheus was definitely right, it was time for pumpkin pie, and we really enjoyed ours over the weekend!
I opted to make a cookie crust instead of the more traditional pie dough, but it is just a matter of personal preference. I am not a big fan of piecrust (except for apple pies!), but do enjoy the traditional cookie-crumb crust used for pies and cheesecakes alike, so I decided to use that instead. For this crust I used a cookie called Vanilla Snaps, which I recently discovered and liked a lot, but the regular graham cracker will work perfectly here. And, for those who like ginger, I bet ginger snaps would work really well here too.
I didn’t follow an exact recipe, but sort of made mine based on other recipes I have previously seen, and since it was a basic traditional pie filling, it worked very well. The filling was very creamy, and nicely complemented by my yummy cookie crust!
As I said, this was so easy to make that Matheus went ahead and mixed up the filing all by himself; my only help was opening the can of evaporated milk to him.
I don’t even need to mention that he was very proud of his pie, and was more than happy when eating his share. It was definitely time for Pumpkins around here!!
Ana

Note: If, like me, you also don’t care for the crust and feel like the filling is the best part, then check out my pumpkin custard recipe, it is really good!

Pumpkin Pie with cookie-crumb crust

About 2 cups cookie crumbs
3 tablespoons butter, melted

2 eggs (I used 4 egg whites)
½ cup brown sugar
1 1/2 teaspoons cinnamon (you can use pumpkin pie spices)
1 can evaporated milk
1 (15oz) can unsweetened pumpkin (or 1 3/4 cups pumpkin puree)

Preheat oven to 325 F.
Mix cookie crumbs and melted butter together in a bowl. Press mixture into bottom and sides of a pie plate and bake for 5 minutes. Let cool.

In another bowl combine the rest of the ingredients until smooth. Pour into pre-baked piecrust and bake at 325 for 50 minutes to 1 hour, or until center of pie is almost set. Let cool and serve!

Monday, May 22, 2006

Savory Ricotta Pie

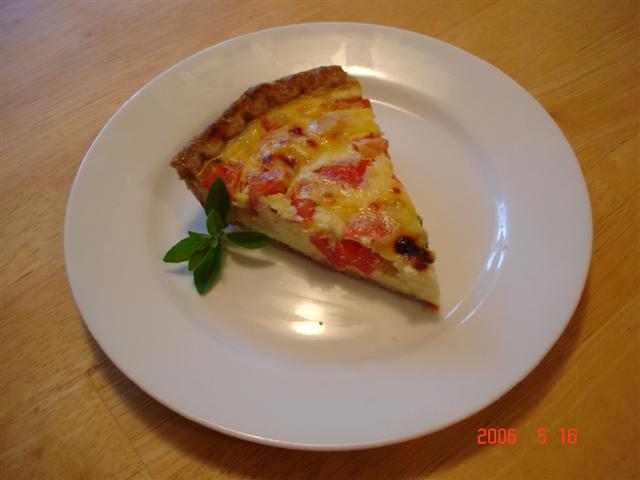
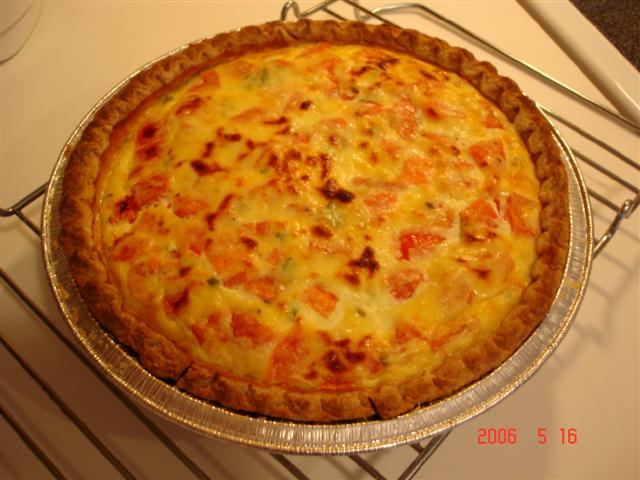
I had some ricotta to use up last week before we headed out for the beach and came up with this recipe. Savory Ricotta Pie was a spur of the moment creation and ended up being a very good dish!
I used a store bought whole wheat pie crust that I had in the freezer, and mixed together the filling in a matter of minutes, making this a very quick and satisfying dinner all in one!
We all liked this a lot, which means it will probably be repeated here. Which is a good thing, because this recipe is so basic that the possibilities for variations are endless. You can add basically anything you like, different cheeses, a variety of veggies, really, you can make up your own pie using the base I used for the ricotta filling. Just make sure you don’t use any wet ingredients, so the pie won’t be soggy.
I used diced fresh tomatoes that I seasoned with salt, pepper, olive oil and oregano, put them on a sieve and let them drain while I pre-baked the crust and made the filling.
The pie filling was very tasty; the ricotta was moist and did set up nicely. The tomatoes and oregano just complemented the whole thing bringing a lot of flavor to the dish. Basil would be great here too!
One combination I love is ricotta and spinach, so I will most likely be trying that one next.
Oh, and the ricotta I used here was the one I made with the recipe I posted here before (I know, I know… I am working on a recipe index, it will make our lives easier to look for previous recipes, but please be patient!!).
Hope you enjoy this one as much as we did!
Ana


Savory Ricotta Pie

1 9-inch piecrust (store bought or your favorite recipe)

2 cups ricotta

2 eggs

¼ cup grated white cheddar cheese

2 teaspoons olive oil

Salt and pepper to taste

2 small roma tomatoes, diced

Sprigs of fresh oregano (or a teaspoon of dried)

Pre heat oven to 350 F.
Season the tomatoes with salt and pepper to taste, put them on a sieve and let it drain while you mix the filling.
Bake piecrust for about 10 minutes, remove from oven and let cool. (If desired you can brush the inside with egg white, just to create a protective coating to the crust, so it doesn’t get soggy)
Mix together the ricotta, eggs, grated cheese, olive oil, fresh oregano, and salt and pepper to taste (I usually season the ricotta first, so I can adjust the amount of salt and pepper according to my tastes without having to taste the raw egg).
Pour about ¾ of the filling into the cooled piecrust, add the tomatoes and top with remaining filling.
Bake at 350 for about 30 - 40 minutes, or until set and golden on top. Let cool before serving.

Wednesday, March 29, 2006

Blueberries so tiny…

They are not in season yet, I know, but I like blueberries so much that I keep buying them frozen throughout the winter months. It is not the same as fresh, but they are so healthy and good for you that even frozen I enjoy my blueberries as if it was summer again.
Blueberry is a fruit I discovered here in the US, we did not used to have them in Brazil, but with its growing popularity I have heard that they are now trying to cultivate it over there too (and if I am not wrong the name in Brazil would be “mirtilos”).
Speaking of cultivated blueberries, I have always heard people talk about wild blueberries and how much better they were supposed to be when compared to their cultivated counterparts. Well, now I know what the experts were talking about.
I happened to find frozen blueberries for the first time at BJs a couple months ago, and for my surprise they were the wild variety. I more than quickly grabbed a bag and run to the register, just as if someone would come and take my new discovery away from me. I was finally going to try wild blueberries!
And you know what, they DO taste better. Much better indeed, they are a lot more flavorful than the regular frozen blueberries I used to buy. I loved it!!
They are so tiny, much smaller than the cultivated variety, but they pack in the smaller ones the entire flavor that the huge ones at the store have to offer. They are also sturdier, meaning that they don’t burst easily when heated up (yes, I like to eat them heated up with a sprinkle of sugar, oh so good!).
I have been eating them straight out of the package, heated up, mixing them into smoothies, and in baked goods, and they are always great, especially on my favorite: blueberry muffins!
However, yesterday I tried them on a very easy recipe for Blueberry Pie!
I wanted to make something with blueberries that would be just as flavorful as it would be easy to make. I have seen a few recipes for blueberry pies and a couple of them called my attention, as they were actually no-bake pies. I sort of combined both recipes and created my own pie, and it turned out very good!
Since I actually prefer them to regular pastry, I used a cookie crumb crust for my pie, but a regular pie shell would definitely work well here too.
The recipe is easy, and you can make it in a pinch when using a store-bought crust. I made mine using frozen blueberries, and can’t wait to try it with the fresh ones over the summer months. Easy and delicious, definitely going to be repeated over here!
Ana

Blueberry Pie
One pre-baked piecrust
4 cups blueberries (you can use more or less according to the size of your pie crust)
½ cup water
¼ cup sugar
1 ½ tablespoons cornstarch
2 tablespoons water
1 teaspoon lemon juice

In a saucepan combine 1 cup of the blueberries with the water, cook over medium heat just until the blueberries heats up and the liquid reduces a little. Add the sugar and cook one minute more. Add lemon juice, dissolve the cornstarch on the 2 tablespoons water and add to the pan, stirring constantly. Cook for one more minute or until mixture thickens. Remove from heat and add the remaining blueberries to the pot, folding them gently into the cooked mixture. Pour blueberry mixture into the prepared crust. Let cool and then refrigerate for a couple hours before serving.

Monday, October 10, 2005

Apple Pie!

If someday I had to choose a pie it would definitely be apple! I like apples a lot, and during the cold months my favorite way to eat them is either cooked or baked. I love apple crisps (peach and blueberries too!) and cobblers, they are easy to make, warm and comfortingly good!
Since I have had a few disasters with pastry dough I settled myself into making crisps when I wanted some warm desert, and I actually prefer crisps to pie.
However, as challenging as it is, I wanted to make an apple pie this fall. So I went to the farmers market (one of my favorite places) last week to see what I could get and was faced with tons of apples, different varieties, from the tart to the most sweet ones. Needles to say I came back home with a full bag of yummy crispy apples, and some delicious apple cider too!
For eating raw I like the Fuji ones, they are crispy and crunchy, tart and sweet, kind of “cider-like” in taste, but for pies I wanted to have a mix of them, so I filled my bag with a couple of each of the ones that were said to be good in pies and hold their shapes, and there were so many varieties that I don’t even remember which ones I got!
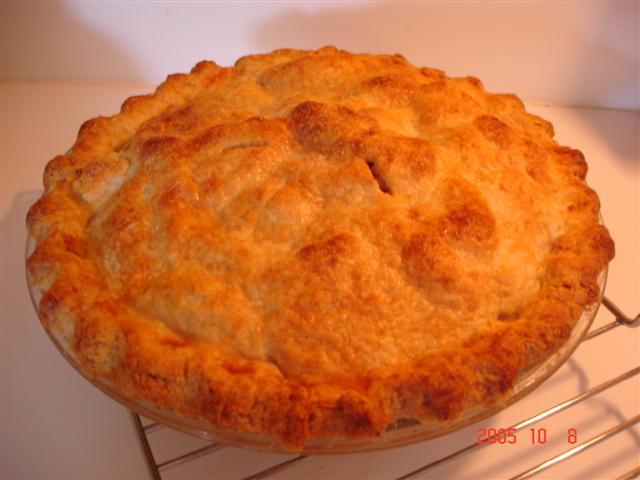
I chose a recipe that was posted on the CL bulletin board, however the recipe comes from Cook’s Illustrated. It is called Classic Apple Pie, and is actually not that difficult to make at all. I took my time and got all the right ingredients, made the dough and let it rest in the fridge overnight, Saturday morning I assembled the pie and baked, everything just as the recipe said. And the recipe is good, because I did not have one little bit of problem with the dough, and the pie came out great!

The only thing I did different was to omit the lemon zest (thought it would be too strong), the allspice (did not have), and the nutmeg (not a big fan of it in sweets). Also, I added a tablespoon of flour to the filling (because I was afraid the apples would give out their juices and make the pie wet), and brushed the top with milk instead of egg white. For everything else I followed the recipe and will do the same when I make it again, which is very likely so.
The crust was flaky and crispy and soft, and the apples came out nice, not mushy at all, just perfectly cooked, sweet and “cinnamonwy”! A good pie and I was very proud of myself because this was definitely my best pie of all!
Now I am going ask here a question for those who like to make and eat pies: I used vegetable shortening in the dough, but I am not a big fan of it myself (and now I am stuck with a whole can of the stuff leftover in the pantry). I saw recipes for pie dough that only used butter, but since most of them ask for a combination of butter and shortening I decided to try it this time. My question is: how is pie dough made only with butter? I know that the shortening makes it flaky, but how is it taste wise?
To be true… I don’t really care for the dough, what I like in the pie is the filling, so flakiness is not a big deal with me. I know taste is something very particular to each one of us, and that the best way to see the difference will be trying it myself, but I wanted to ask and see the different opinions in the subject, you know, it is nice to be able to talk to more people and get real reviews about foods you like.
Thanks for visiting and I hope you try the pie too!

Ana

Classic Apple Pie (Cook's Illustrated)
Serves 8

Pie Dough
2 1/2 cups unbleached all-purpose flour , plus extra for dusting
1 teaspoon table salt
2 tablespoons granulated sugar
12 tablespoons unsalted butter chilled, cut into 1/4-inch pieces
8 tablespoons vegetable shortening (chilled)
6 - 8 tablespoons water (iced)

Apple Filling
2 (cookbook says 1 1/2 pounds) pounds Granny Smith apples (4 medium)
2 pounds McIntosh apples (4 medium)
3/4 cup granulated sugar
1 tablespoon granulated sugar
1 1/2 tablespoons lemon juice
1 teaspoon lemon zest from 1 medium lemon
1/4 teaspoon table salt
1/4 teaspoon of freshly ground nutmeg
1/4 teaspoon ground cinnamon
1/8 teaspoon ground allspice
1 egg white , beaten lightly

1. Pulse flour, salt, and sugar in a food processor workbowl fitted with the steel blade. Add butter and pulse to mix in five 1-second bursts. Add shortening and continue pulsing until flour is pale yellow and resembles coarse cornmeal, four or five more 1-second pulses. Turn mixture into medium bowl. (To do this by hand, freeze the butter and shortening, grate it into the flour using the large holes of a box grater, and rub the flour-coated pieces between your fingers for a minute until the flour turns pale yellow and coarse.)
2. Sprinkle 6 tablespoons ice water over mixture. Press mixture together with broad side of rubber spatula, adding up to 2 tablespoons more ice water if dough will not hold together. Squeeze dough gently until cohesive and divide into two equal balls. Flatten each into a 4-inch-wide disk. Dust lightly with flour, wrap separately in plastic, and refrigerate at least 30 minutes, or up to 2 days, before rolling.
3. Remove dough from refrigerator. If stiff and very cold, let stand until dough is cool but malleable. Adjust oven rack to center position and heat oven to 425 degrees.
4. Roll one dough disk on a lightly floured surface into a 12-inch circle. Fold dough in quarters, then place dough point in center of 9-inch Pyrex regular or deep dish pie pan. Unfold dough.
5. Gently press dough into sides of pan leaving portion that overhangs lip of pie plate in place. Refrigerate while preparing fruit.
6. Peel, core, and cut apples into 1/2-to-3/4-inch slices and toss with 3/4 cup sugar and lemon juice and zest through allspice. Turn fruit mixture, including juices, into chilled pie shell and mound slightly in center. Roll out other dough round and place over filling. Trim top and bottom edges to 1/2 inch beyond pan lip. Tuck this rim of dough underneath itself so that folded edge is flush with pan lip. Flute edging or press with fork tines to seal. Cut four slits at right angles on dough top. Brush egg white onto top of crust and sprinkle evenly with remaining 1 tablespoon sugar.
7. Bake until top crust is golden, about 25 minutes. Reduce oven temperature to 375 degrees; continue baking until juices bubble and crust is deep golden brown, 30 to 35 minutes longer. Transfer pie to wire rack; cool to almost room temperature, at least 4 hours.